INSTALLATION - BLOWER ASSEMBLY, 42” & 48” MOWER
1.Remove the
2.Slip mower belt off the right hand pulley. Remove
the pulley from the arbor by removing capscrew and washers. Save washers for
4.Before installing arbor bracket (9, figure X), remove washer from underneath blade brake bracket (rear capscrew). Arbor bracket is same thickness as washer and will replace washer.
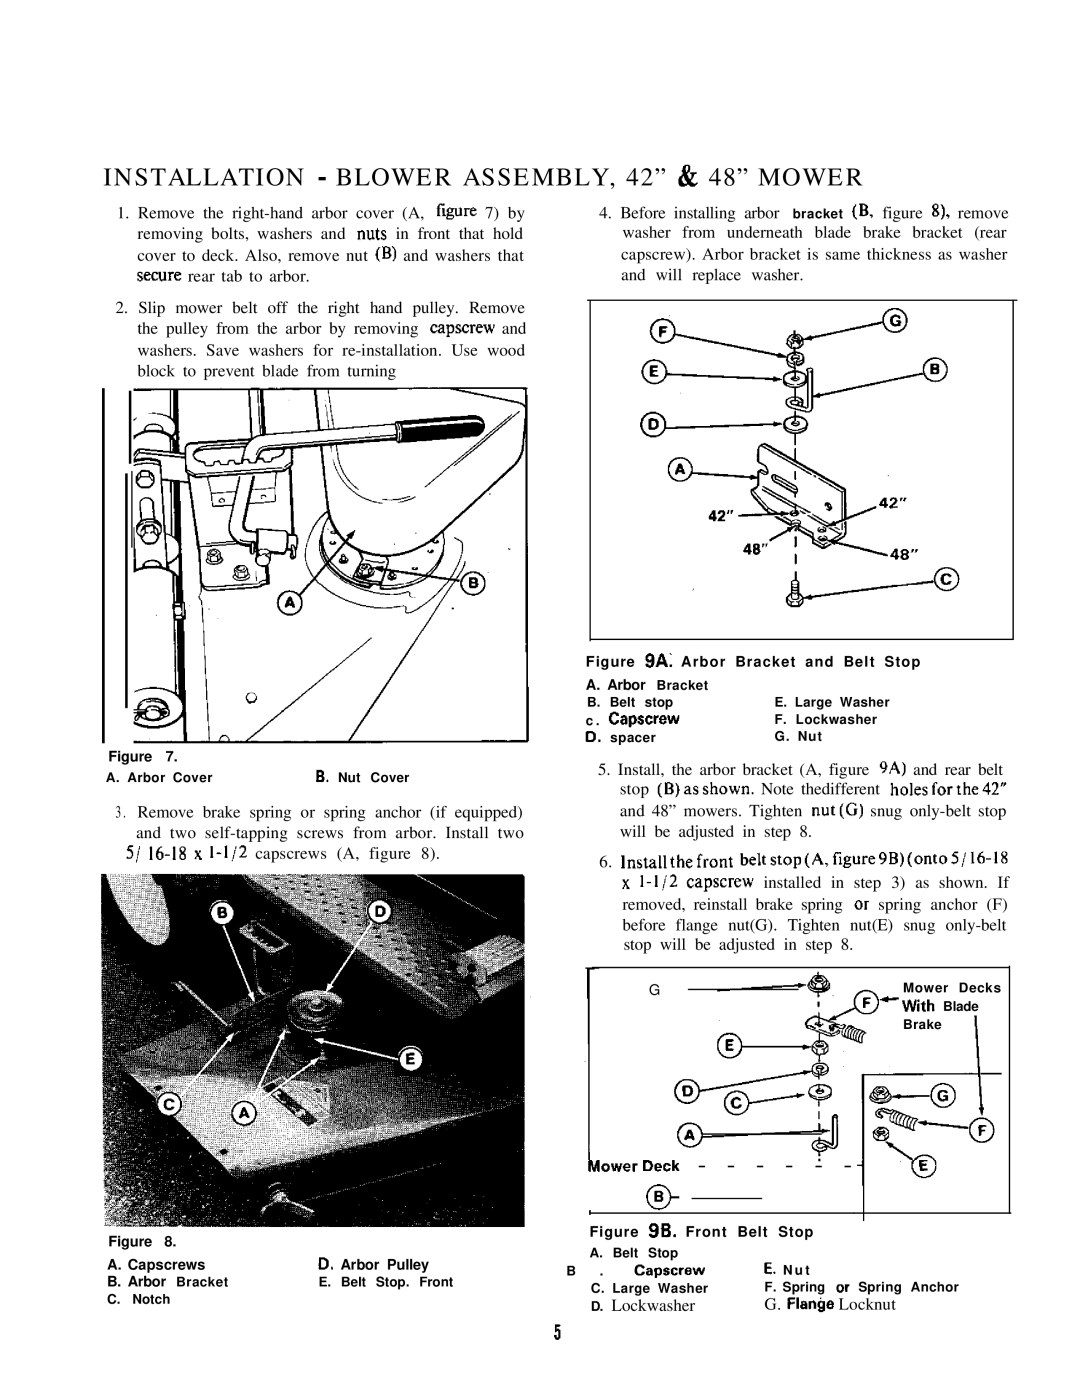
Figure 7.
A. Arbor Cover | 6. Nut Cover |
3 . Remove brake spring or spring anchor (if equipped) and two
5/
Figure 9A: Arbor Bracket and Belt Stop
A. Arbor Bracket
B. | Belt stop | E. Large Washer |
c . | Capscraw | F. Lockwasher |
cl. | spacer | G. Nut |
5.Install, the arbor bracket (A, figure 9A) and rear belt stop (B)asshown. Note thedifferent holesforthe42” and 48” mowers. Tighten nut(G) snug
6.lnstallthefront
x
G |
| Mower Decks |
| ||
|
| *With Blade |
|
| Brake |
|
|
|
|
|
|
|
|
|
|
| |
|
|
| Mower;) | - - - - - - |
| ||||||
|
|
|
|
|
|
|
|
| |||
|
|
|
|
|
|
| |||||
|
|
|
|
|
|
|
|
|
|
| |
Figure 8. |
|
| Figure 9B. Front Belt Stop | ||||||||
|
| A. Belt Stop |
|
|
|
|
| ||||
A. Capscrews | D. Arbor Pulley |
|
|
|
|
|
| ||||
B . | Capscrew | E. N u t | |||||||||
B. Arbor Bracket | E. Belt Stop. Front | ||||||||||
| C. Large Washer | F. Spring or Spring Anchor | |||||||||
C. Notch |
|
| |||||||||
|
| D. Lockwasher |
|
| G. Flan@ Locknut | ||||||
|
|
|
|
| |||||||
5