BRACKET INSTALLATION
The Cart Collector attaches to a mounting bracket, which is bolted to the tractor’s back plate. The same bracket is used on the riding mowers and the lawn tractors. Once bolted in place, the bracket never needs to be removed. For lawn tractors, see Section A. For tractors with 3 forward speeds, see Section B.
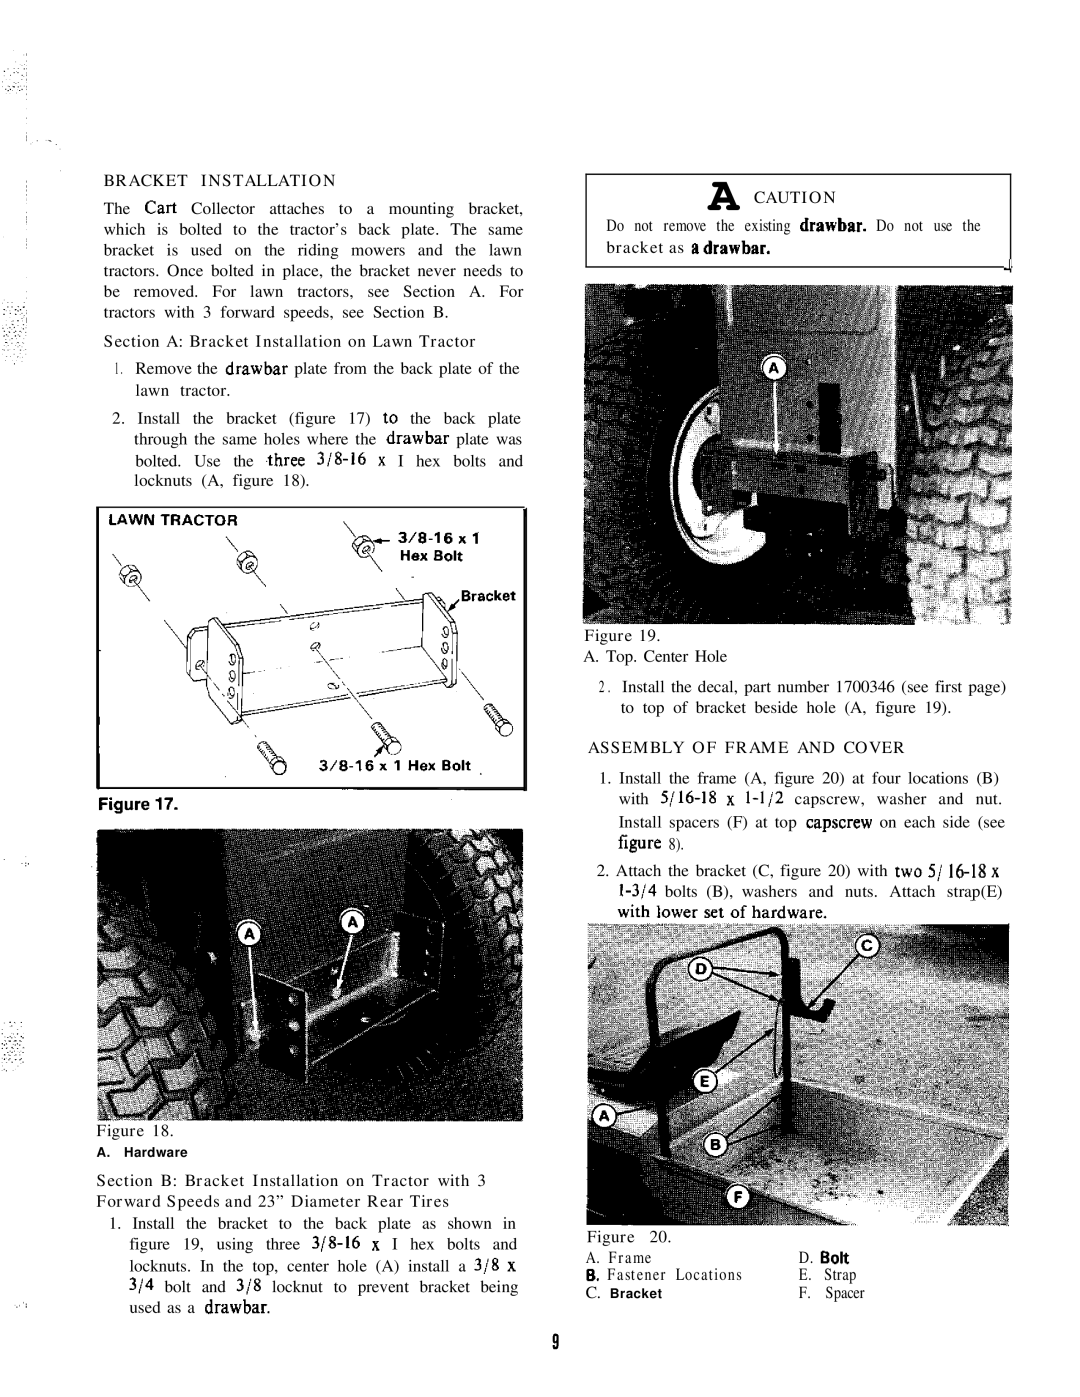
Section A: Bracket Installation on Lawn Tractor
1 . Remove the drawbar plate from the back plate of the lawn tractor.
2.Install the bracket (figure 17) to the back plate through the same holes where the drawbar plate was bolted. Use the ~three
Figure 18.
A.Hardware
Section B: Bracket Installation on Tractor with 3 Forward Speeds and 23” Diameter Rear Tires
1.Install the bracket to the back plate as shown in figure 19, using three
A CAUTION
Do not remove the existing drawbar. Do not use the bracket as a drawbar.
1
Figure 19.
A. Top. Center Hole
2 . Install the decal, part number 1700346 (see first page) to top of bracket beside hole (A, figure 19).
ASSEMBLY OF FRAME AND COVER
1.Install the frame (A, figure 20) at four locations (B) with
2.Attach the bracket (C, figure 20) with two 5/
Figure 20. |
|
| |
A. Frame | D. son | ||
6. | Fastener Locations | E. | Strap |
C. | Bracket | F. | Spacer |
9