How to Engage the Blades (46 & 52” models)
The PTO switch is above and to the right of the steering wheel (Figure 11). Use the PTO switch to engage the blades.
A |
Figure 11: PTO switch (46 & 52” models only)
A - PTO switch (shown in the DISENGAGE position)
1.Before you start the engine, make sure the PTO switch is pushed down in the DISENGAGE position.
2.Pull the PTO switch up to the ENGAGE position to rotate the blades.
NOTE: If the engine stops when you engage the blades, the seat switch is not activated. Make sure you sit in the middle of the seat. Also, make sure the wire is connected to the seat switch.
3.Push the PTO switch down to the DISENGAGE position to stop the blades. Before you leave the operator’s position, make sure the blades have stopped rotating.
4.Before you ride the unit across a sidewalk or a road, push the PTO switch down to the DISENGAGE position.
WARNING: Always keep your hands and feet away from the blade, deflector opening, and the mower housing when the engine runs.
How to Use the Speed Control Pedal
The drive system uses a Hydrostatic Automatic Drive transmission. The Hydrostatic transmission is very easy to operate. This type of drive system does not require a shift lever or a clutch pedal.
The speed and direction of travel is controlled by a single speed control pedal operated with your right foot. Do not use the left brake pedal in normal operation. Only use the left brake pedal to quickly stop in an emergency.
Driving and Stopping the Unit
How to Drive Forward
1.The automatic drive disconnect must be in the DRIVE position (Figure 14).
2.Slowly release your left foot from the brake pedal.
3.Move the throttle control to the FAST position.
4.Slowly push the speed control pedal forward to the desired speed (Figure 12).
5.To increase forward speed, slowly move the speed control pedal forward. To reduce forward speed, slowly release the speed control pedal until the unit slows to the desired speed.
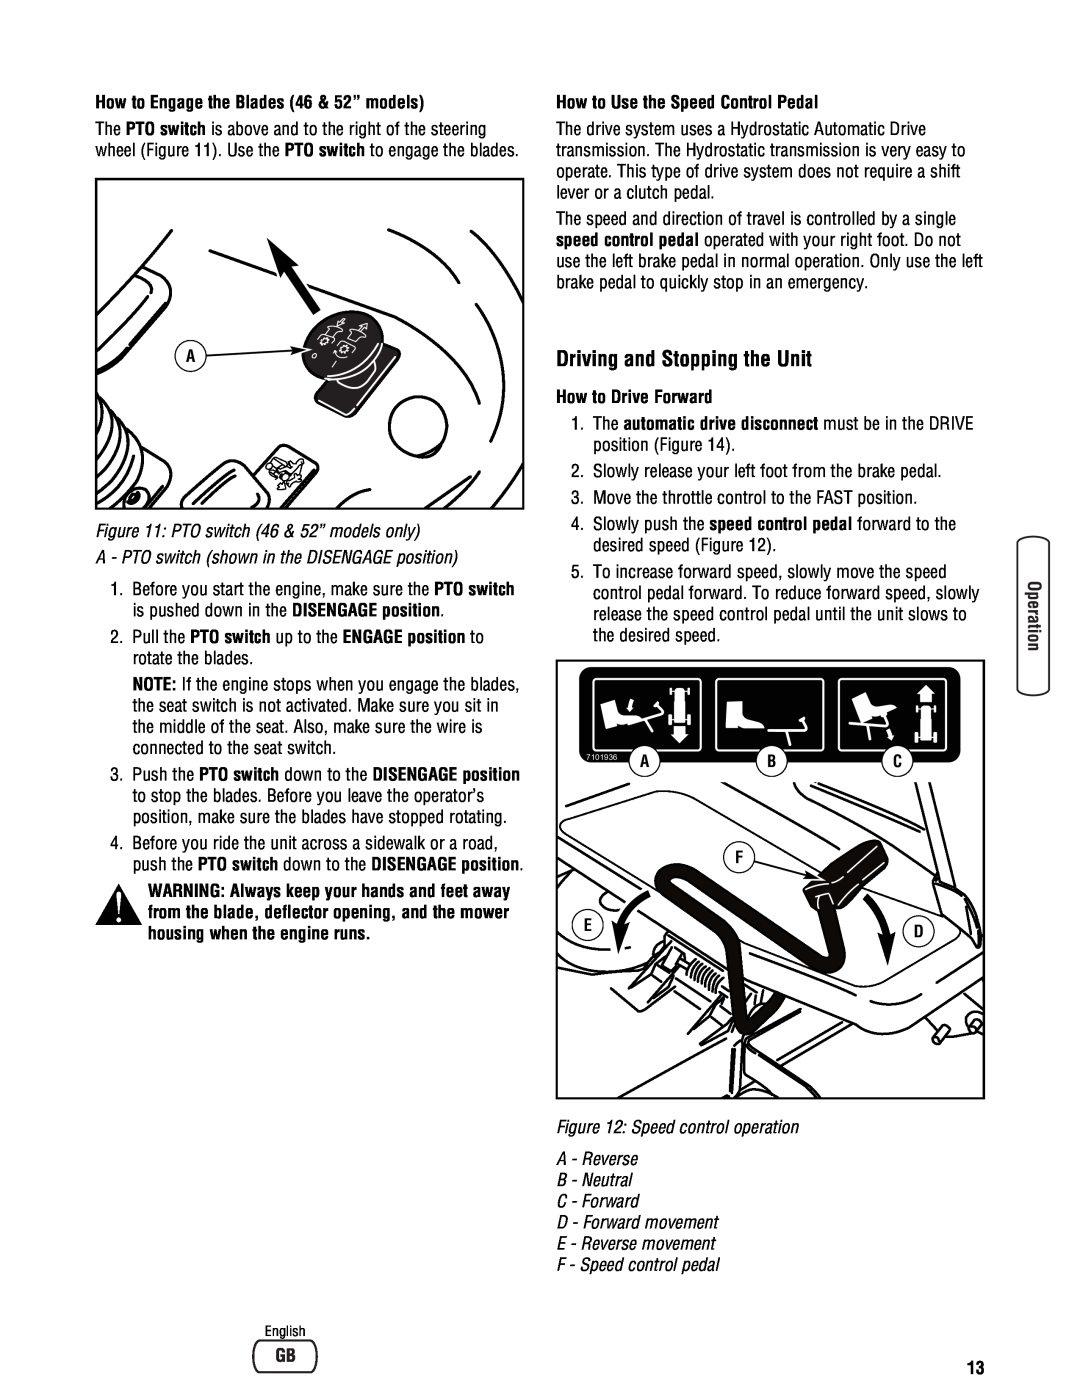
7101936 | A | B | C |
| |||
|
| F |
|
E |
|
| D |
|
|
|
Figure 12: Speed control operation
A - Reverse
B - Neutral
C - Forward
D - Forward movement
E - Reverse movement
F - Speed control pedal
English
13