10.Install the mower deck. See “How To Install The Mower Deck”.
A |
|
| E |
B | D |
| C |
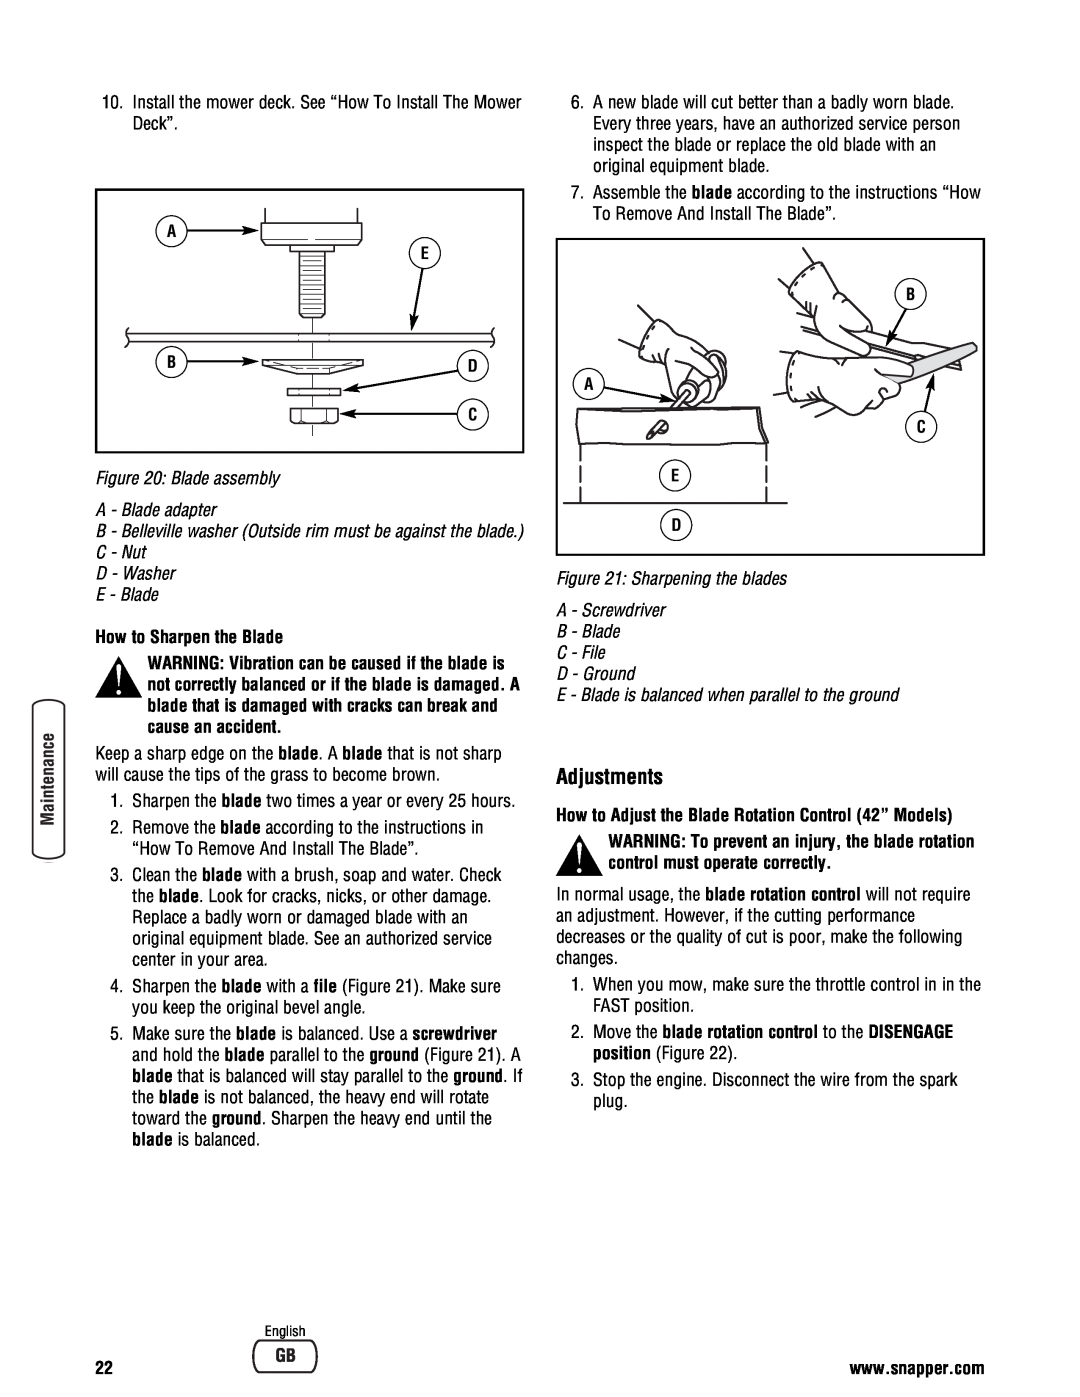
Figure 20: Blade assembly
A - Blade adapter
B - Belleville washer (Outside rim must be against the blade.) C - Nut
D - Washer E - Blade
How to Sharpen the Blade
WARNING: Vibration can be caused if the blade is not correctly balanced or if the blade is damaged. A blade that is damaged with cracks can break and cause an accident.
Keep a sharp edge on the blade. A blade that is not sharp will cause the tips of the grass to become brown.
1.Sharpen the blade two times a year or every 25 hours.
2.Remove the blade according to the instructions in “How To Remove And Install The Blade”.
3.Clean the blade with a brush, soap and water. Check the blade. Look for cracks, nicks, or other damage. Replace a badly worn or damaged blade with an original equipment blade. See an authorized service center in your area.
4.Sharpen the blade with a file (Figure 21). Make sure you keep the original bevel angle.
5.Make sure the blade is balanced. Use a screwdriver and hold the blade parallel to the ground (Figure 21). A blade that is balanced will stay parallel to the ground. If the blade is not balanced, the heavy end will rotate toward the ground. Sharpen the heavy end until the blade is balanced.
6.A new blade will cut better than a badly worn blade. Every three years, have an authorized service person inspect the blade or replace the old blade with an original equipment blade.
7.Assemble the blade according to the instructions “How To Remove And Install The Blade”.
B |
A |
C |
E |
D |
Figure 21: Sharpening the blades
A - Screwdriver B - Blade
C - File
D - Ground
E - Blade is balanced when parallel to the ground
Adjustments
How to Adjust the Blade Rotation Control (42” Models)
WARNING: To prevent an injury, the blade rotation control must operate correctly.
In normal usage, the blade rotation control will not require an adjustment. However, if the cutting performance decreases or the quality of cut is poor, make the following changes.
1.When you mow, make sure the throttle control in in the FAST position.
2.Move the blade rotation control to the DISENGAGE position (Figure 22).
3.Stop the engine. Disconnect the wire from the spark plug.
English
22 | www.snapper.com |