3 unit assembly (cont.)
HANDLE ASSEMBLY INSTALLATION
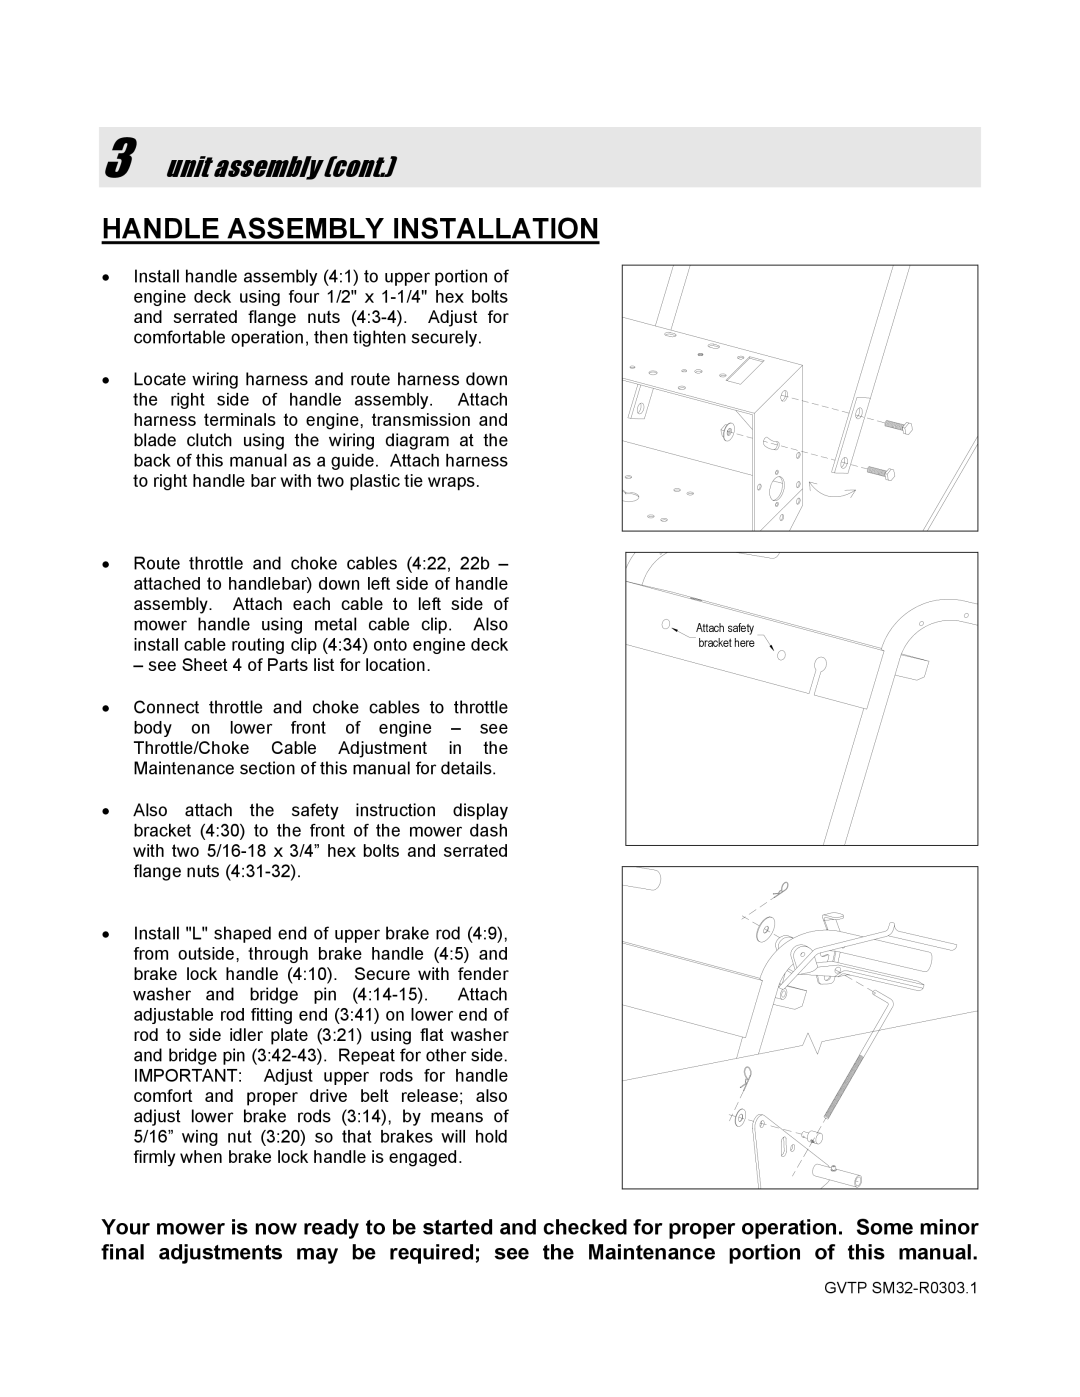
•Install handle assembly (4:1) to upper portion of engine deck using four 1/2" x
•Locate wiring harness and route harness down the right side of handle assembly. Attach harness terminals to engine, transmission and blade clutch using the wiring diagram at the back of this manual as a guide. Attach harness to right handle bar with two plastic tie wraps.
•Route throttle and choke cables (4:22, 22b – attached to handlebar) down left side of handle assembly. Attach each cable to left side of mower handle using metal cable clip. Also install cable routing clip (4:34) onto engine deck
– see Sheet 4 of Parts list for location.
•Connect throttle and choke cables to throttle body on lower front of engine – see Throttle/Choke Cable Adjustment in the Maintenance section of this manual for details.
•Also attach the safety instruction display bracket (4:30) to the front of the mower dash with two
•Install "L" shaped end of upper brake rod (4:9), from outside, through brake handle (4:5) and brake lock handle (4:10). Secure with fender washer and bridge pin
Attach safety |
bracket here |
Your mower is now ready to be started and checked for proper operation. Some minor final adjustments may be required; see the Maintenance portion of this manual.
GVTP
