9. Press the

ENTER/YES “R”

button display “EFB =

MO-P”.

Then, the optical pick-up moves to the pit area automatically and servo is imposed.

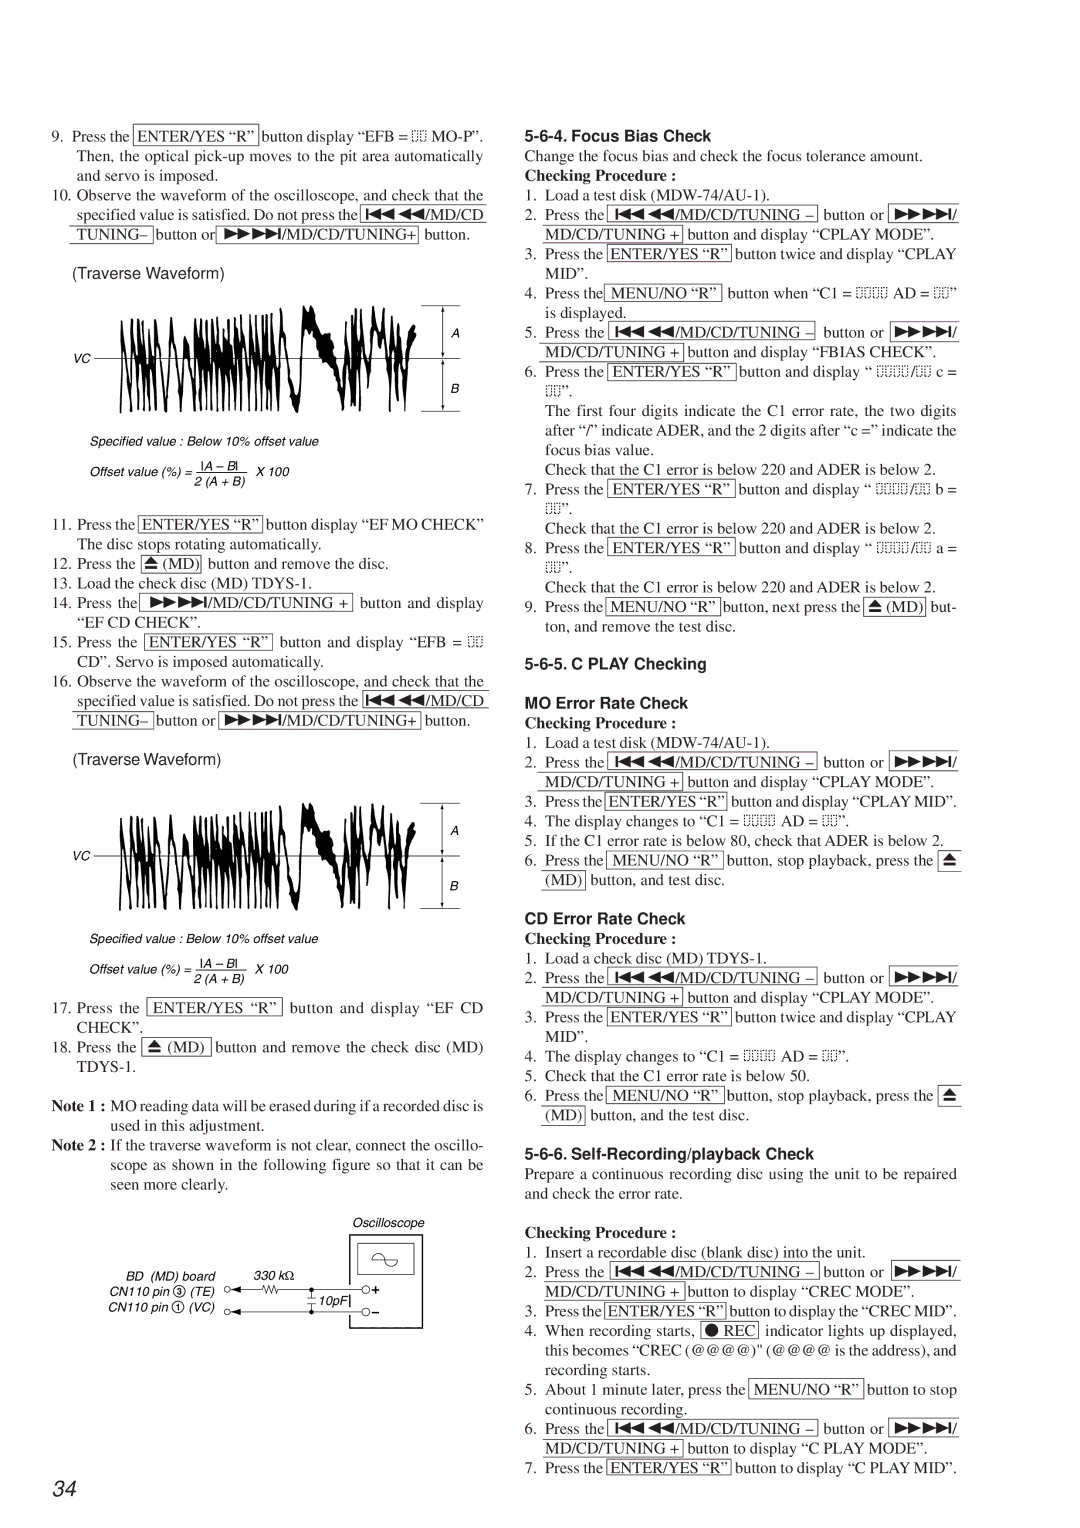
10.Observe the waveform of the oscilloscope, and check that the specified value is satisfied. Do not press the =0/MD/CD

TUNING– button or)+/MD/CD/TUNING+ button.

(Traverse Waveform)

A

VC

B

Specified value : Below 10% offset value

Offset value (%) = IA – BI X 100 2 (A + B)

11.Press the ENTER/YES “R” button display “EF MO CHECK” The disc stops rotating automatically.

12.Press the 6 (MD) button and remove the disc.

13.Load the check disc (MD) TDYS-1.

14.Press the )+/MD/CD/TUNING + button and display “EF CD CHECK”.

15. Press the ENTER/YES “R” button and display “EFB = CD”. Servo is imposed automatically.

16. Observe the waveform of the oscilloscope, and check that the specified value is satisfied. Do not press the =0/MD/CD

TUNING– button or)+/MD/CD/TUNING+ button. (Traverse Waveform)

A

VC

B

Specified value : Below 10% offset value

Offset value (%) = IA – BI X 100 2 (A + B)

17.Press the ENTER/YES “R” button and display “EF CD CHECK”.

18.Press the 6 (MD) button and remove the check disc (MD) TDYS-1.

Note 1 : MO reading data will be erased during if a recorded disc is used in this adjustment.

Note 2 : If the traverse waveform is not clear, connect the oscillo- scope as shown in the following figure so that it can be seen more clearly.

Oscilloscope

BD (MD) board

330 kΩ

CN110 pin 3 (TE)

10pF

CN110 pin 1

(VC)


5-6-4. Focus Bias Check

Change the focus bias and check the focus tolerance amount.

Checking Procedure :

1.Load a test disk (MDW-74/AU-1).

2.Press the =0/MD/CD/TUNING – button or )+/ MD/CD/TUNING + button and display “CPLAY MODE”.

3.Press the ENTER/YES “R” button twice and display “CPLAY MID”.

4. Press the

MENU/NO “R”

button when “C1 =

AD = ”

is displayed.


5.Press the =0/MD/CD/TUNING – button or )+/ MD/CD/TUNING + button and display “FBIAS CHECK”.

6.

Press the

ENTER/YES “R”

button and display “

/

c =


”.


The first four digits indicate the C1 error rate, the two digits


after “/” indicate ADER, and the 2 digits after “c =” indicate the


focus bias value.


Check that the C1 error is below 220 and ADER is below 2.

7.

Press the

ENTER/YES “R”

button and display “

/

b =


”.


Check that the C1 error is below 220 and ADER is below 2.

8.

Press the

ENTER/YES “R”

button and display “

/

a =


”.


Check that the C1 error is below 220 and ADER is below 2.

9.

Press the

MENU/NO “R”

button, next press the

6(MD)

but-


ton, and remove the test disc.


5-6-5. C PLAY Checking

MO Error Rate Check

Checking Procedure :

1.Load a test disk (MDW-74/AU-1).

2.Press the =0/MD/CD/TUNING – button or )+/ MD/CD/TUNING + button and display “CPLAY MODE”.

3.Press the ENTER/YES “R” button and display “CPLAY MID”.

4.The display changes to “C1 = AD = ”.

5.If the C1 error rate is below 80, check that ADER is below 2.

6. Press the MENU/NO “R” button, stop playback, press the 6 (MD) button, and test disc.

CD Error Rate Check

Checking Procedure :

1.Load a check disc (MD) TDYS-1.

2.Press the =0/MD/CD/TUNING – button or )+/ MD/CD/TUNING + button and display “CPLAY MODE”.

3.Press the ENTER/YES “R” button twice and display “CPLAY MID”.

4.The display changes to “C1 = AD = ”.

5.Check that the C1 error rate is below 50.

6. Press the MENU/NO “R” button, stop playback, press the 6 (MD) button, and the test disc.

5-6-6. Self-Recording/playback Check

Prepare a continuous recording disc using the unit to be repaired and check the error rate.

Checking Procedure :

1.Insert a recordable disc (blank disc) into the unit.

2.Press the =0/MD/CD/TUNING – button or )+/ MD/CD/TUNING + button to display “CREC MODE”.

3.Press the ENTER/YES “R” button to display the “CREC MID”.

4.When recording starts, r REC indicator lights up displayed, this becomes “CREC (@@@@)" (@@@@ is the address), and recording starts.

5.About 1 minute later, press the MENU/NO “R” button to stop continuous recording.

6.Press the =0/MD/CD/TUNING – button or )+/ MD/CD/TUNING + button to display “C PLAY MODE”.

7.Press the ENTER/YES “R” button to display “C PLAY MID”.

34

Page 34
Image 34
Sony HCD-MD373 Focus Bias Check, Play Checking MO Error Rate Check, CD Error Rate Check, Self-Recording/playback Check

HCD-MD373 specifications

The Sony HCD-MD373 is a compact mini audio system that offers an impressive blend of sound quality, versatility, and advanced technology, making it an ideal choice for audio enthusiasts and casual listeners alike. One of the standout features of the HCD-MD373 is its MiniDisc recorder/player, a legacy technology that allows users to record high-quality audio onto MiniDiscs, providing an alternative to traditional CDs and cassettes. This feature is particularly appealing for those looking to capture live music or create personalized playlists.

Another notable aspect of the HCD-MD373 is its integrated CD player, which supports a variety of formats including CD, CD-R, and CD-RW. This versatility means that users can enjoy their favorite albums without the hassle of switching devices. The audio system also includes a built-in AM/FM tuner, enabling users to easily tune into their favorite radio stations and enjoy live broadcasts.

The HCD-MD373 is equipped with a powerful amplifier that delivers impressive sound output, complemented by its two-way speaker system. The speakers provide a rich audio experience with clear highs and deep lows, making it suitable for various music genres, from classical to contemporary. The system also features a bass boost function that enhances low-frequency sounds, allowing for a more immersive listening experience.

In terms of connectivity, the HCD-MD373 offers multiple inputs and outputs, including audio line-in, headphone jacks, and a digital optical output. These features make it easy to connect external devices such as MP3 players, smartphones, or even home theater systems. Additionally, the audio system supports various playback options, including shuffle and repeat modes, providing enhanced flexibility for users.

The design of the HCD-MD373 is sleek and modern, with a compact form factor that allows it to fit seamlessly into any living space. Its user-friendly interface, complete with an LCD display, makes it easy to navigate and control playback settings. Overall, the Sony HCD-MD373 is a testament to Sony's commitment to quality audio experiences, combining innovative features, robust technology, and elegant design into a single, powerful audio system. Whether enjoying a quiet evening at home or hosting a gathering with friends, the HCD-MD373 is sure to deliver satisfying sound and performance.