ON TIMER | MENU |
SLEEP | OK |
SHOW VIEW
1 2 3
ONCE
4 5 6
DAILY
7 8 9
WEEKLY
0
PROGR
REC | TIMER ON | TIMER REC |
SCREEN | ON/OFF CLEAR | |
QUICK | PAUSE | COUNTER |
TIMER | RESET |
![]() PLAY
PLAY
REWFF
![]() STOP
STOP
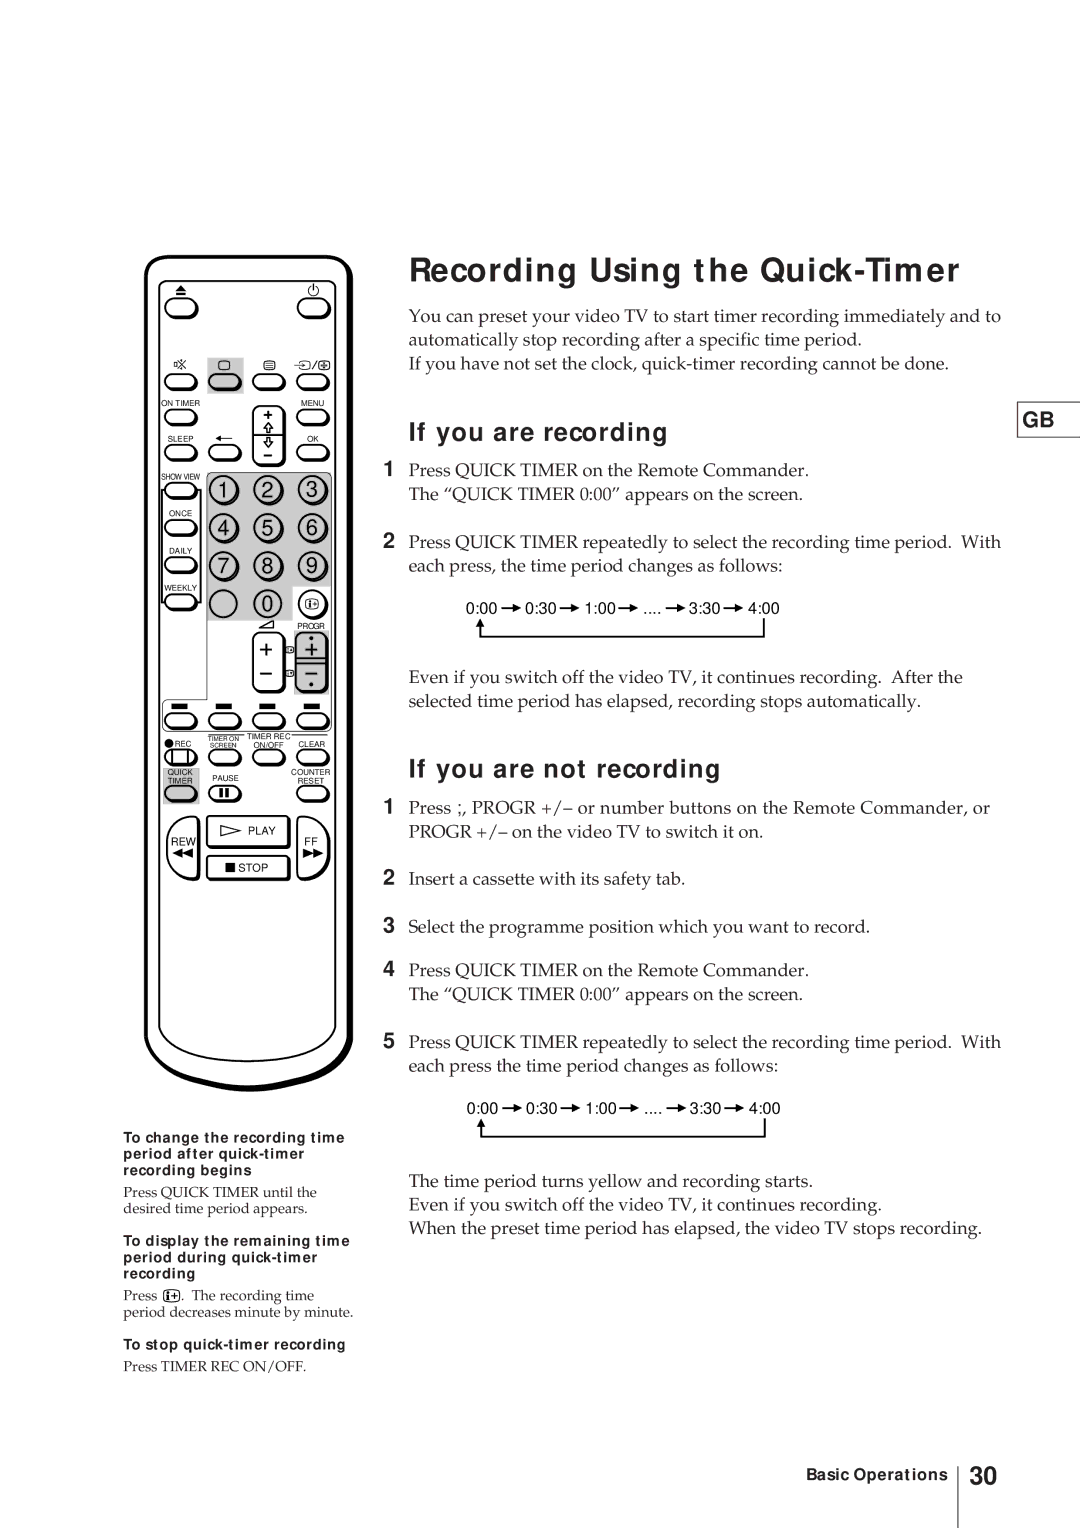
To change the recording time period after
Press QUICK TIMER until the desired time period appears.
To display the remaining time period during
Press ![]() . The recording time period decreases minute by minute.
. The recording time period decreases minute by minute.
To stop quick-timer recording
Press TIMER REC ON/OFF.
Recording Using the Quick-Timer
You can preset your video TV to start timer recording immediately and to automatically stop recording after a specific time period.
If you have not set the clock,
If you are recording | GB |
| |
|
1Press QUICK TIMER on the Remote Commander. The “QUICK TIMER 0:00” appears on the screen.
2Press QUICK TIMER repeatedly to select the recording time period. With each press, the time period changes as follows:
0:00 |
| 0:30 |
| 1:00 |
| .... |
| 3:30 |
| 4:00 | ||
|
|
|
|
| ||||||||
|
|
|
|
|
|
|
|
|
|
|
|
|
|
|
|
|
|
|
|
|
|
|
|
|
|
Even if you switch off the video TV, it continues recording. After the selected time period has elapsed, recording stops automatically.
If you are not recording
1Press ;, PROGR +/– or number buttons on the Remote Commander, or PROGR +/– on the video TV to switch it on.
2Insert a cassette with its safety tab.
3Select the programme position which you want to record.
4Press QUICK TIMER on the Remote Commander. The “QUICK TIMER 0:00” appears on the screen.
5Press QUICK TIMER repeatedly to select the recording time period. With each press the time period changes as follows:
0:00 |
| 0:30 |
| 1:00 |
| .... |
| 3:30 |
| 4:00 | ||
|
|
|
|
| ||||||||
|
|
|
|
|
|
|
|
|
|
|
|
|
|
|
|
|
|
|
|
|
|
|
|
|
|
The time period turns yellow and recording starts.
Even if you switch off the video TV, it continues recording.
When the preset time period has elapsed, the video TV stops recording.
Basic Operations
30
