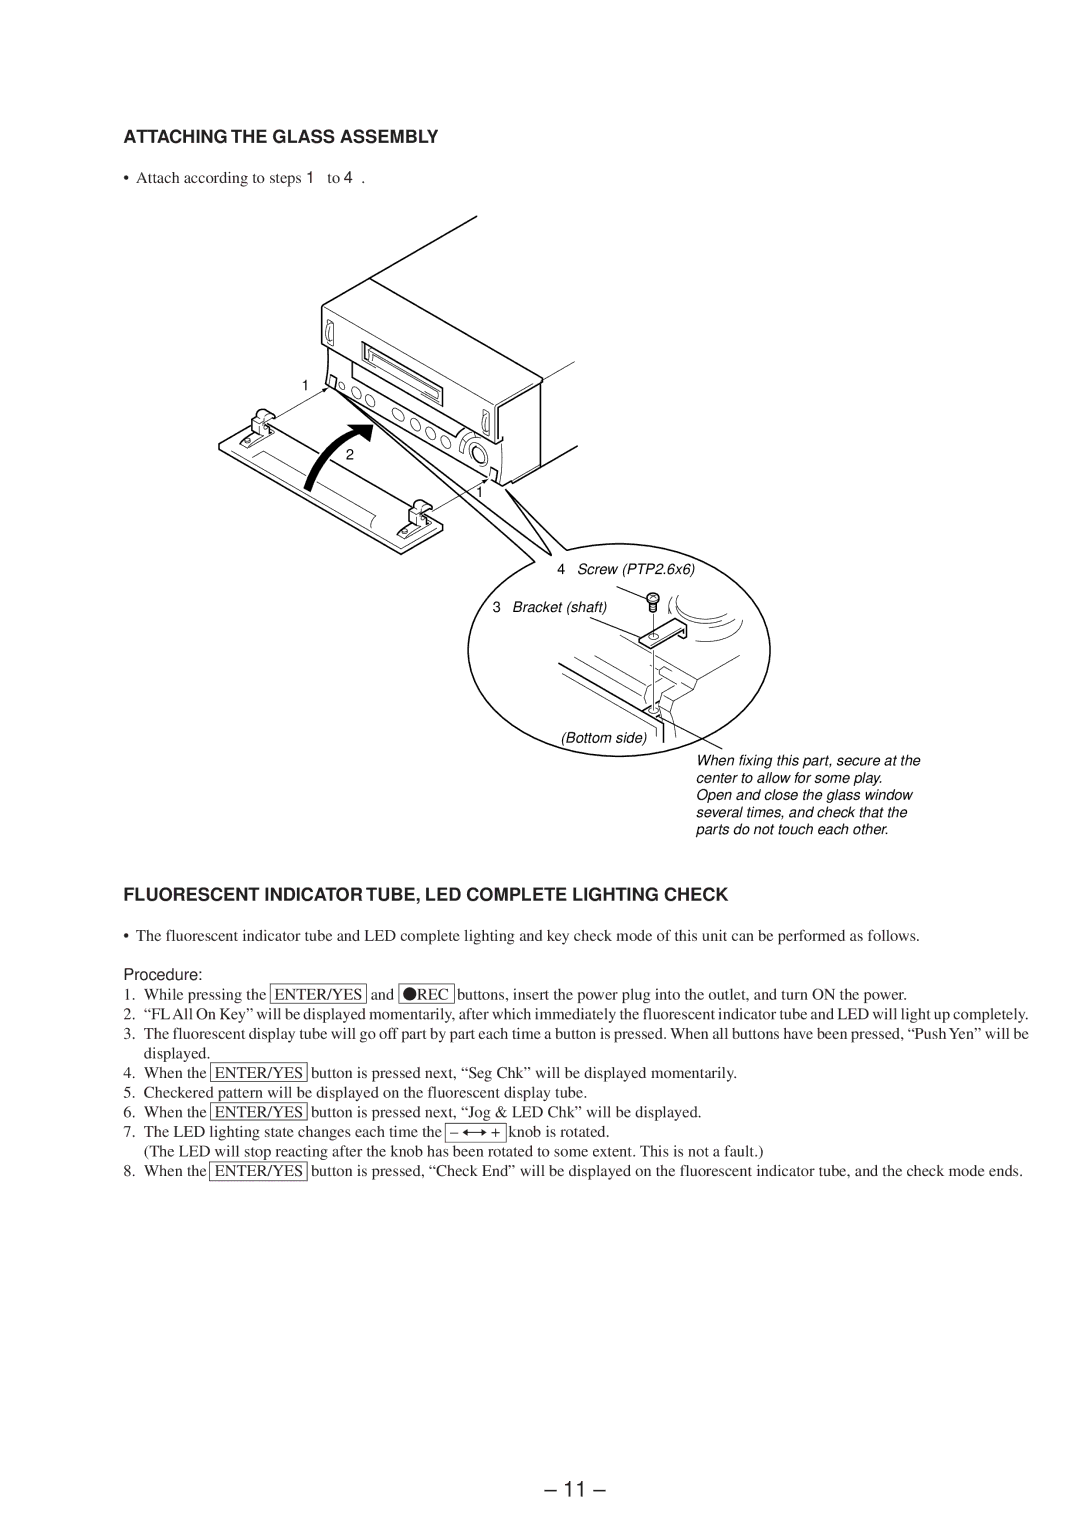
ATTACHING THE GLASS ASSEMBLY
• Attach according to steps 1 to 4.
1 ![]()
2![]()
1
4Screw (PTP2.6x6)
3 Bracket (shaft)
(Bottom side)
When fixing this part, secure at the center to allow for some play. Open and close the glass window several times, and check that the parts do not touch each other.
FLUORESCENT INDICATOR TUBE, LED COMPLETE LIGHTING CHECK
• The fluorescent indicator tube and LED complete lighting and key check mode of this unit can be performed as follows.
Procedure:
1.While pressing the ENTER/YES and rREC buttons, insert the power plug into the outlet, and turn ON the power.
2.“FL All On Key” will be displayed momentarily, after which immediately the fluorescent indicator tube and LED will light up c ompletely.
3.The fluorescent display tube will go off part by part each time a button is pressed. When all buttons have been pressed, “Pus h Yen” will be displayed.
4.When the ENTER/YES button is pressed next, “Seg Chk” will be displayed momentarily.
5.Checkered pattern will be displayed on the fluorescent display tube.
6.When the ENTER/YES button is pressed next, “Jog & LED Chk” will be displayed.
7.The LED lighting state changes each time the
(The LED will stop reacting after the knob has been rotated to some extent. This is not a fault.)
8.When the ENTER/YES button is pressed, “Check End” will be displayed on the fluorescent indicator tube, and the check mode e nds.
– 11 –
