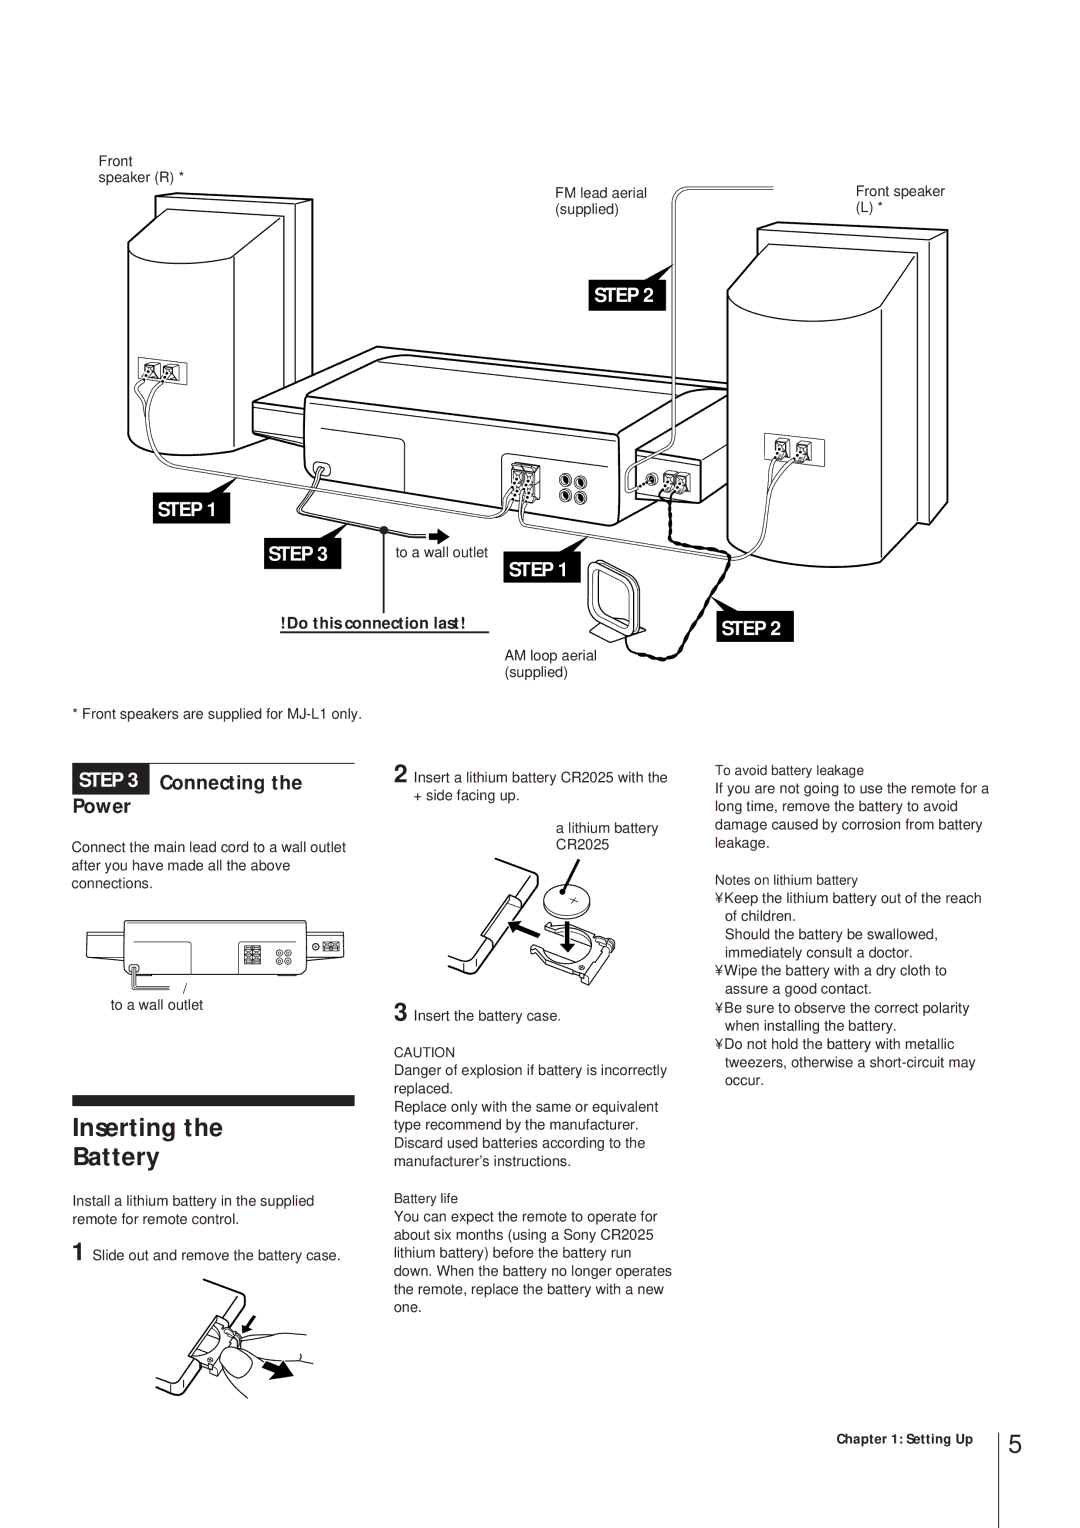
Front speaker (R) *
FM lead aerial (supplied)
STEP 2
STEP 1
STEP 3 | to a wall outlet |
STEP 1
!Do this connection last!
* Front speakers are supplied for
STEP 3 Connecting the
Power
AM loop aerial (supplied)
2 Insert a lithium battery CR2025 with the + side facing up.
a lithium battery
Connect the main lead cord to a wall outletCR2025 after you have made all the above
connections.
/
to a wall outlet | 3 Insert the battery case. |
| |
| CAUTION |
Inserting the
Battery
Install a lithium battery in the supplied remote for remote control.
1 Slide out and remove the battery case.
Danger of explosion if battery is incorrectly replaced.
Replace only with the same or equivalent type recommend by the manufacturer. Discard used batteries according to the manufacturer's instructions.
Battery life
You can expect the remote to operate for about six months (using a Sony CR2025 lithium battery) before the battery run down. When the battery no longer operates the remote, replace the battery with a new one.
Front speaker
(L) *
STEP 2
To avoid battery leakage
If you are not going to use the remote for a long time, remove the battery to avoid damage caused by corrosion from battery leakage.
Notes on lithium battery
•Keep the lithium battery out of the reach of children.
Should the battery be swallowed, immediately consult a doctor.
•Wipe the battery with a dry cloth to assure a good contact.
•Be sure to observe the correct polarity when installing the battery.
•Do not hold the battery with metallic tweezers, otherwise a
Chapter 1: Setting Up
5