
2008H05-1, SCD-XA5400ES specifications
The Sony SCD-XA5400ES is a high-end Super Audio CD (SACD) player that made its debut in 2008, quickly establishing itself as a premier choice for audiophiles and music enthusiasts. Combining cutting-edge technology with elegant design, the XA5400ES exemplifies Sony's commitment to audio excellence.One of the standout features of the SCD-XA5400ES is its capability to play not just standard CDs, but also SACDs, which offer significantly higher resolution audio. This player is equipped with a Dual Discrete Direct Circuit configuration for a cleaner audio path and reduced interference. As a result, it delivers exceptional sound clarity and detail, allowing listeners to experience music as it was intended by the artists.
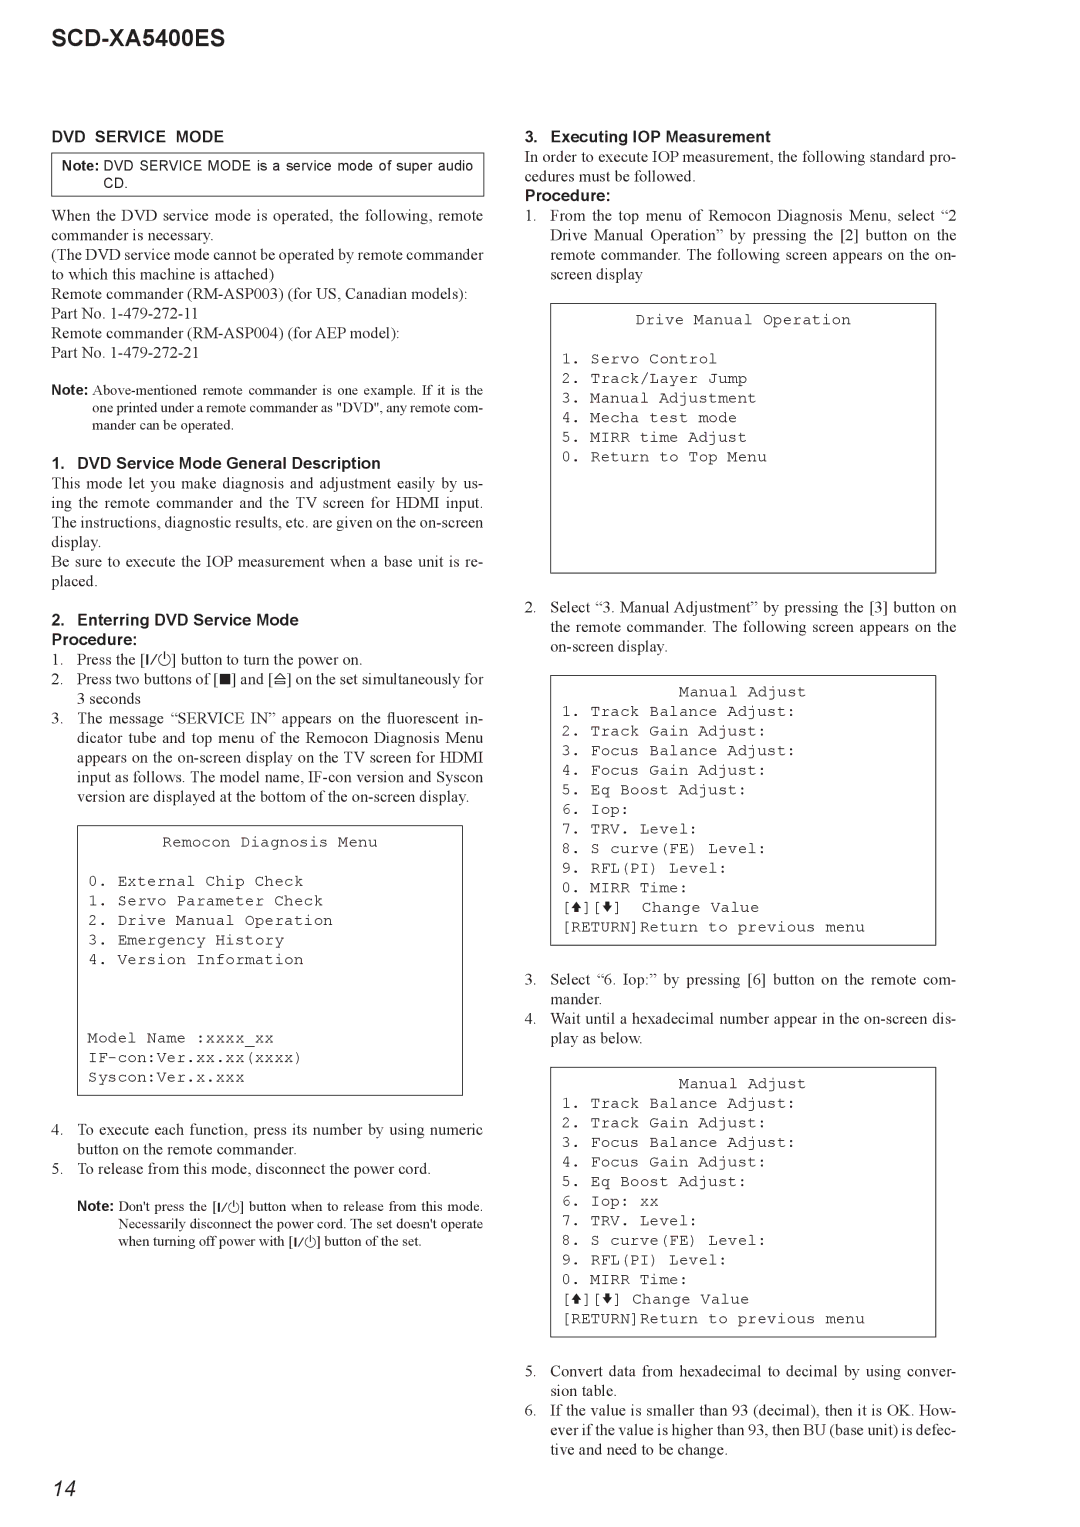
The XA5400ES utilizes a top-of-the-line D/A converter, the Cirrus Logic CS4398, which supports high-resolution audio processing. This converter ensures outstanding audio performance, providing a dynamic range and impressive low distortion figures. The player also features a sophisticated digital signal processing system, which includes multiple digital filters that let audiophiles tailor their listening experience according to their preferences.
In addition to its audio prowess, the SCD-XA5400ES is designed with robust construction meant to minimize vibrations and mechanical noise. This attention to physical integrity is evident in its solid chassis and premium components, which work together to create an ideal environment for high-fidelity playback.
For connectivity, the XA5400ES provides an array of outputs, including balanced XLR outputs, RCA outputs, and a digital output for those needing to connect to external DACs or processors. With these options, the player is highly versatile, capable of integrating seamlessly into various audio systems.
Moreover, the player supports both stereo and multi-channel SACD playback, allowing users to delve into a more immersive sonic landscape. Whether enjoying orchestral pieces or rock concerts, the SCD-XA5400ES enhances the listening experience through its nuanced sound staging and three-dimensional audio reproduction.
In conclusion, the Sony SCD-XA5400ES stands out as a benchmark in the realm of high-quality audio playback. With its advanced technologies, exceptional sound quality, and robust build, it caters to the needs of discerning listeners who seek the ultimate in home audio performance. As a part of Sony's dedicated ES (Elevated Standard) lineup, it emphasizes the brand's expertise in delivering products that merge technical sophistication with a passion for music.