2Press the M/m buttons to select 8 (BRIGHTNESS) and press the OK button.
The BRIGHTNESS menu appears on the screen.
3Press the M/m buttons to adjust the brightness.
SCREEN (analog RGB signal only)
Note
When receiving digital RGB signals from the
xAutomatic picture quality adjustment function
When the monitor receives an input signal, it automatically adjusts the picture’s position and sharpness (phase/pitch), and ensures that a clear picture appears on the screen (page 18).
Note
While the automatic picture quality adjustment function is activated, only the 1 (power) switch will operate.
If the automatic picture quality adjustment function of this monitor seems to not completely adjust the picture.
You can make further automatic adjustment of the picture quality for the current input signal. (See AUTO below.)
If you still need to make further adjustments to the picture quality
You can manually adjust the picture’s sharpness (phase/pitch) and position (horizontal/vertical position).
These adjustments are stored in memory and automatically recalled when the display receives the same input signal.
SCREEN
AU TO
PHASE
P I TCH
H CENTER
V CENTER
1 2 8 0 x 1 0 2 4 / 6 0 H z
E X I T ![]()
xMake further automatic adjustments to the picture quality for the current input signal (AUTO)
1Press the MENU button.
The main menu appears on the screen.
2Press the M/m buttons to select ![]() (SCREEN) and press the OK button.
(SCREEN) and press the OK button.
The SCREEN menu appears on the screen.
3Press the M/m buttons to select AUTO and press the
OK button
Make the appropriate adjustments of the screen’s phase, pitch and horizontal/vertical position for the current input signal and store them.
4Press the M/m buttons to select ![]() and press the OK button.
and press the OK button.
Return to the menu screen.
xAdjust the picture’s sharpness manually (PHASE/PITCH)
You can adjust the picture’s sharpness as follows. This adjustment is effective when the computer is connected to the monitor’s HD15 input connector (analog RGB).
1Set the resolution to 1024 × 768
1280 × 1024
2Load the Utility Disk.
3Start the Utility Disk and display the test pattern. For Windows
Click [Utility] t [Windows]/[Win Utility.exe].
For Macintosh
Click [Utility] t [Mac]/[Mac Utility].
4 | Press the MENU button. |
| US | ||||||
|
| ||||||||
| The main menu appears on the screen. |
|
| ||||||
5 | Press the M/m buttons to select | (SCREEN) and | |||||||
| press the OK button. |
|
| ||||||
| The SCREEN menu appears on the screen. | ||||||||
6 | Press the M/m buttons to select PHASE and press | ||||||||
| the OK button. |
|
| ||||||
| The PHASE menu appears on the screen. |
|
| ||||||
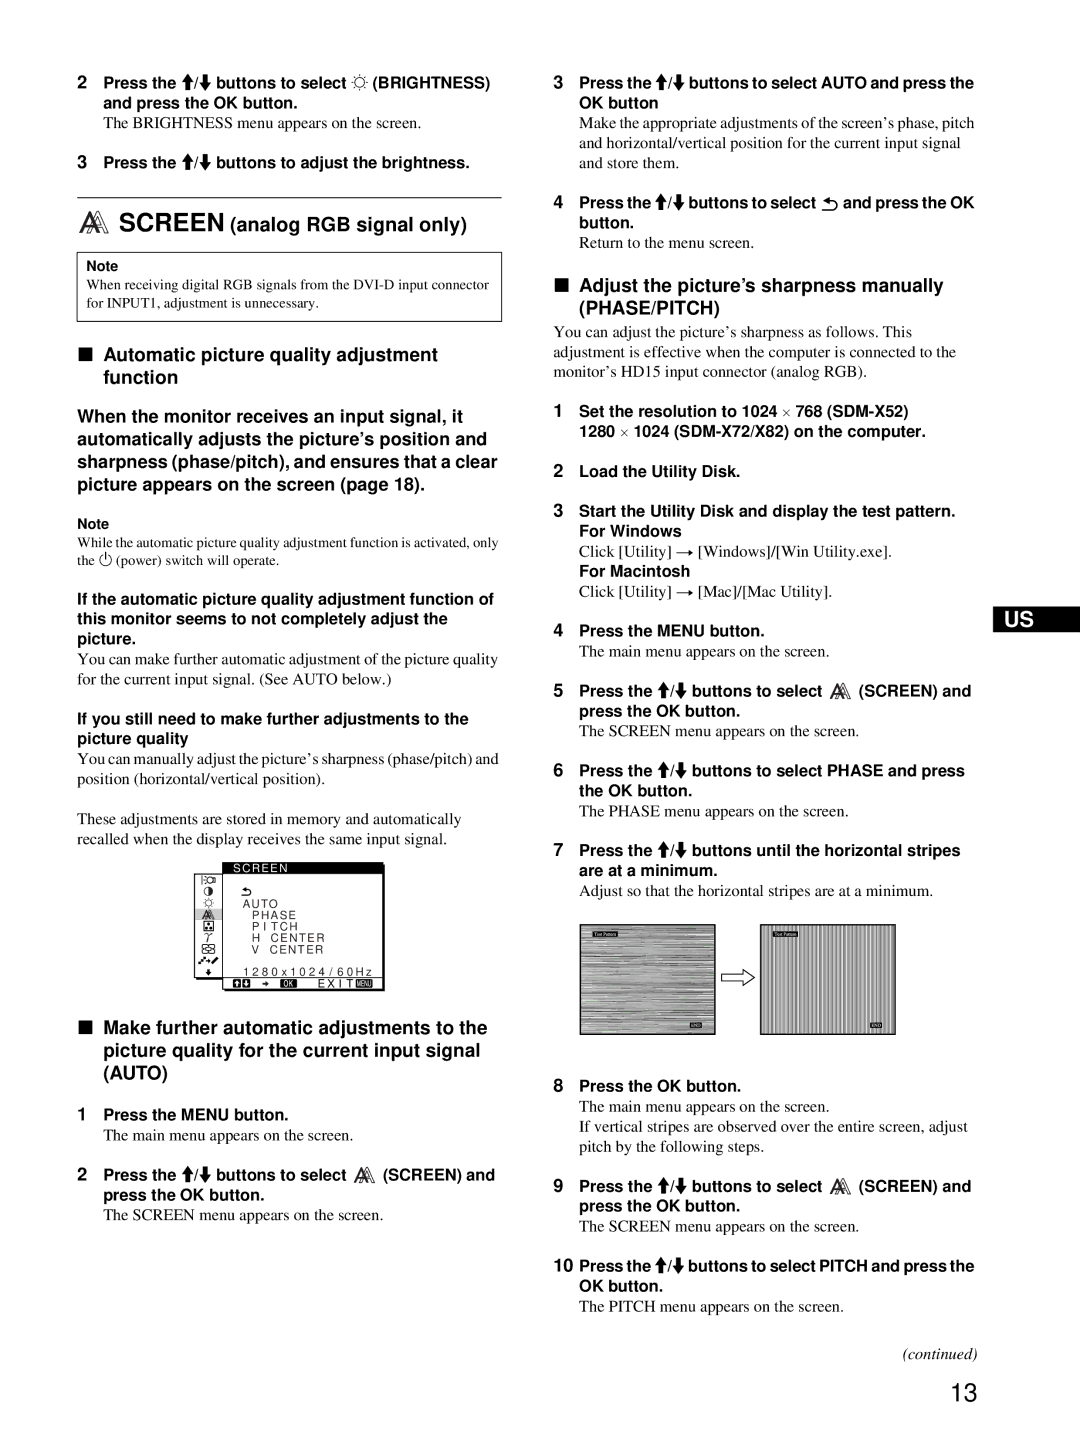
7 | Press the M/m buttons until the horizontal stripes | ||||||||
| are at a minimum. |
|
| ||||||
| Adjust so that the horizontal stripes are at a minimum. | ||||||||
|
|
|
|
|
|
|
|
|
|
|
|
|
|
|
|
|
|
|
|
|
|
|
|
|
|
|
|
|
|
|
|
|
|
|
|
|
|
|
|
8Press the OK button.
The main menu appears on the screen.
If vertical stripes are observed over the entire screen, adjust pitch by the following steps.
9Press the M/m buttons to select ![]() (SCREEN) and press the OK button.
(SCREEN) and press the OK button.
The SCREEN menu appears on the screen.
10Press the M/m buttons to select PITCH and press the
OK button.
The PITCH menu appears on the screen.
(continued)
13