For Machines Mfg. Since 8/09 | M A I N T E N A N C E | Model SB1023 |
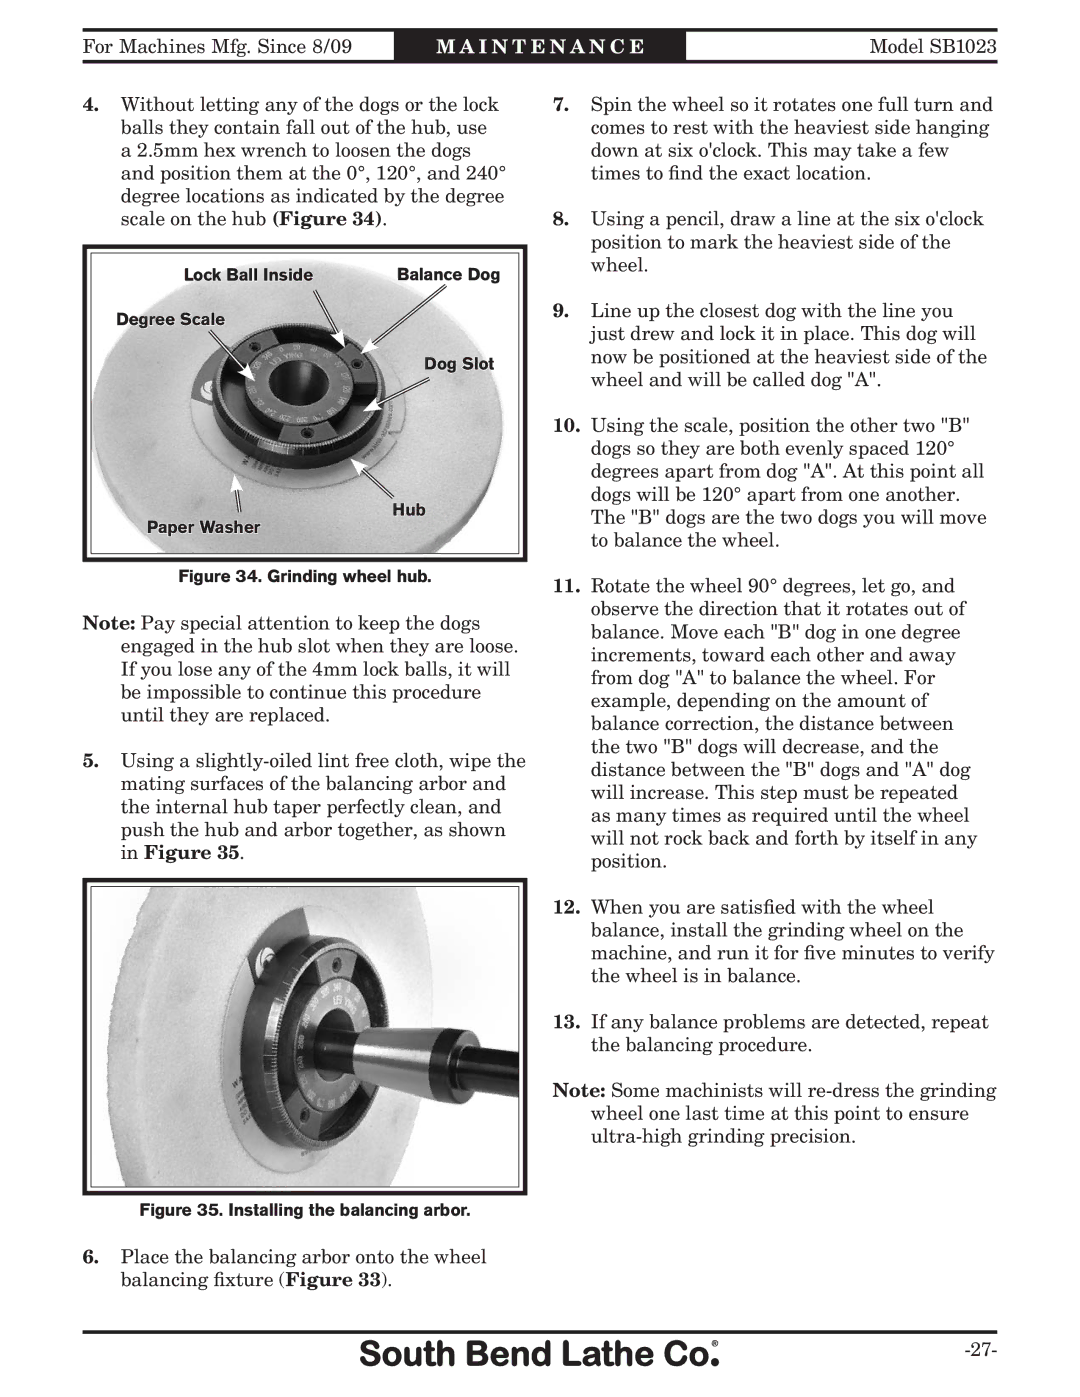
4.Without letting any of the dogs or the lock balls they contain fall out of the hub, use a 2.5mm hex wrench to loosen the dogs and position them at the 0°, 120°, and 240° degree locations as indicated by the degree scale on the hub (Figure 34).
Lock Ball Inside | Balance Dog |
Degree Scale
Dog Slot
Hub
Paper Washer
Figure 34. Grinding wheel hub.
Note: Pay special attention to keep the dogs engaged in the hub slot when they are loose. If you lose any of the 4mm lock balls, it will be impossible to continue this procedure until they are replaced.
5.Using a
7.Spin the wheel so it rotates one full turn and comes to rest with the heaviest side hanging down at six o'clock. This may take a few times to find the exact location.
8.Using a pencil, draw a line at the six o'clock position to mark the heaviest side of the wheel.
9.Line up the closest dog with the line you just drew and lock it in place. This dog will now be positioned at the heaviest side of the wheel and will be called dog "A".
10.Using the scale, position the other two "B" dogs so they are both evenly spaced 120° degrees apart from dog "A". At this point all dogs will be 120° apart from one another. The "B" dogs are the two dogs you will move to balance the wheel.
11.Rotate the wheel 90° degrees, let go, and observe the direction that it rotates out of balance. Move each "B" dog in one degree increments, toward each other and away from dog "A" to balance the wheel. For example, depending on the amount of balance correction, the distance between the two "B" dogs will decrease, and the distance between the "B" dogs and "A" dog will increase. This step must be repeated as many times as required until the wheel will not rock back and forth by itself in any position.
12.When you are satisfied with the wheel balance, install the grinding wheel on the machine, and run it for five minutes to verify the wheel is in balance.
13.If any balance problems are detected, repeat the balancing procedure.
Note: Some machinists will
Figure 35. Installing the balancing arbor.
6.Place the balancing arbor onto the wheel balancing fixture (Figure 33).