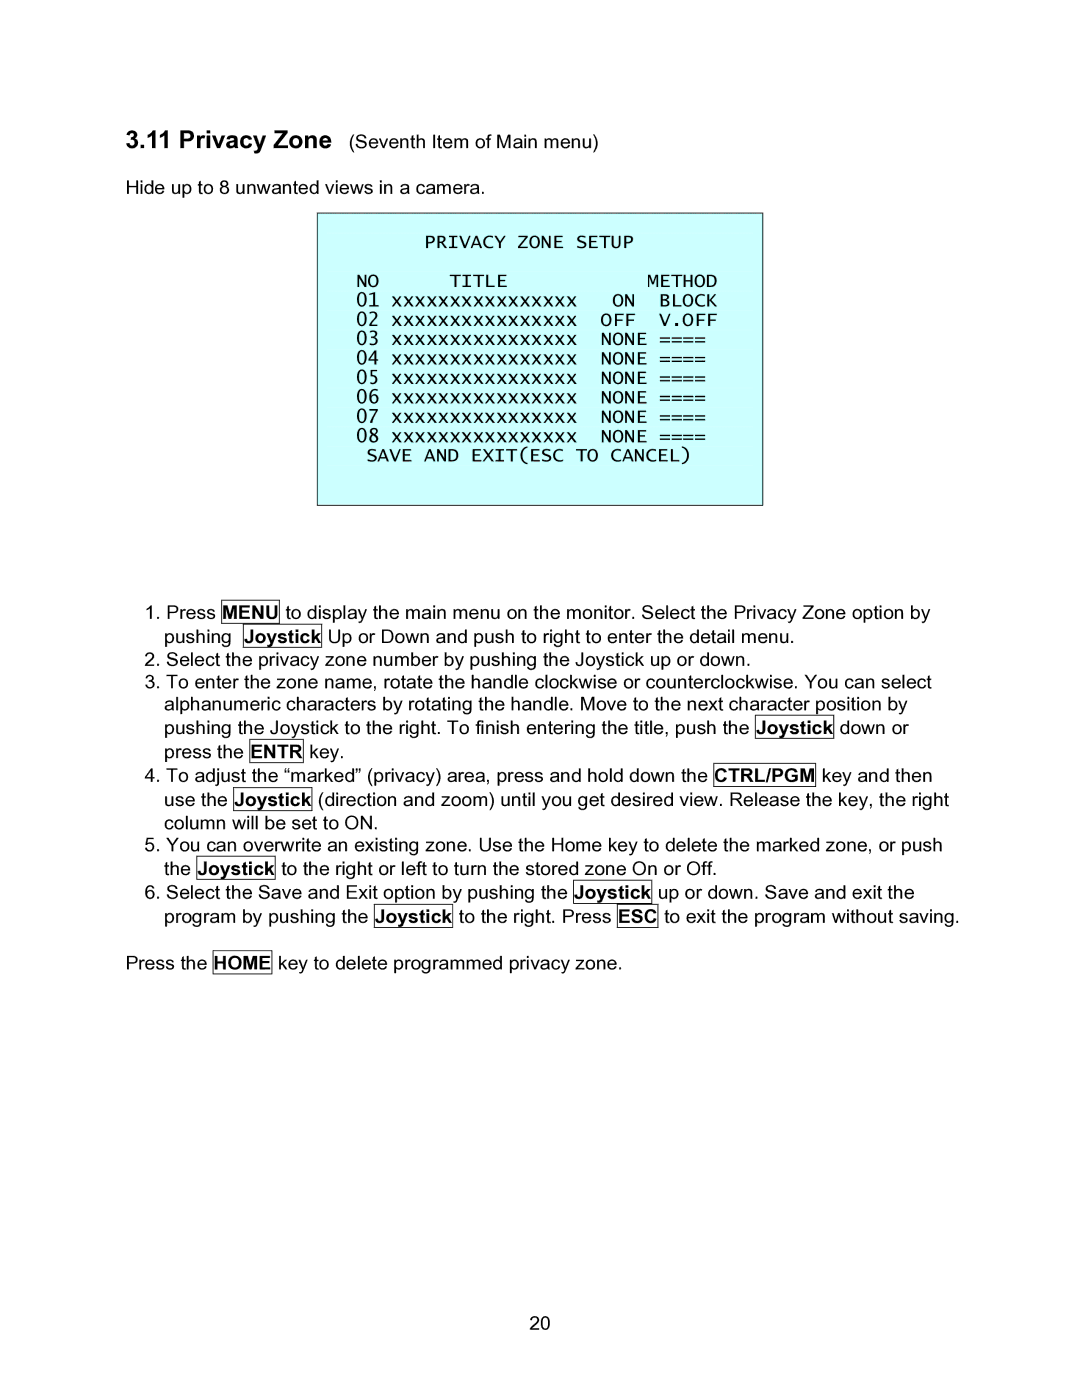
3.11Privacy Zone (Seventh Item of Main menu) Hide up to 8 unwanted views in a camera.
| PRIVACY ZONE SETUP |
| |
NO | TITLE |
| METHOD |
01 | xxxxxxxxxxxxxxxx | ON | BLOCK |
02 | xxxxxxxxxxxxxxxx | OFF | V.OFF |
03 | xxxxxxxxxxxxxxxx | NONE | ==== |
04 | xxxxxxxxxxxxxxxx | NONE | ==== |
05 | xxxxxxxxxxxxxxxx | NONE | ==== |
06 | xxxxxxxxxxxxxxxx | NONE | ==== |
07 | xxxxxxxxxxxxxxxx | NONE | ==== |
08 | xxxxxxxxxxxxxxxx | NONE | ==== |
SAVE AND EXIT(ESC TO CANCEL)
1.Press MENU to display the main menu on the monitor. Select the Privacy Zone option by pushing Joystick Up or Down and push to right to enter the detail menu.
2.Select the privacy zone number by pushing the Joystick up or down.
3.To enter the zone name, rotate the handle clockwise or counterclockwise. You can select alphanumeric characters by rotating the handle. Move to the next character position by pushing the Joystick to the right. To finish entering the title, push the Joystick down or press the ENTR key.
4.To adjust the “marked” (privacy) area, press and hold down the CTRL/PGM key and then use the Joystick (direction and zoom) until you get desired view. Release the key, the right column will be set to ON.
5.You can overwrite an existing zone. Use the Home key to delete the marked zone, or push the Joystick to the right or left to turn the stored zone On or Off.
6.Select the Save and Exit option by pushing the Joystick up or down. Save and exit the program by pushing the Joystick to the right. Press ESC to exit the program without saving.
Press the HOME key to delete programmed privacy zone.
20
