Automatic PlaneLok mode
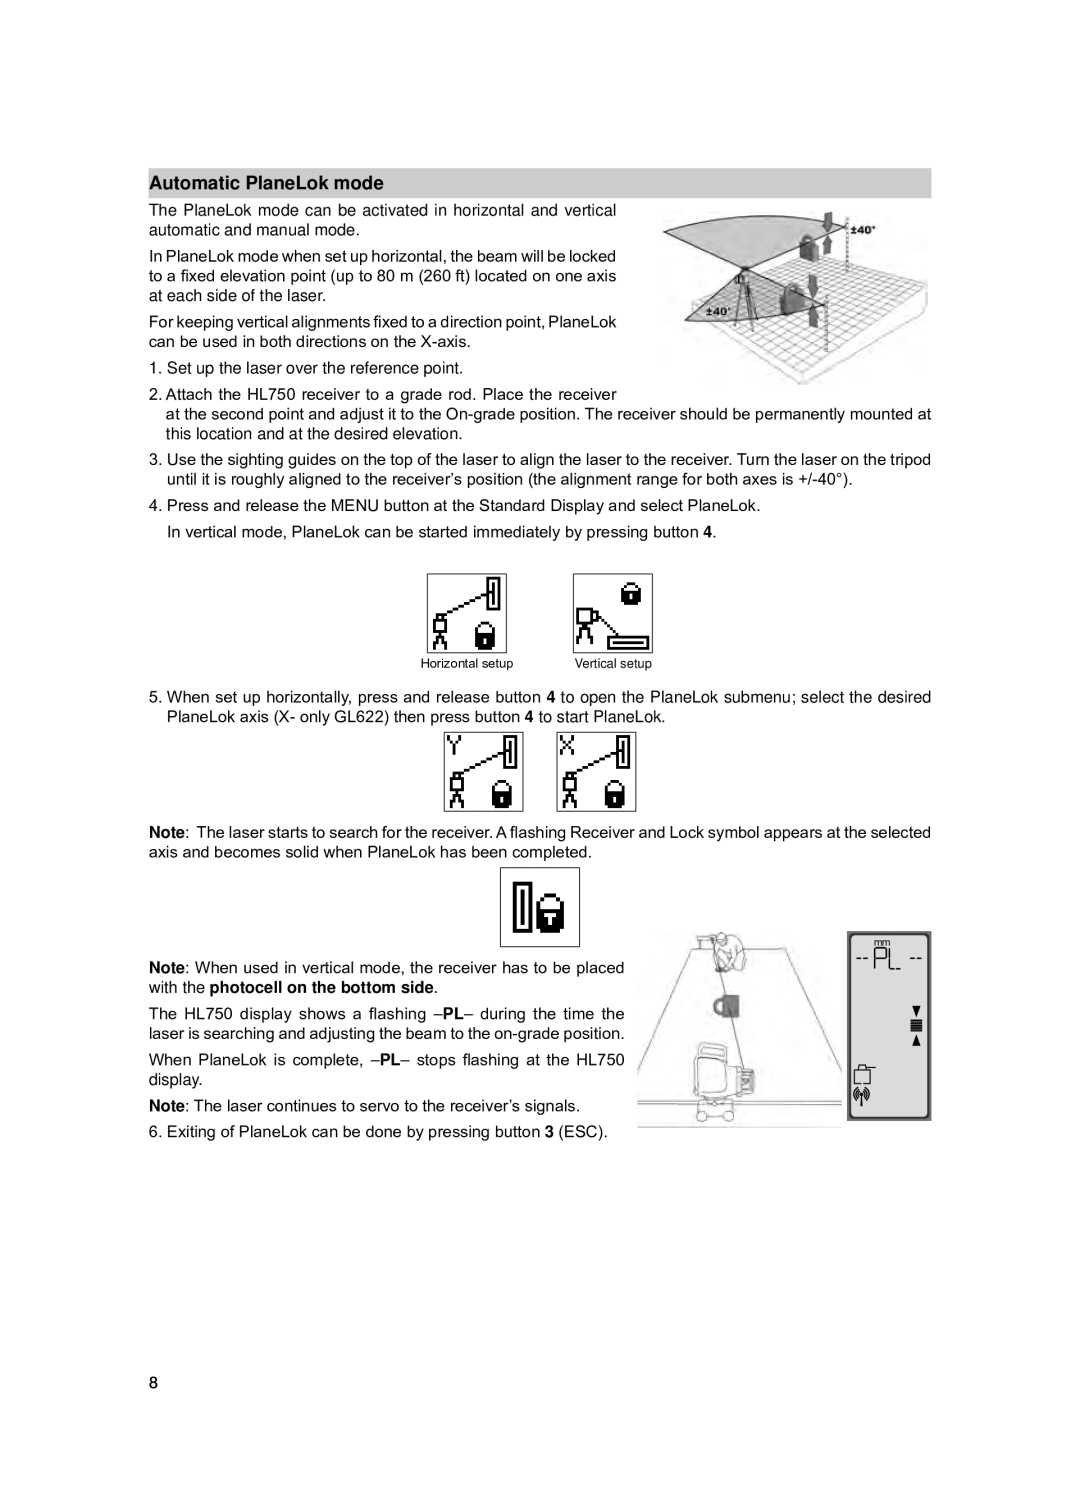
The PlaneLok mode can be activated in horizontal and vertical automatic and manual mode.
In PlaneLok mode when set up horizontal, the beam will be locked to a fixed elevation point (up to 80 m (260 ft) located on one axis at each side of the laser.
For keeping vertical alignments fixed to a direction point, PlaneLok can be used in both directions on the
1.Set up the laser over the reference point.
2.Attach the HL750 receiver to a grade rod. Place the receiver
at the second point and adjust it to the
3.Use the sighting guides on the top of the laser to align the laser to the receiver. Turn the laser on the tripod until it is roughly aligned to the receiver’s position (the alignment range for both axes is
4.Press and release the MENU button at the Standard Display and select PlaneLok. In vertical mode, PlaneLok can be started immediately by pressing button 4.
|
|
|
|
Horizontal setup | Vertical setup | ||
5.When set up horizontally, press and release button 4 to open the PlaneLok submenu; select the desired PlaneLok axis (X- only GL622) then press button 4 to start PlaneLok.
Note: The laser starts to search for the receiver. A flashing Receiver and Lock symbol appears at the selected axis and becomes solid when PlaneLok has been completed.
mm
Note: When used in vertical mode, the receiver has to be placed with the photocell on the bottom side.
The HL750 display shows a flashing
When PlaneLok is complete,
Note: The laser continues to servo to the receiver’s signals.
6. Exiting of PlaneLok can be done by pressing button 3 (ESC).
8
