Pairing the transmitter with remote control
The chain symbol at button 1 indicates the remote has never been paired before which means no radio connectivity is given. Pressing the pairing button 1 will initiate a pairing request. The transmitter has to be in pairing mode as shown above.
Note: Make sure that pairing mode is selected only at one transmitter which is within the radio range of the remote during a pairing request. Otherwise pairing procedure can be confused.
Pairing the transmitter with receiver
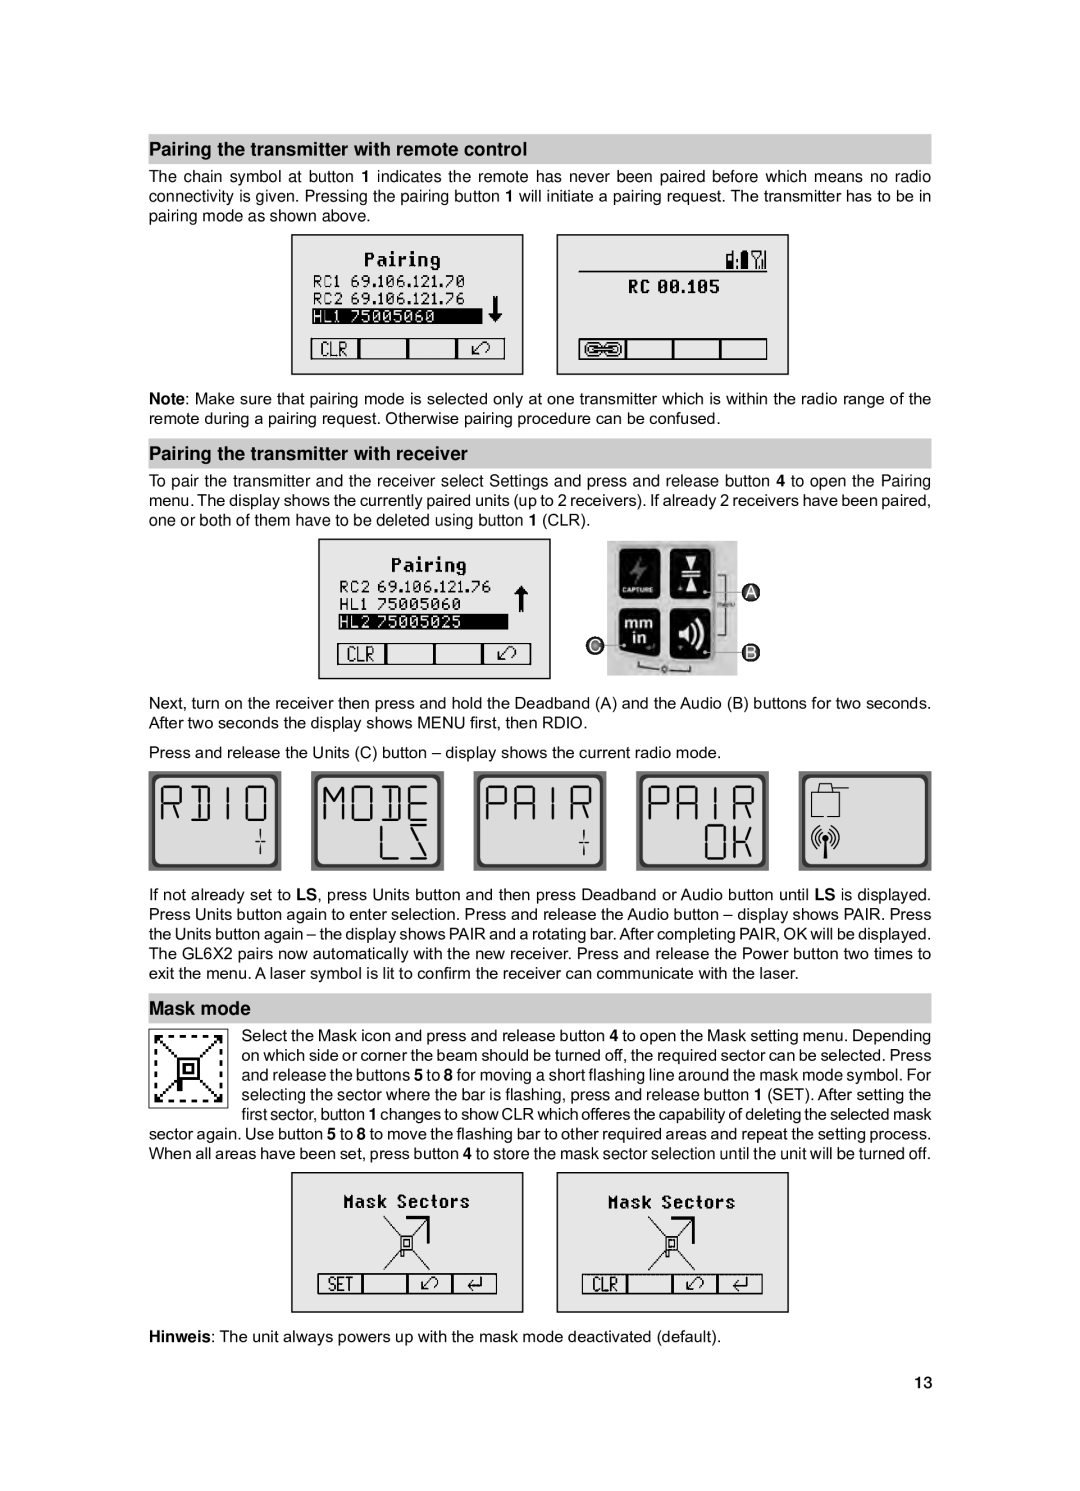
To pair the transmitter and the receiver select Settings and press and release button 4 to open the Pairing menu. The display shows the currently paired units (up to 2 receivers). If already 2 receivers have been paired, one or both of them have to be deleted using button 1 (CLR).
A
C ![]()
![]() B
B
Next, turn on the receiver then press and hold the Deadband (A) and the Audio (B) buttons for two seconds. After two seconds the display shows MENU first, then RDIO.
Press and release the Units (C) button – display shows the current radio mode.
If not already set to LS, press Units button and then press Deadband or Audio button until LS is displayed. Press Units button again to enter selection. Press and release the Audio button – display shows PAIR. Press the Units button again – the display shows PAIR and a rotating bar. After completing PAIR, OK will be displayed. The GL6X2 pairs now automatically with the new receiver. Press and release the Power button two times to exit the menu. A laser symbol is lit to confirm the receiver can communicate with the laser.
Mask mode
Select the Mask icon and press and release button 4 to open the Mask setting menu. Depending on which side or corner the beam should be turned off, the required sector can be selected. Press and release the buttons 5 to 8 for moving a short flashing line around the mask mode symbol. For selecting the sector where the bar is flashing, press and release button 1 (SET). After setting the first sector, button 1 changes to show CLR which offeres the capability of deleting the selected mask
sector again. Use button 5 to 8 to move the flashing bar to other required areas and repeat the setting process. When all areas have been set, press button 4 to store the mask sector selection until the unit will be turned off.
Hinweis: The unit always powers up with the mask mode deactivated (default).
13