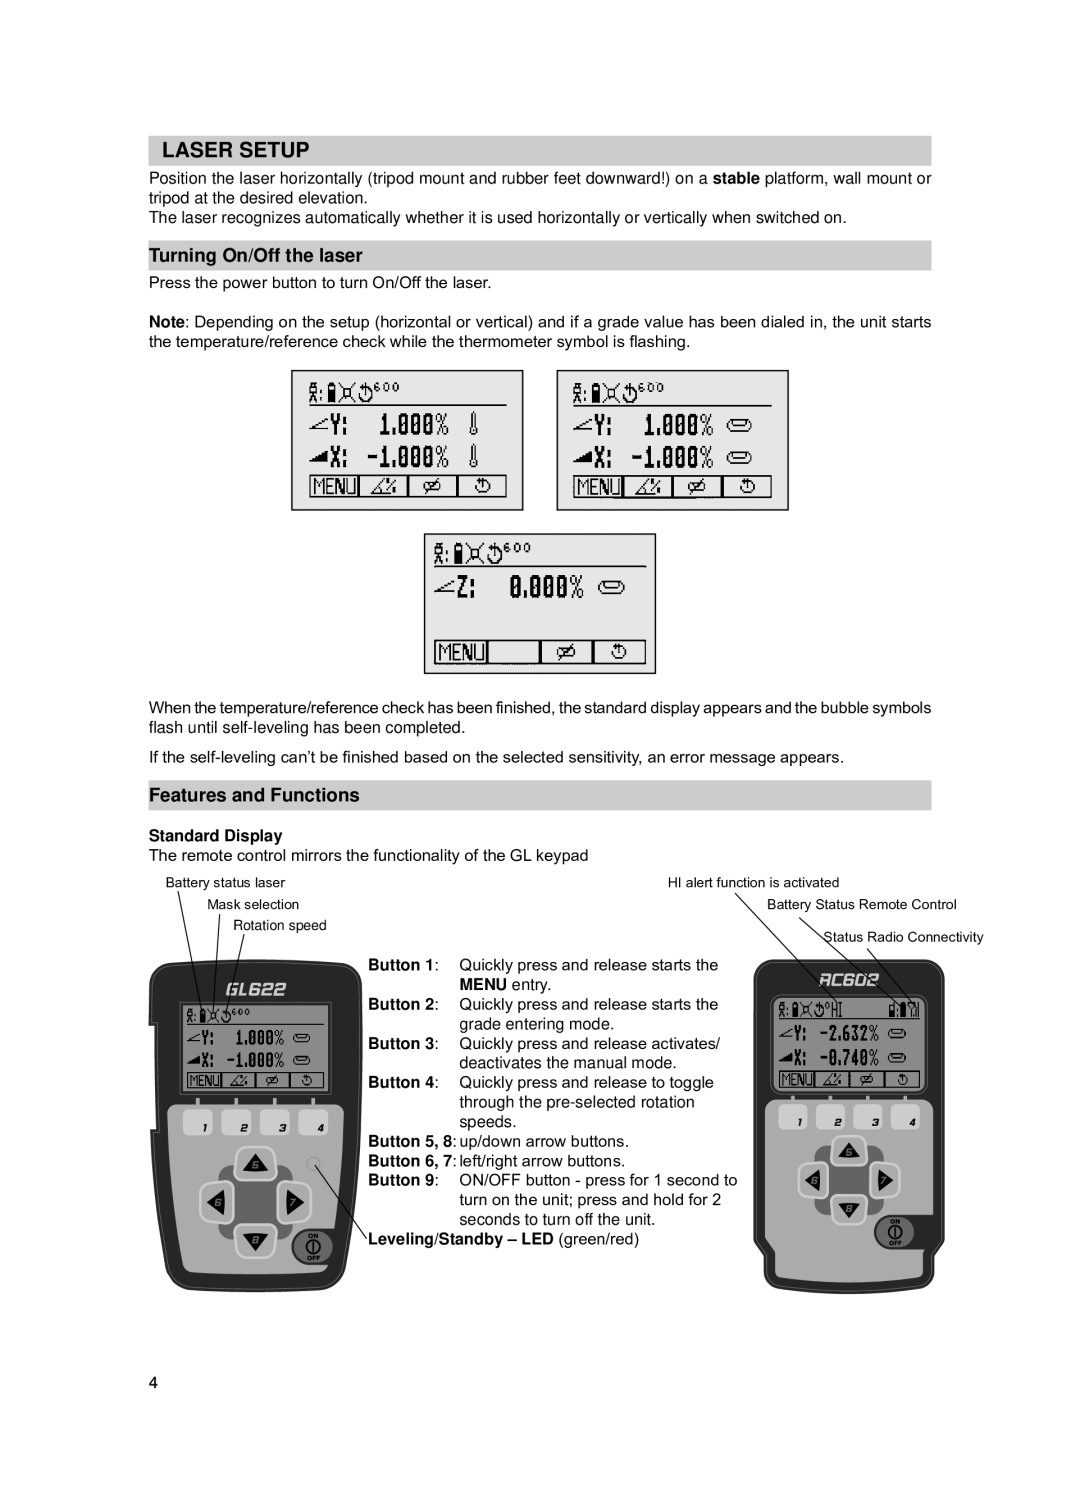
LASER SETUP
Position the laser horizontally (tripod mount and rubber feet downward!) on a stable platform, wall mount or tripod at the desired elevation.
The laser recognizes automatically whether it is used horizontally or vertically when switched on.
Turning On/Off the laser
Press the power button to turn On/Off the laser.
Note: Depending on the setup (horizontal or vertical) and if a grade value has been dialed in, the unit starts the temperature/reference check while the thermometer symbol is flashing.
When the temperature/reference check has been finished, the standard display appears and the bubble symbols flash until
If the
Features and Functions
Standard Display
The remote control mirrors the functionality of the GL keypad
Battery status laser | HI alert function is activated | |||
| Mask selection | Battery Status Remote Control | ||
| Rotation speed |
| Status Radio Connectivity | |
|
|
| ||
|
| Button 1: Quickly press and release starts the | ||
|
| MENU entry. | ||
|
| Button 2: Quickly press and release starts the |
|
|
|
| |||
|
| grade entering mode. |
|
|
|
| Button 3: Quickly press and release activates/ |
|
|
|
| deactivates the manual mode. |
|
|
|
| Button 4: Quickly press and release to toggle |
|
|
|
| through the |
|
|
|
| speeds. | ||
|
| Button 5, 8: up/down arrow buttons. | ||
|
| Button 6, 7: left/right arrow buttons. | ||
|
| Button 9: ON/OFF button - press for 1 second to | ||
|
| turn on the unit; press and hold for 2 | ||
|
| seconds to turn off the unit. | ||
|
| Leveling/Standby – LED (green/red) | ||
4
