5. VALIDATION PRINTING (Models with validation function only)
This printer can print one line of validation printing.
5-1. Operating Method
B
![]() A
A
Adjust lever
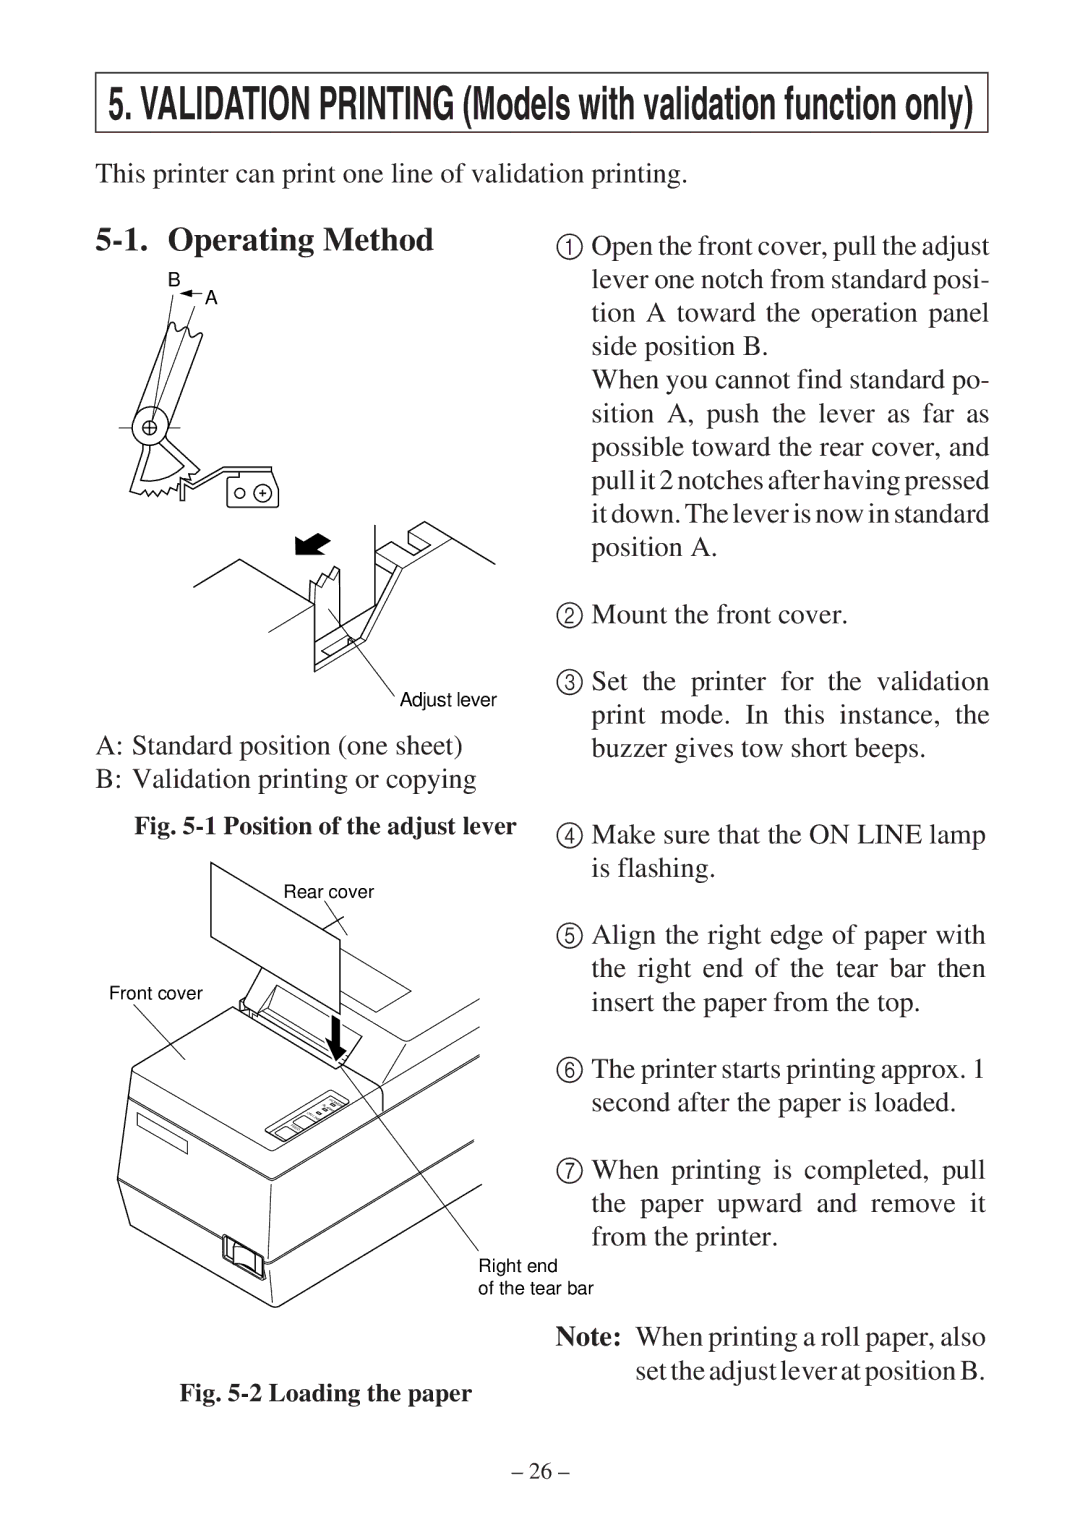
A:Standard position (one sheet)
B:Validation printing or copying
1Open the front cover, pull the adjust lever one notch from standard posi- tion A toward the operation panel side position B.
When you cannot find standard po- sition A, push the lever as far as possible toward the rear cover, and pull it 2 notches after having pressed it down. The lever is now in standard position A.
2Mount the front cover.
3Set the printer for the validation print mode. In this instance, the buzzer gives tow short beeps.
Fig. 5-1 Position of the adjust lever
Rear cover
Front cover
| POWER |
ON | ALARM |
| LINE |
FEED
4Make sure that the ON LINE lamp is flashing.
5Align the right edge of paper with the right end of the tear bar then insert the paper from the top.
6The printer starts printing approx. 1 second after the paper is loaded.
7When printing is completed, pull
the paper upward and remove it from the printer.
Right end
of the tear bar
Note: When printing a roll paper, also set the adjust lever at position B.
Fig. 5-2 Loading the paper
– 26 –
