INSTALLING THE WELDED CROSS SUPPORT:
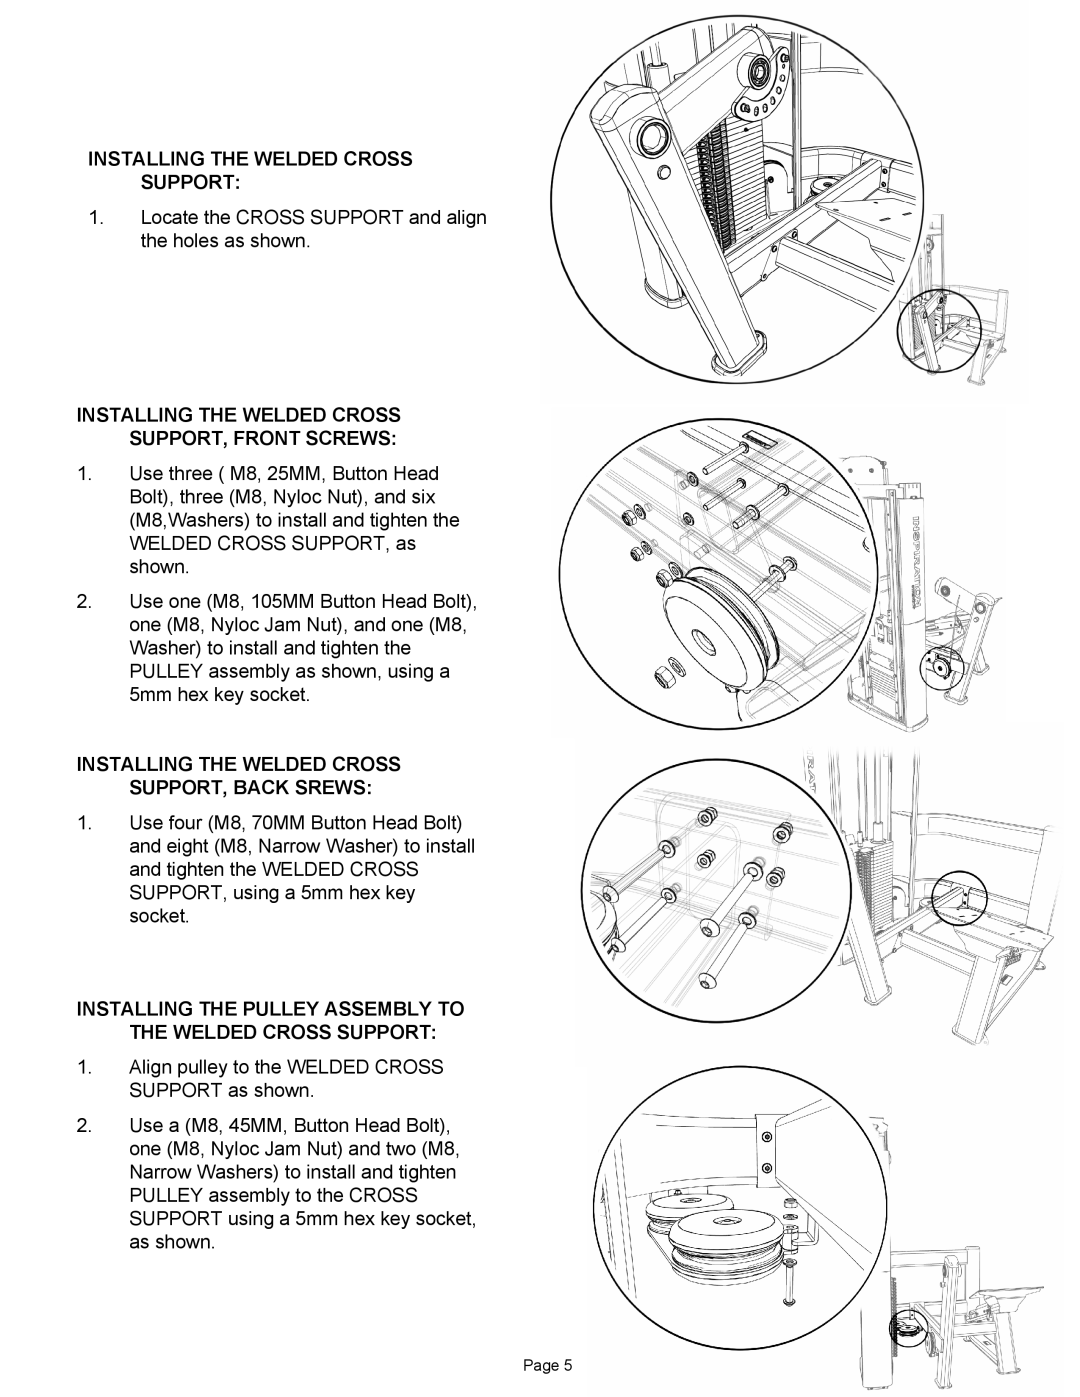
1.Locate the CROSS SUPPORT and align the holes as shown.
INSTALLING THE WELDED CROSS SUPPORT, FRONT SCREWS:
1.Use three ( M8, 25MM, Button Head Bolt), three (M8, Nyloc Nut), and six (M8,Washers) to install and tighten the WELDED CROSS SUPPORT, as shown.
2.Use one (M8, 105MM Button Head Bolt), one (M8, Nyloc Jam Nut), and one (M8, Washer) to install and tighten the PULLEY assembly as shown, using a 5mm hex key socket.
INSTALLING THE WELDED CROSS SUPPORT, BACK SREWS:
1.Use four (M8, 70MM Button Head Bolt) and eight (M8, Narrow Washer) to install and tighten the WELDED CROSS SUPPORT, using a 5mm hex key socket.
INSTALLING THE PULLEY ASSEMBLY TO THE WELDED CROSS SUPPORT:
1.Align pulley to the WELDED CROSS SUPPORT as shown.
2.Use a (M8, 45MM, Button Head Bolt), one (M8, Nyloc Jam Nut) and two (M8, Narrow Washers) to install and tighten PULLEY assembly to the CROSS SUPPORT using a 5mm hex key socket, as shown.
Page 5
