INSTALLATION INSTRUCTIONS
INSTALLATION
3.2 TOP EXIT
3.2.1There are two types of top exit flues available, one with a vertical terminal, the other with a horizontal terminal. Minimum and maximum flue lengths are shown in Diagram 3 under Site Requirements, 1.4. There is an optional decorative collar, part No. 8548, to cover the gap between the top plate and the flue.
THIS MUST BE IN PLACE BEFORE THE FLUE IS INSTALLED.
IMPORTANT: WHEN INSTALLING A TOP EXIT FLUE REFER TO THE TECHNICAL SPECIFICATIONS ON THIS PAGE FOR THE APPROPRIATE SIZE RESTRICTOR.
VERTICAL & HORIZONTAL FLUE
TABLE A - TOP EXIT FLUE - VERTICAL AND HORIZONTAL RESTRICTORS
Vertical Flue Height | Horizontal Length | Restrictor Size |
From Top of Stove |
|
|
500mm to 1490mm | 250mm to 1000mm | No restrictor |
1500mm to 3000mm | 250mm to 5000mm | 75mm Ø |
3.2.2The appliance is factory set for rear exit, therefore for top exit the spigots and blanking plates must be reversed. See diagram 5. Take care not to drop or damage the gaskets. If a restrictor is required fit this between the small outlet spigot and the air duct. See diagram 10. The large outer spigot must be fitted with the flue fixing hole facing forward.
10
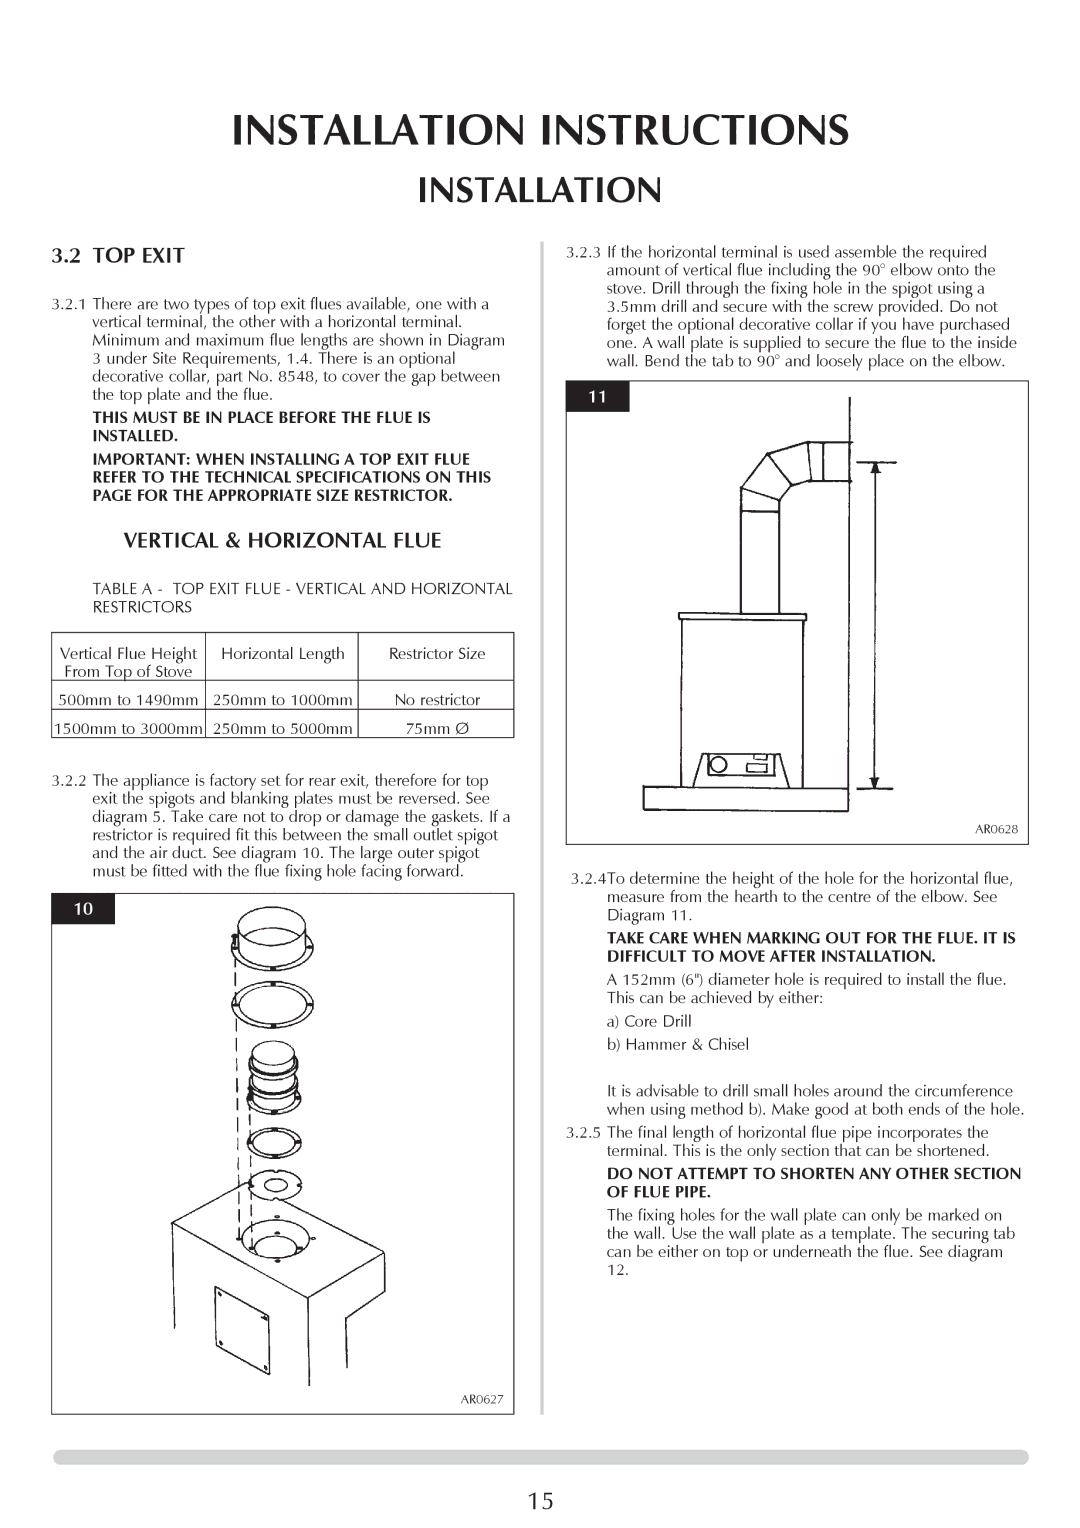
3.2.3If the horizontal terminal is used assemble the required amount of vertical flue including the 90° elbow onto the stove. Drill through the fixing hole in the spigot using a 3.5mm drill and secure with the screw provided. Do not forget the optional decorative collar if you have purchased one. A wall plate is supplied to secure the flue to the inside wall. Bend the tab to 90° and loosely place on the elbow.
11
AR0628
3.2.4To determine the height of the hole for the horizontal flue, measure from the hearth to the centre of the elbow. See Diagram 11.
TAKE CARE WHEN MARKING OUT FOR THE FLUE. IT IS DIFFICULT TO MOVE AFTER INSTALLATION.
A 152mm (6") diameter hole is required to install the flue. This can be achieved by either:
a)Core Drill
b)Hammer & Chisel
It is advisable to drill small holes around the circumference when using method b). Make good at both ends of the hole.
3.2.5The final length of horizontal flue pipe incorporates the terminal. This is the only section that can be shortened.
DO NOT ATTEMPT TO SHORTEN ANY OTHER SECTION OF FLUE PIPE.
The fixing holes for the wall plate can only be marked on the wall. Use the wall plate as a template. The securing tab can be either on top or underneath the flue. See diagram 12.
AR0627
15