INSTALLATION INSTRUCTIONS
INSTALLATION
NOTE: IT IS IMPORTANT TO ENSURE THAT THE PANEL LOCATES TIGHTLY AGAINST THE BURNER TRAY.
13
AR1931
8. E-STUDIO
ARRANGEMENT OF FUEL BED
COMPONENTS
ONLY USE THE CORRECT TYPE AND QUANTITY OF GRANITE CHIPPINGS. Always follow the fuel bed layout as stated in these instructions. NEVER change the layout from that shown here.
8.1Arrange the granite chippings in the areas highlighted in Diagram 14. Granite chippings should be evenly distributed.
14
AR1768
8.2Lean the granite chippings against the burner ledges to disguise the ledges.
15
AR1769
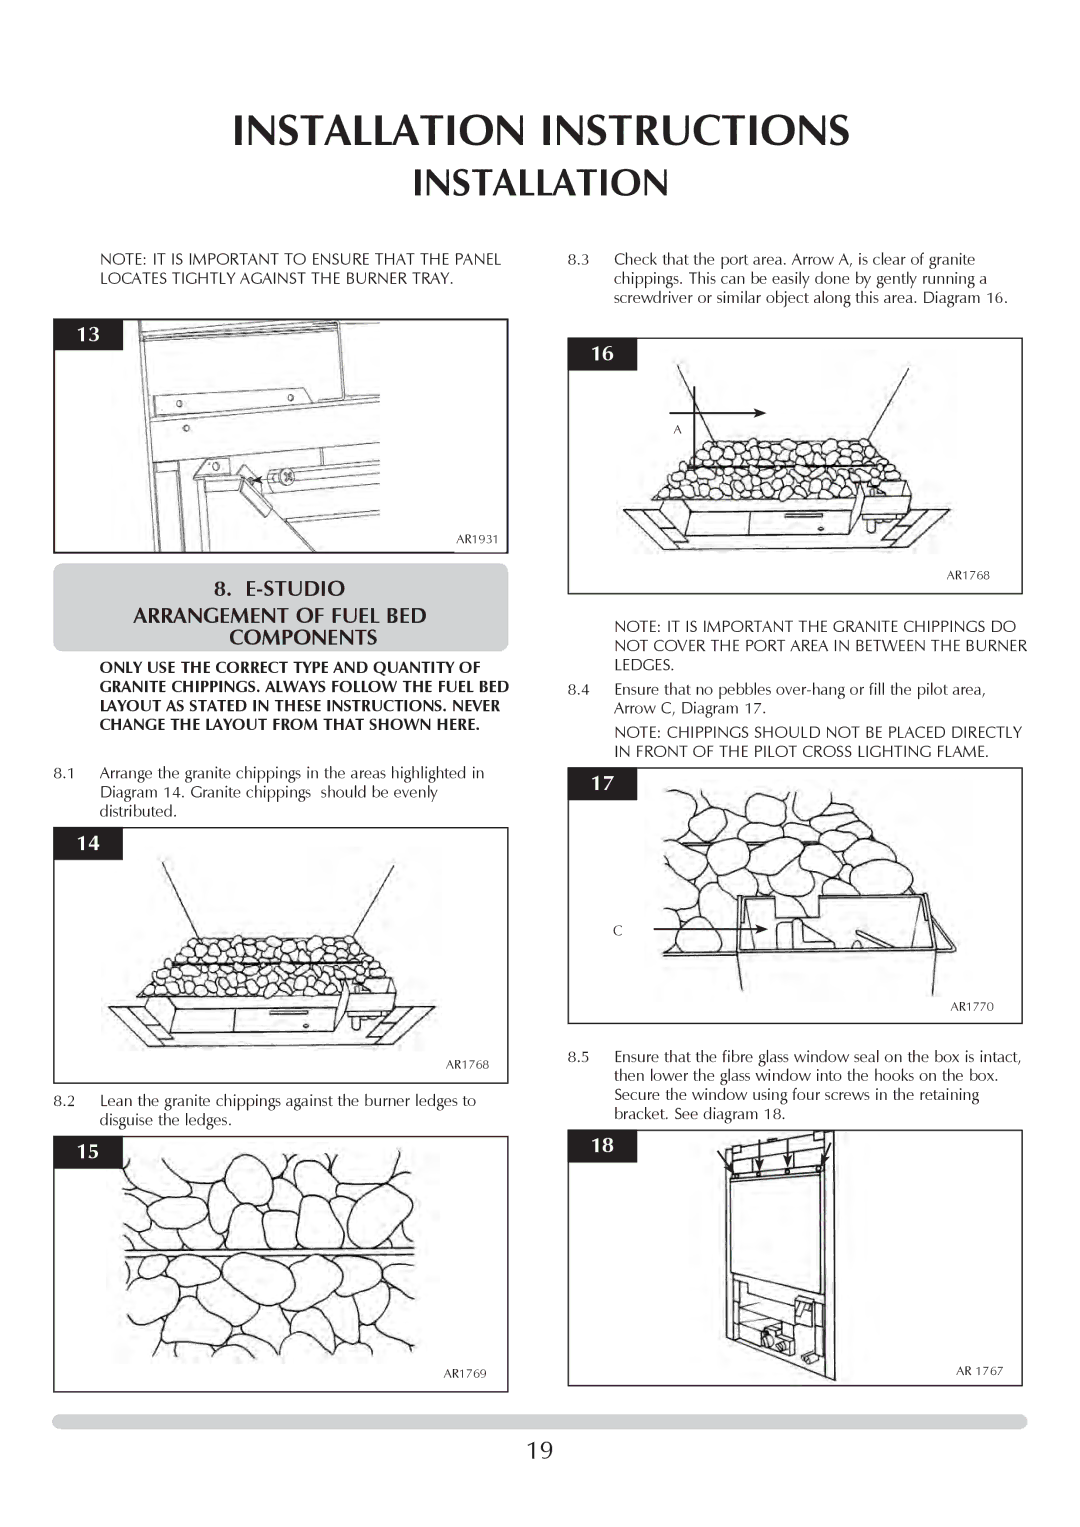
8.3Check that the port area. Arrow A, is clear of granite chippings. This can be easily done by gently running a screwdriver or similar object along this area. Diagram 16.
16 |
A |
AR1768 |
NOTE: IT IS IMPORTANT THE GRANITE CHIPPINGS DO NOT COVER THE PORT AREA IN BETWEEN THE BURNER LEDGES.
8.4Ensure that no pebbles
NOTE: CHIPPINGS SHOULD NOT BE PLACED DIRECTLY IN FRONT OF THE PILOT CROSS LIGHTING FLAME.
17 |
C |
AR1770 |
8.5Ensure that the fibre glass window seal on the box is intact, then lower the glass window into the hooks on the box. Secure the window using four screws in the retaining bracket. See diagram 18.
18 |
AR 1767 |
19