Undercounter Installation | 7 |
subzero.com/specs
Unpack the Unit
Before moving the undercounter unit into position, make sure all opening dimensions, electrical and plumbing requirements are complete and accurate.
IMPORTANT NOTE: The floor under the undercounter unit must be at the same level as the surrounding finished floor to allow for removal of the unit for servicing.
Use an appliance dolly to move the undercounter unit near the installation opening. Position the dolly at the side of the unit to prevent damage to finished surfaces. Remove and discard all packing materials and tape.
IMPORTANT NOTE: Do not discard the kickplate,
For models
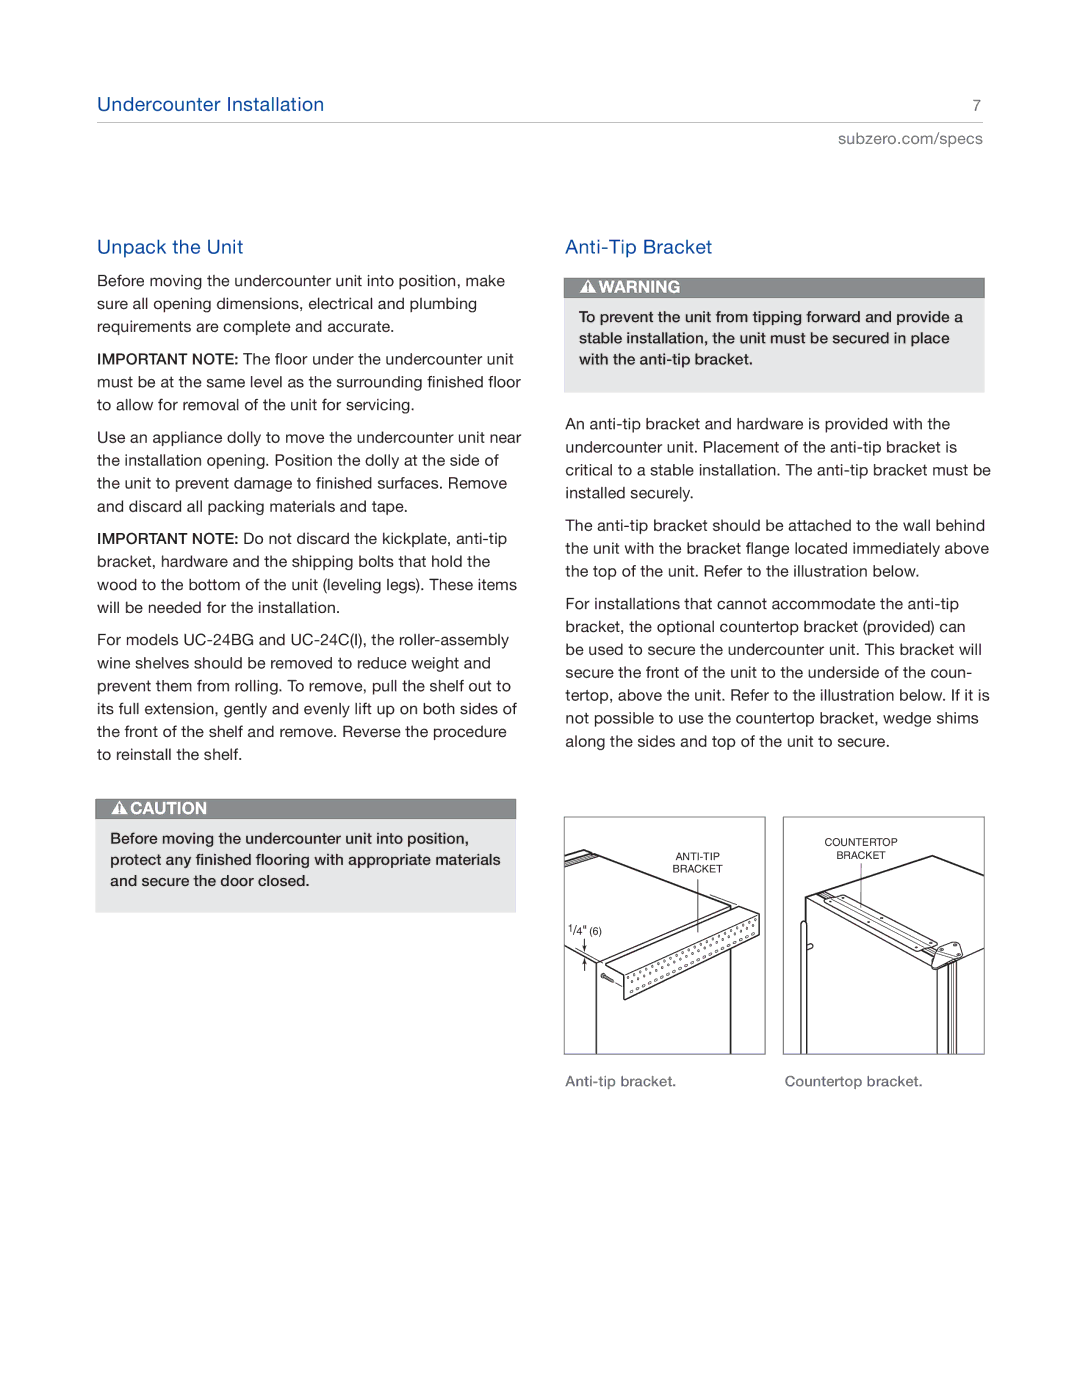
Anti-Tip Bracket
To prevent the unit from tipping forward and provide a stable installation, the unit must be secured in place with the
An
The
For installations that cannot accommodate the
Before moving the undercounter unit into position, protect any finished flooring with appropriate materials and secure the door closed.
BRACKET |
1/4" (6) |
COUNTERTOP |
BRACKET |
Countertop bracket. |