About the Wireless Camera
Your RedAlert may have come with the Wireless Camera. If so, you’ll want to read this section on how to install and use the Camera. Also, see the section on page 11 on how to get the best results from it.
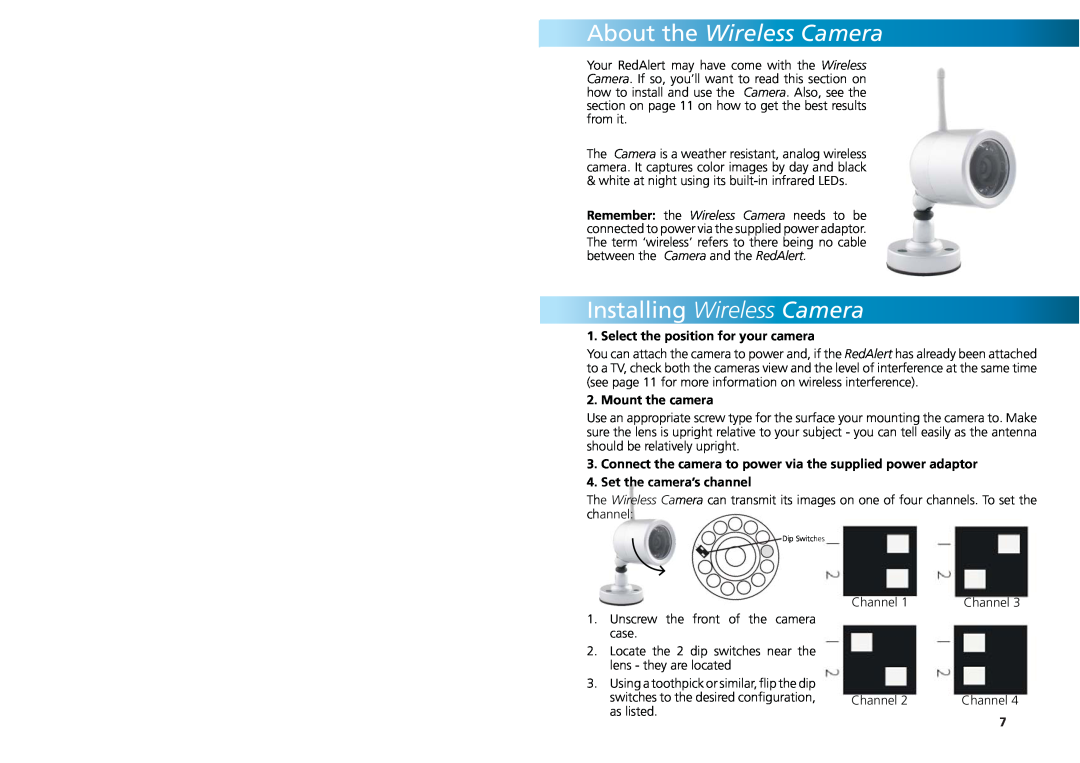
The Camera is a weather resistant, analog wireless camera. It captures color images by day and black & white at night using its
Remember: the Wireless Camera needs to be connected to power via the supplied power adaptor. The term ‘wireless’ refers to there being no cable between the Camera and the RedAlert.
Installing Wireless Camera
1. Select the position for your camera
You can attach the camera to power and, if the RedAlert has already been attached to a TV, check both the cameras view and the level of interference at the same time (see page 11 for more information on wireless interference).
2. Mount the camera
Use an appropriate screw type for the surface your mounting the camera to. Make sure the lens is upright relative to your subject - you can tell easily as the antenna should be relatively upright.
3.Connect the camera to power via the supplied power adaptor
4.Set the camera’s channel
The Wireless Camera can transmit its images on one of four channels. To set the channel:
Dip Switches
1.Unscrew the front of the camera![]() case.
case.
2.Locate the 2 dip switches near the![]() lens - they are located
lens - they are located
3.Using a toothpick or similar, flip the dip![]() switches to the desired configuration,
switches to the desired configuration,![]() as listed.
as listed.
Channel 1 | Channel 3 |
Channel 2 | Channel 4 |
7