NOTE: On the
Side Tone Adjustment (R145)
The side tone adjustment is accessible either internally (refer to Figure 2) or by removing the belt clip mounting screw (callout 5 in Figure 1).
To adjust the level of your own voice heard in the headphones, tap the Talk button once to turn on the headset microphone. Then, use a small flat- blade screwdriver to increase or decrease your voice level while talking into the microphone.
Clear-Com Setup
Make the following switch and jumper changes when the belt pack is used with
BP-2002
1.SW1 must be placed in the UNBAL position.
2.JP4 must have pins 1 and 2 shorted (U position).
3.JP5 jumper must be removed and placed on JP2.
4.JP2 must have pins 1 and 2 shorted (using jumper from JP5).
5.JP1 must have pins 1 and 2 shorted.
BP-1002
1.SW1 must be placed in the UNBAL position.
2.JP4 must have pins 1 and 2 shorted (U position).
3.JP6, JP5 must have pins 2 and 3 shorted at all times.
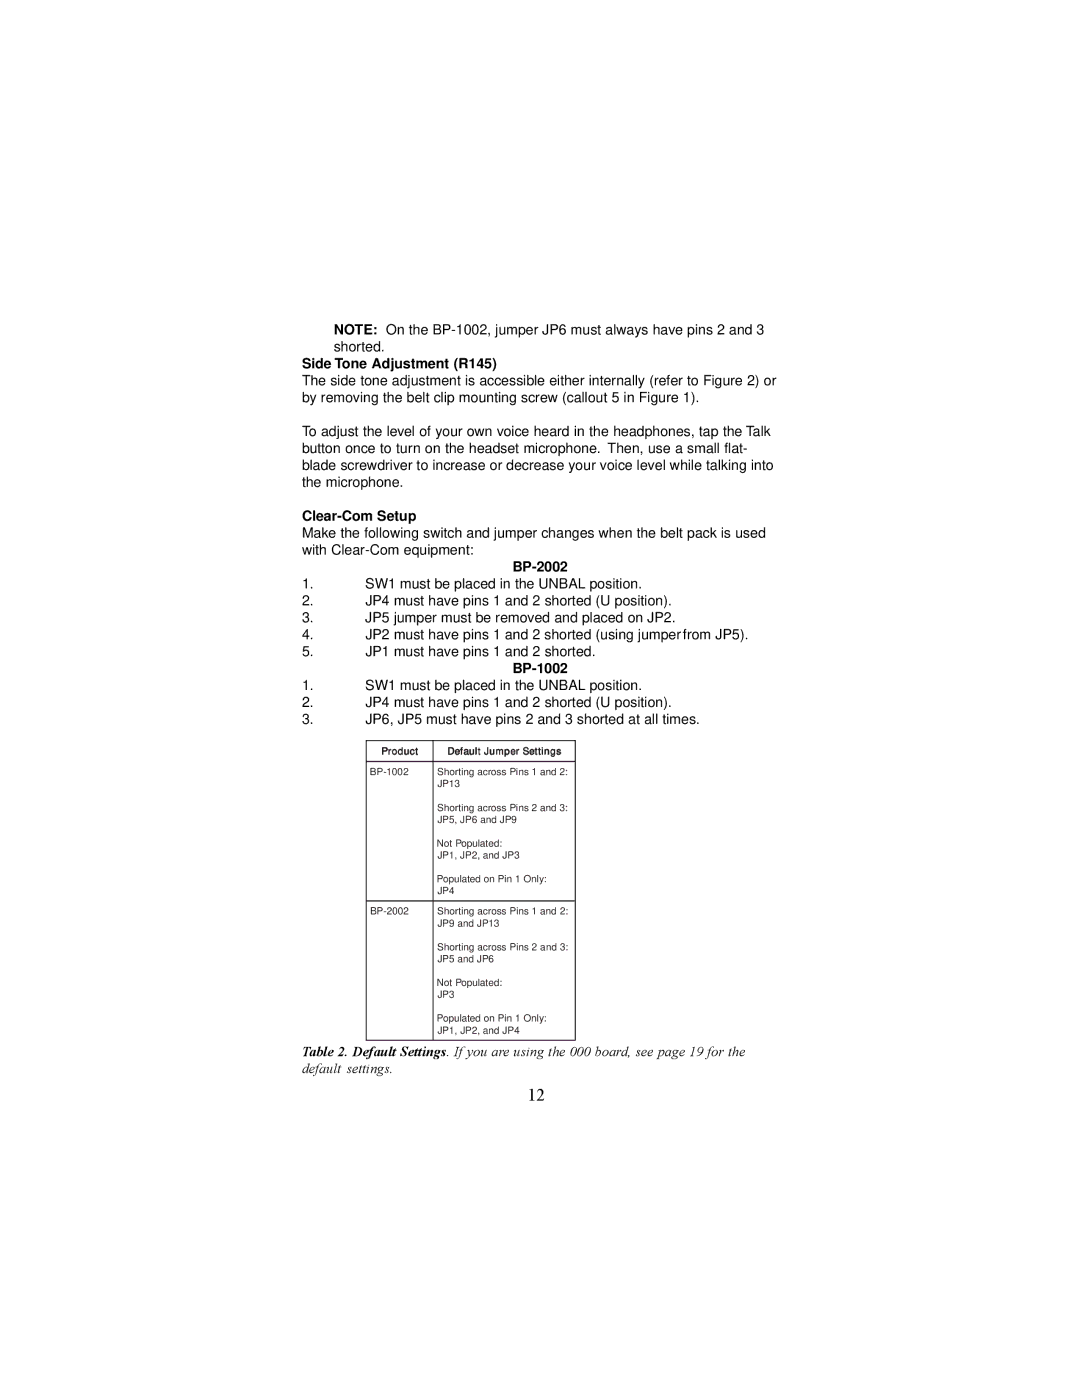
Product | Default Jumper Settings |
|
|
Shorting across Pins 1 and 2: | |
| JP13 |
| Shorting across Pins 2 and 3: |
| JP5, JP6 and JP9 |
| Not Populated: |
| JP1, JP2, and JP3 |
| Populated on Pin 1 Only: |
| JP4 |
|
|
Shorting across Pins 1 and 2: | |
| JP9 and JP13 |
| Shorting across Pins 2 and 3: |
| JP5 and JP6 |
| Not Populated: |
| JP3 |
| Populated on Pin 1 Only: |
| JP1, JP2, and JP4 |
|
|
Table 2. Default Settings. If you are using the 000 board, see page 19 for the default settings.
12