
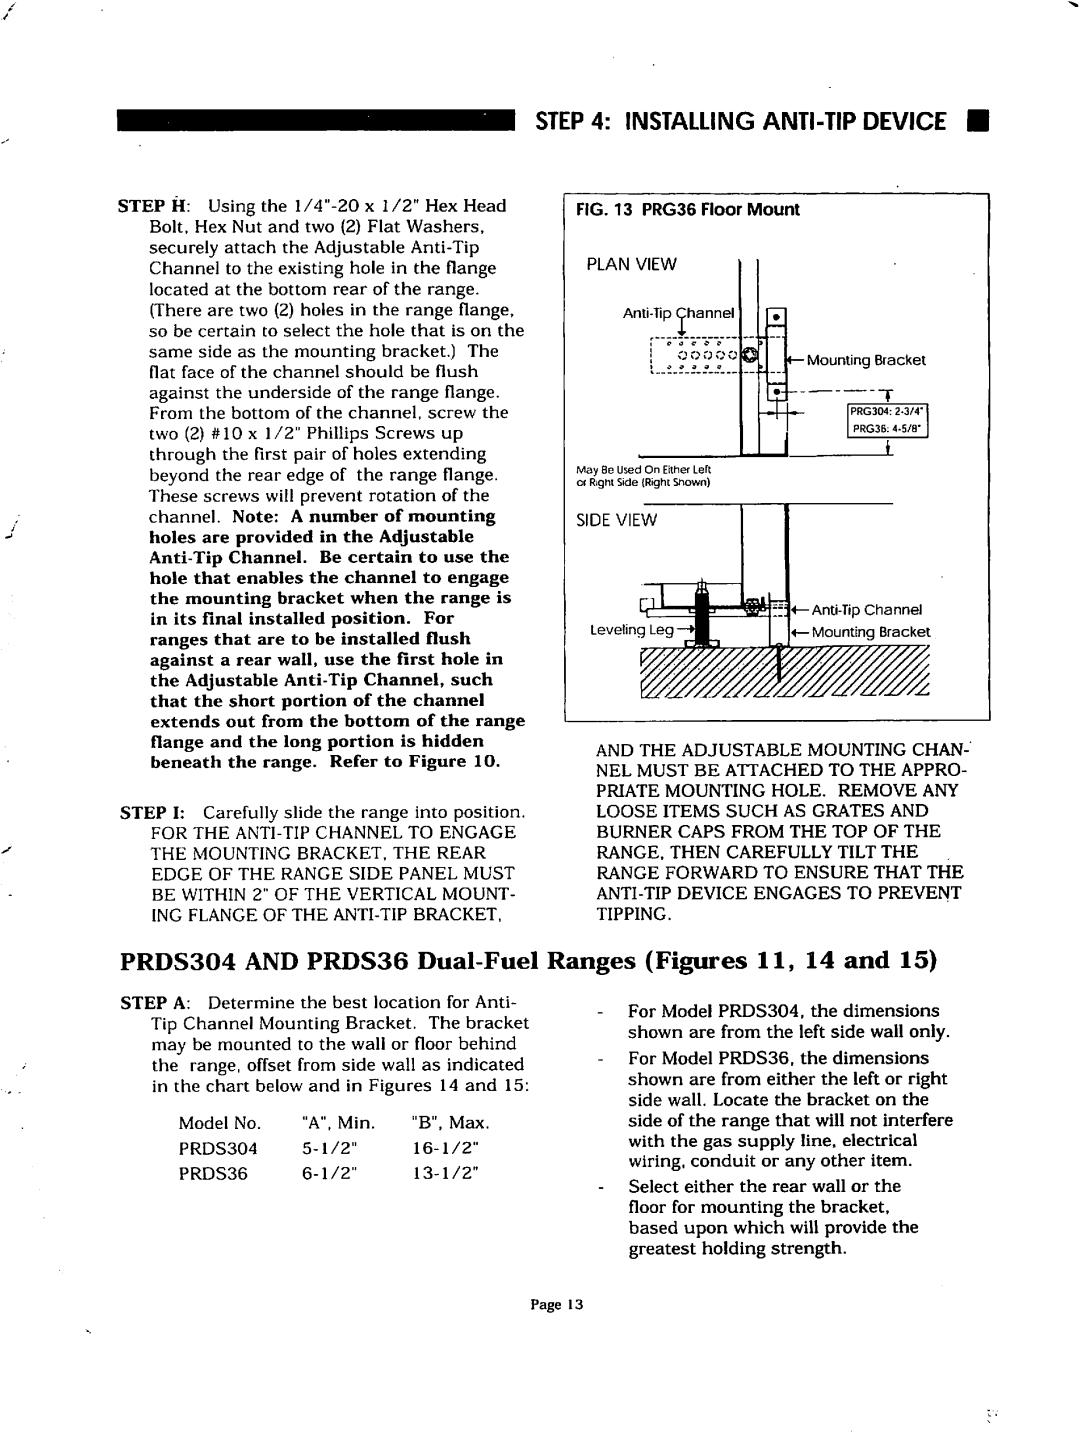
PRDS304, PRDS48, PRG304, PRDS36 specifications
Thermador is a brand synonymous with luxury and high-performance kitchen appliances, particularly in the realm of cooking. Among their impressive lineup, the PRDS36, PRG304, PRDS48, and PRDS304 stand out as premium gas ranges that cater to the needs of both professional chefs and avid home cooks. These models combine advanced technology, precision, and elegance, making them must-have appliances for any modern kitchen.The Thermador PRDS36 is a 36-inch range equipped with a powerful 24,000 BTU burner, ideal for high-heat cooking methods such as boiling and frying. Its patented Star Burners provide superior heat distribution and quicker boil times, ensuring that your culinary creations are cooked to perfection. The oven features a True Convection system, which ensures even baking results by promoting consistent airflow throughout the oven cavity.
Similarly, the PRG304 model also boasts impressive specifications with its 30-inch structure. This range comes with four powerful gas burners and an infrared broiler, offering versatility for various cooking styles. The oven has a large capacity and is equipped with multiple rack positions, accommodating various dish sizes and allowing for seamless meal preparation.
For those needing extra space, the Thermador PRDS48 stands as the ultimate cooking machine. This 48-inch range provides six powerful gas burners, including a 22,000 BTU burner ideal for high-heat cooking. The addition of a built-in griddle enhances the functionality, enabling the preparation of breakfast favorites like pancakes and bacon. Its spacious oven includes a self-cleaning option, making maintenance a breeze.
The PRDS304 offers a balance of size and efficiency. As a 30-inch range, it caters well to those who want a professional-grade appliance in a compact footprint. It is equipped with four high-performance burners and a large oven with an advanced convection system. Notably, the PRDS304 has a signature telescopic rack, allowing for easy access to dishes without the risk of burns or spills.
All models feature Thermador’s unique Ignite feature, which provides an easy-to-use ignition system that ensures hassle-free start-up. Constructed from premium materials, these ranges not only offer durability but are designed to enhance the aesthetics of any kitchen with their sleek lines and modern finishes. The combination of cutting-edge technology and exquisite craftsmanship makes the Thermador PRD series ranges a top choice for discerning cooks seeking uncompromised performance and style.