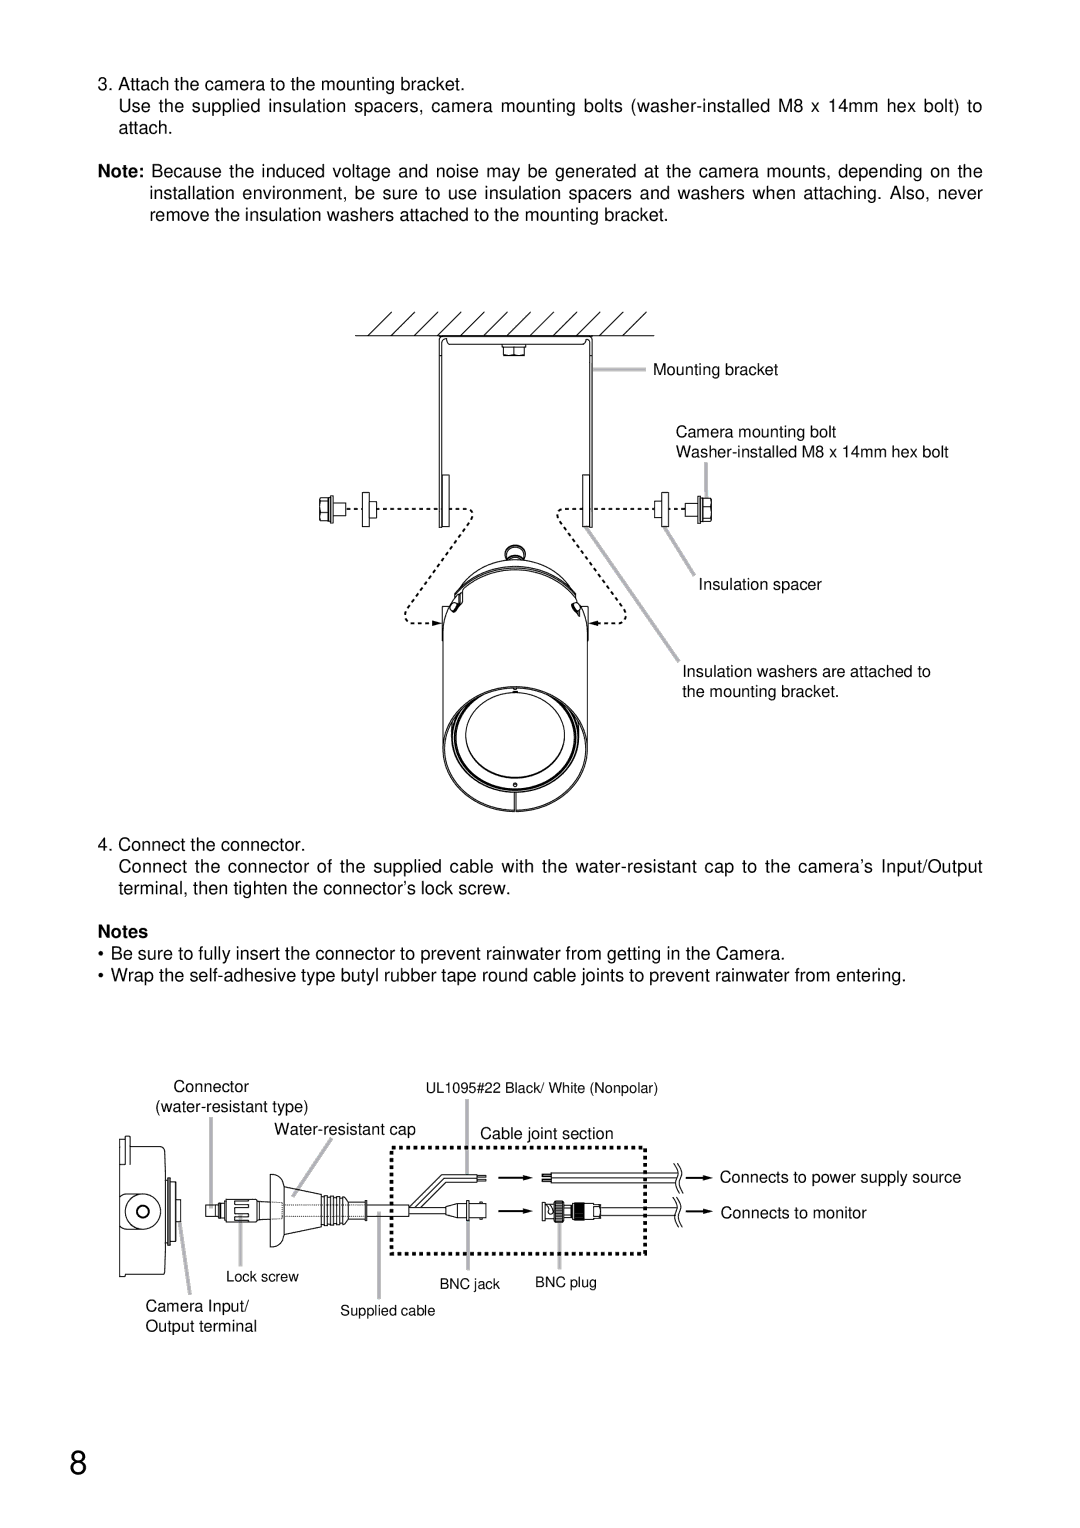
3.Attach the camera to the mounting bracket.
Use the supplied insulation spacers, camera mounting bolts
Note: Because the induced voltage and noise may be generated at the camera mounts, depending on the installation environment, be sure to use insulation spacers and washers when attaching. Also, never remove the insulation washers attached to the mounting bracket.
Mounting bracket
Camera mounting bolt
Insulation spacer
Insulation washers are attached to the mounting bracket.
4.Connect the connector.
Connect the connector of the supplied cable with the
Notes
•Be sure to fully insert the connector to prevent rainwater from getting in the Camera.
•Wrap the
Connector | UL1095#22 Black/ White (Nonpolar) |
| |
Cable joint section |
![]() Connects to power supply source
Connects to power supply source
![]() Connects to monitor
Connects to monitor
Lock screw | BNC jack | BNC plug |
| ||
Camera Input/ | Supplied cable |
|
Output terminal |
|
|
8