Satellite 1400 Series Disassembly Overview, cont.
!
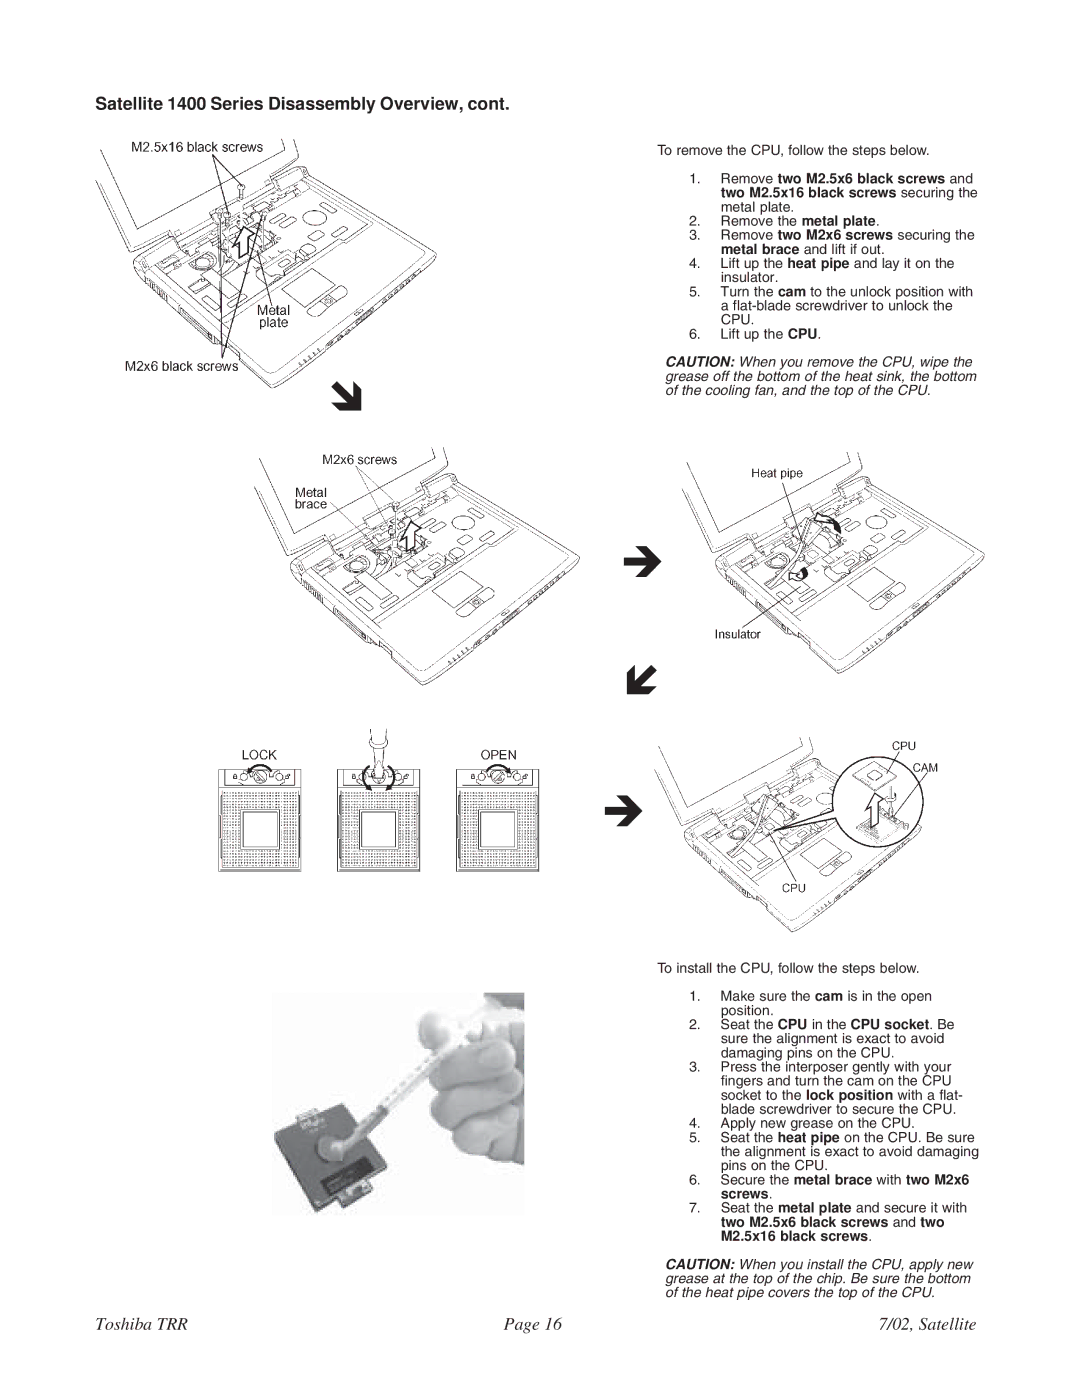
To remove the CPU, follow the steps below.
1.Remove two M2.5x6 black screws and two M2.5x16 black screws securing the metal plate.
2.Remove the metal plate.
3.Remove two M2x6 screws securing the metal brace and lift if out.
4.Lift up the heat pipe and lay it on the insulator.
5.Turn the cam to the unlock position with a
6.Lift up the CPU.
CAUTION: When you remove the CPU, wipe the grease off the bottom of the heat sink, the bottom of the cooling fan, and the top of the CPU.
"
#
"
To install the CPU, follow the steps below.
1.Make sure the cam is in the open position.
2.Seat the CPU in the CPU socket. Be sure the alignment is exact to avoid damaging pins on the CPU.
3.Press the interposer gently with your fingers and turn the cam on the CPU socket to the lock position with a flat- blade screwdriver to secure the CPU.
4.Apply new grease on the CPU.
5.Seat the heat pipe on the CPU. Be sure the alignment is exact to avoid damaging pins on the CPU.
6.Secure the metal brace with two M2x6 screws.
7.Seat the metal plate and secure it with two M2.5x6 black screws and two M2.5x16 black screws.
CAUTION: When you install the CPU, apply new grease at the top of the chip. Be sure the bottom of the heat pipe covers the top of the CPU.
Toshiba TRR | Page 16 | 7/02, Satellite |