Satellite 1400 Series Disassembly Overview, cont.
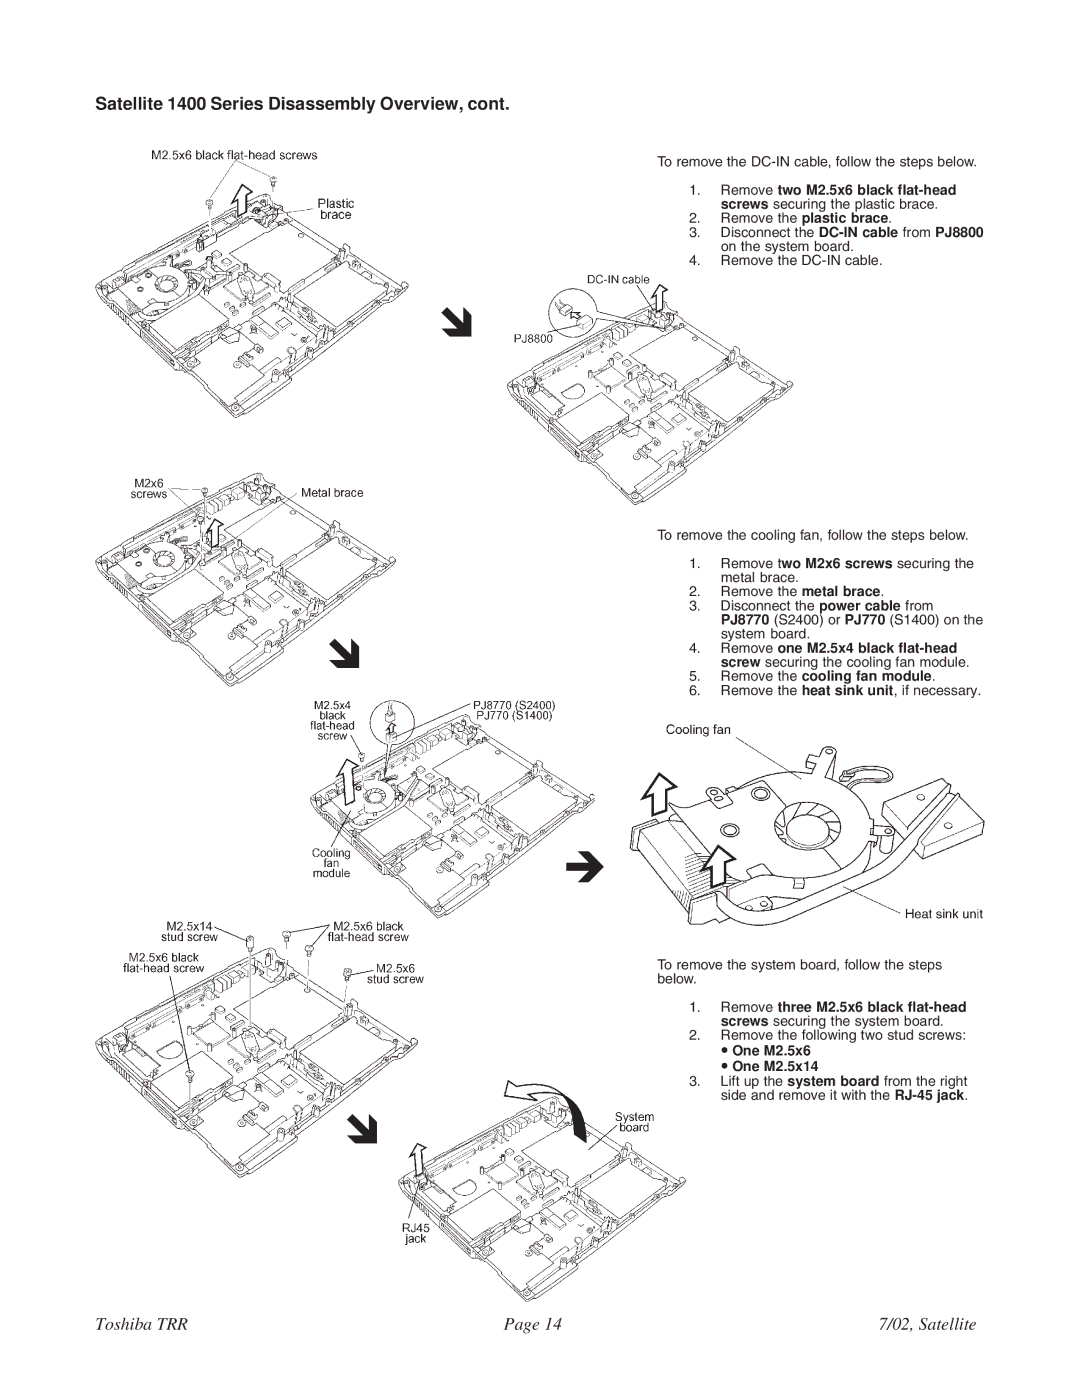
To remove the
1. Remove two M2.5x6 black
2. Remove the plastic brace.
3. Disconnect the
4. Remove the
!
!
To remove the cooling fan, follow the steps below.
1.Remove two M2x6 screws securing the metal brace.
2.Remove the metal brace.
3.Disconnect the power cable from PJ8770 (S2400) or PJ770 (S1400) on the system board.
4.Remove one M2.5x4 black
5.Remove the cooling fan module.
6.Remove the heat sink unit, if necessary.
"
To remove the system board, follow the steps below.
1. Remove three M2.5x6 black
2. Remove the following two stud screws:
• One M2.5x6
• One M2.5x14
3. Lift up the system board from the right side and remove it with the
!
Toshiba TRR | Page 14 | 7/02, Satellite |