R17DTKB
On / Standby
Precautions
Laser Safety
Power Supply
Moisture Condensation Warning
Connection to Power
Installation Location
Avoid the Hazards of Electrical Shock and Fire
Declaration of Conformity
Maintenance
About Copyright
Accessories Supplied
Table of Contents
Editing
Features
Recording
Playback
High-Definition Multimedia Interface
Symbols for Tuner Setting
Compatibility
Others
DVD-RW DVD+RW
Available Gray Not available Cprm compatible disc only
Region Codes
10 EN
Unplayable Discs
Colour Systems
Front Panel
Functional Overview
This unit does not have an RF modulator
Rear Panel
12 EN
Remote Control
14 EN
Installing Batteries in the Remote Control
About the Remote Control
Display Menu
Guide to On-Screen Displays
16 EN
Main Menu
Program Play audio CD/video CD only
Disc Protect VR mode DVD-RW, DVD+RW/+R disc only
Delete All Playlists VR mode DVD-RW disc only
Random Play
Current status of the unit Title / Track and Chapter number
Front Panel Display Guide
Display Messages
18 EN
Commercially available Scart cable
Connecting to a TV
Connections
Hdmi Connection
Connection to a TV with an Hdmi Compatible Port
20 EN
Actual Output Modes by Media
AV3 Front
Connecting to External Equipment
22 EN
Connecting to an MD deck or DAT deck
Digital Audio for Better Sound Quality
After You Have Completed Connections
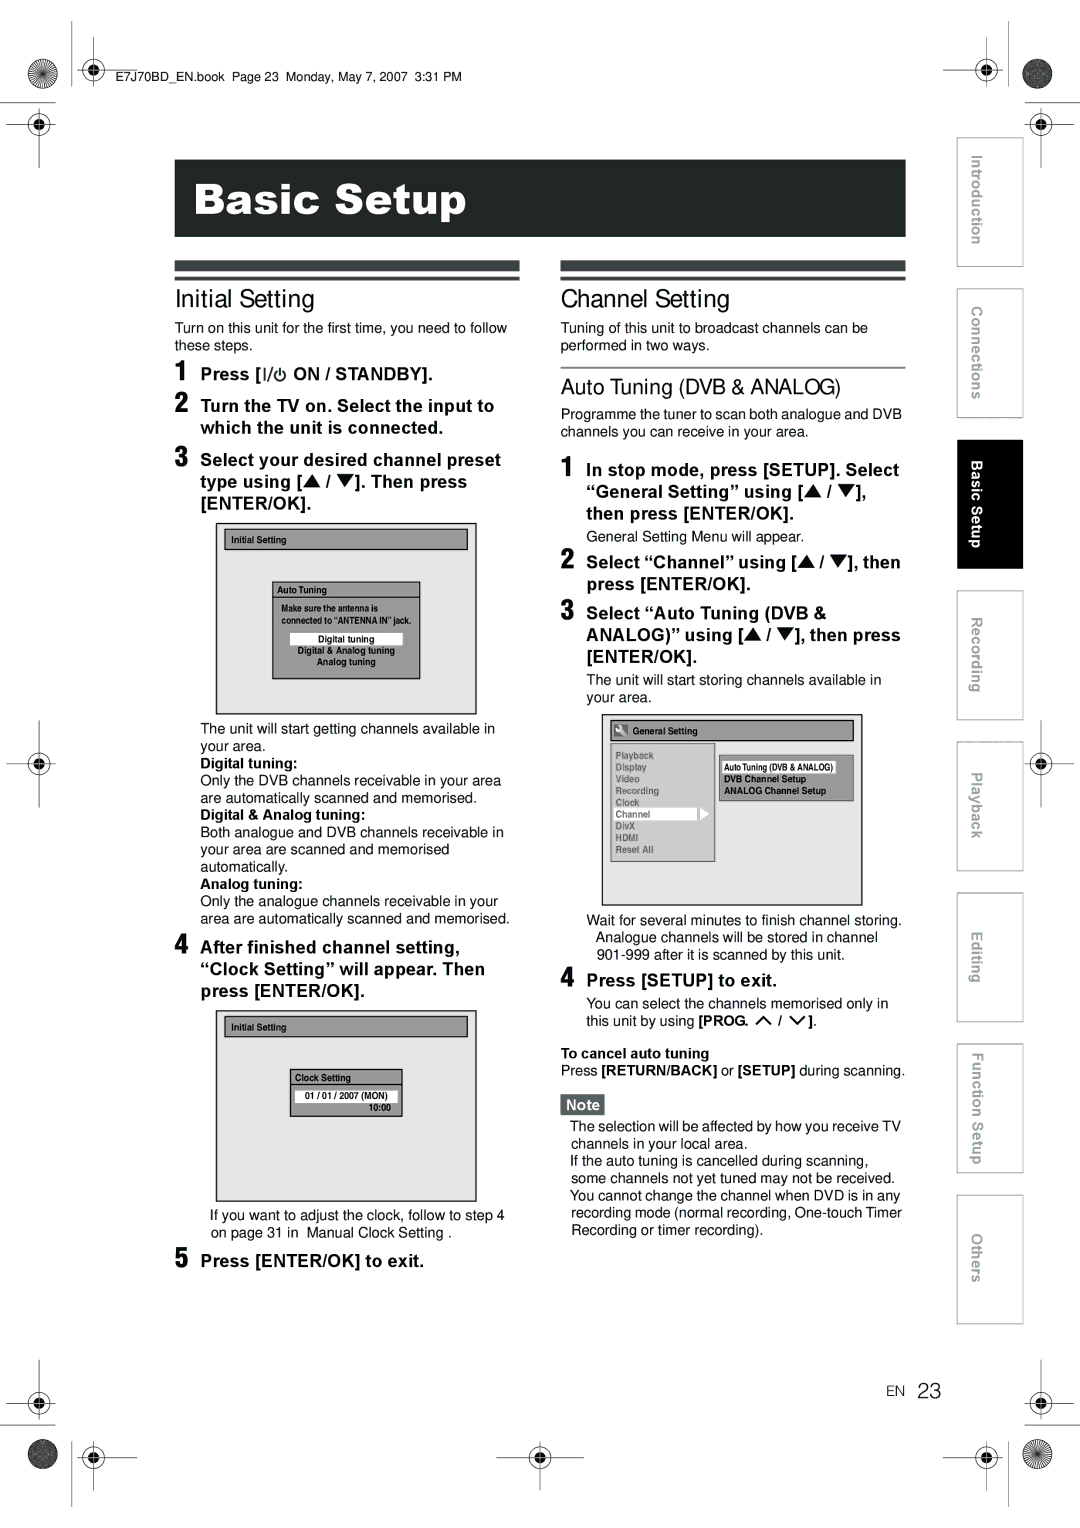
Auto Tuning DVB & Analog
Initial Setting
Channel Setting
24 EN
Auto Tuning Analog
Manual Tuning Analog
Move
To Skip a Preset Channel
Auto Tuning DVB
After completion, press Setup to exit
26 EN
Manual Tuning DVB
To Select a Channel
Edit Channels
Changing the Channel Order of the Favourite List
Signal Information
Press Setup or RETURN/BACK to exit
TV Title List
Digital Teletext Reception
Selecting the Audio Mode
TV View Operation
Selecting the TV Aspect Ratio
Subtitle
DVB Menu Setting
Pincode Setting for Adult Lock
EPG Electronic Programme Guide
30 EN
Service Preference Setting
About
Enter the date day / month / year using U / D
Setting the Clock
Auto Clock Setting
Manual Clock Setting
Restrictions on Recording
Recording Mode
Information on DVD Recording
Type of Discs
Choosing the Recording Format of a Blank DVD-RW Disc
Formatting a Disc
Making Discs Playable in Other DVD Players Finalise
34 EN
Setting Aspect Ratio for Video Mode Recording
Setting Auto Chapter
Make Recording Compatible
Reformatting a Disc Manually
Select Yes using U / D, then press ENTER/OK
VR mode DVD-RW
Recording Audio Select XP
Selecting the Sound Mode
Setting External Input Audio
Setting Bilingual Recording Audio
Basic Recording
Turn on the unit and insert a recordable disc
One-Touch Timer Recording OTR
38 EN
Timer Recording
40 EN
To Stop the Timer Recording in Progress
If the Timer Programming Did Not Complete Correctly
PDC Programme Delivery Control
Hints for the Timer Recording
42 EN
Timer Recording EPG
Satellite Link
Press on / Standby to turn on the unit
To Standby Mode is highlighted
Recording from External Equipment
Settings for External Equipment
Select a recording mode using REC Mode
Connection to External Equipment
Finalising Discs
Setting a Disc to Protect
To cancel the disc protect
To cancel finalising DVD-RW disc only
Finalising is complete
Auto Finalise
46 EN
Playing Back a DVD-V / Video CD without PBC Function
Basic Playback
Hint for DVD Playback
Playing Back a DVD-RW / DVD-R / DVD+RW / DVD+R Disc
48 EN
Playing Back an Audio CD, MP3 or
Playing Back a DivX
Certified product
DivX Subtitle
Hint for the purchased or rental official DivX
Your registration code will appear
50 EN
DivX VOD
Playing Back a Disc Using the Title Menu
Playing Back Discs Using the Disc Menu
52 EN
Playing Back a Video CD Using the Title Menu
Cancelling and Recalling the PBC Function
PBC Function for Video CDs
Special Playback
54 EN
Step by Step Playback
Slow Forward Slow Reverse Playback
Zoom
To stop the playback, press Stop C once
Marker Setup
Chasing Playback during Recording
Press Play B during recording
56 EN
Simultaneous Playback Recording
Track Search
Using the Display button
Search
Title / Chapter Search
Repeat Playback
During playback, press Display Select the icon using L / P
Repeat / Random / Programme Playback / Slide Show
Time Search
Slide Show
Select Random Play using U / D, then press ENTER/OK
Random Playback
Programme Playback
Selecting the Format of Audio and Video
Switching Subtitles
Switching Audio Soundtrack
Switching Virtual Surround System
Reducing Block Noise
Switching Camera Angles
Select the desired option using U / D, then press ENTER/OK
Angle will switch each time you press ENTER/OK
62 EN
Disc Editing
Editing Discs
Guide to a Title List
Editing Title Name
Deleting Titles
Press RETURN/BACK and then RETURN/BACK or Stop S to exit
Setting or Clearing Chapter Markers
Guide to Editing Title Names
64 EN
Hiding Chapters
66 EN
Protecting Titles
Dividing a Title
Combining Titles
All Playlists can be deleted if it is no longer needed
Adding Titles to a Playlist
Deleting All Playlists
Title is added to Playlist
Part of the title is deleted
Select Delete using U / D, then press ENTER/OK
Deleting Parts of Titles
68 EN
Function Setup
70 EN
Items highlight is the default Contents
Playback
Parental Lock Default All
Select a desired item using U / D, then press ENTER/OK
Enter the current password using the Number buttons
72 EN
Disc Menu Language Default English
Audio Language Default Original
Select a setting using U / D, then press ENTER/OK
TV System Default PAL
Subtitle Language Default OFF
Angle Icon Default on
Still Mode Default Auto
74 EN
Display
Video
DivX
DivX Subtitle Default OFF
Set to OFF when the Hdmi sound is not outputted
Format Default RGB
Hdmi Audio Default on
RGB Range Default Normal
Reset All
DVD
Troubleshooting
78 EN
Open / Close O
Hdmi
80 EN
Error message Cause Solution
82 EN
Language Code
MP3
Glossary
Cprm
DTS
84 EN
Specifications
E7J70BDEN.book Page 85 Monday, May 7, 2007 331 PM
86 EN
E7J70BDEN.book Page 87 Monday, May 7, 2007 331 PM
1VMN23632A / E7J70BD

