2 INSTALLATION
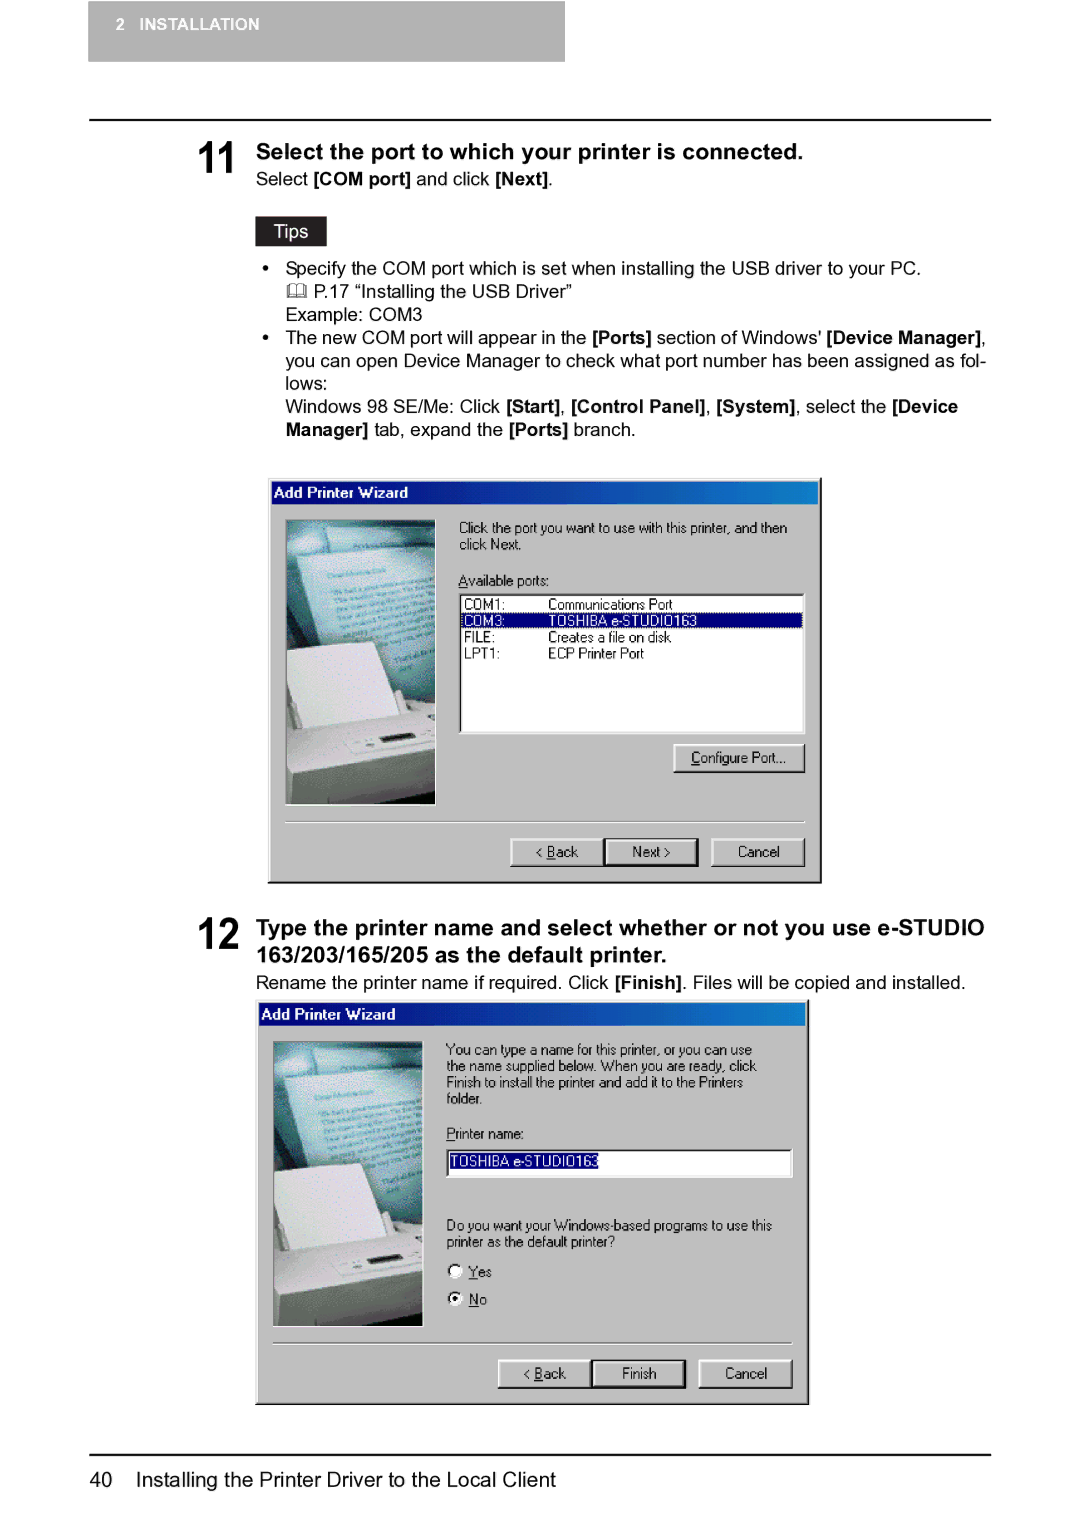
11 Select the port to which your printer is connected. Select [COM port] and click [Next].
ySpecify the COM port which is set when installing the USB driver to your PC.
P.17 “Installing the USB Driver”
Example: COM3
yThe new COM port will appear in the [Ports] section of Windows' [Device Manager], you can open Device Manager to check what port number has been assigned as fol- lows:
Windows 98 SE/Me: Click [Start], [Control Panel], [System], select the [Device Manager] tab, expand the [Ports] branch.
12 Type the printer name and select whether or not you use
Rename the printer name if required. Click [Finish]. Files will be copied and installed.
