INTRODUCTION
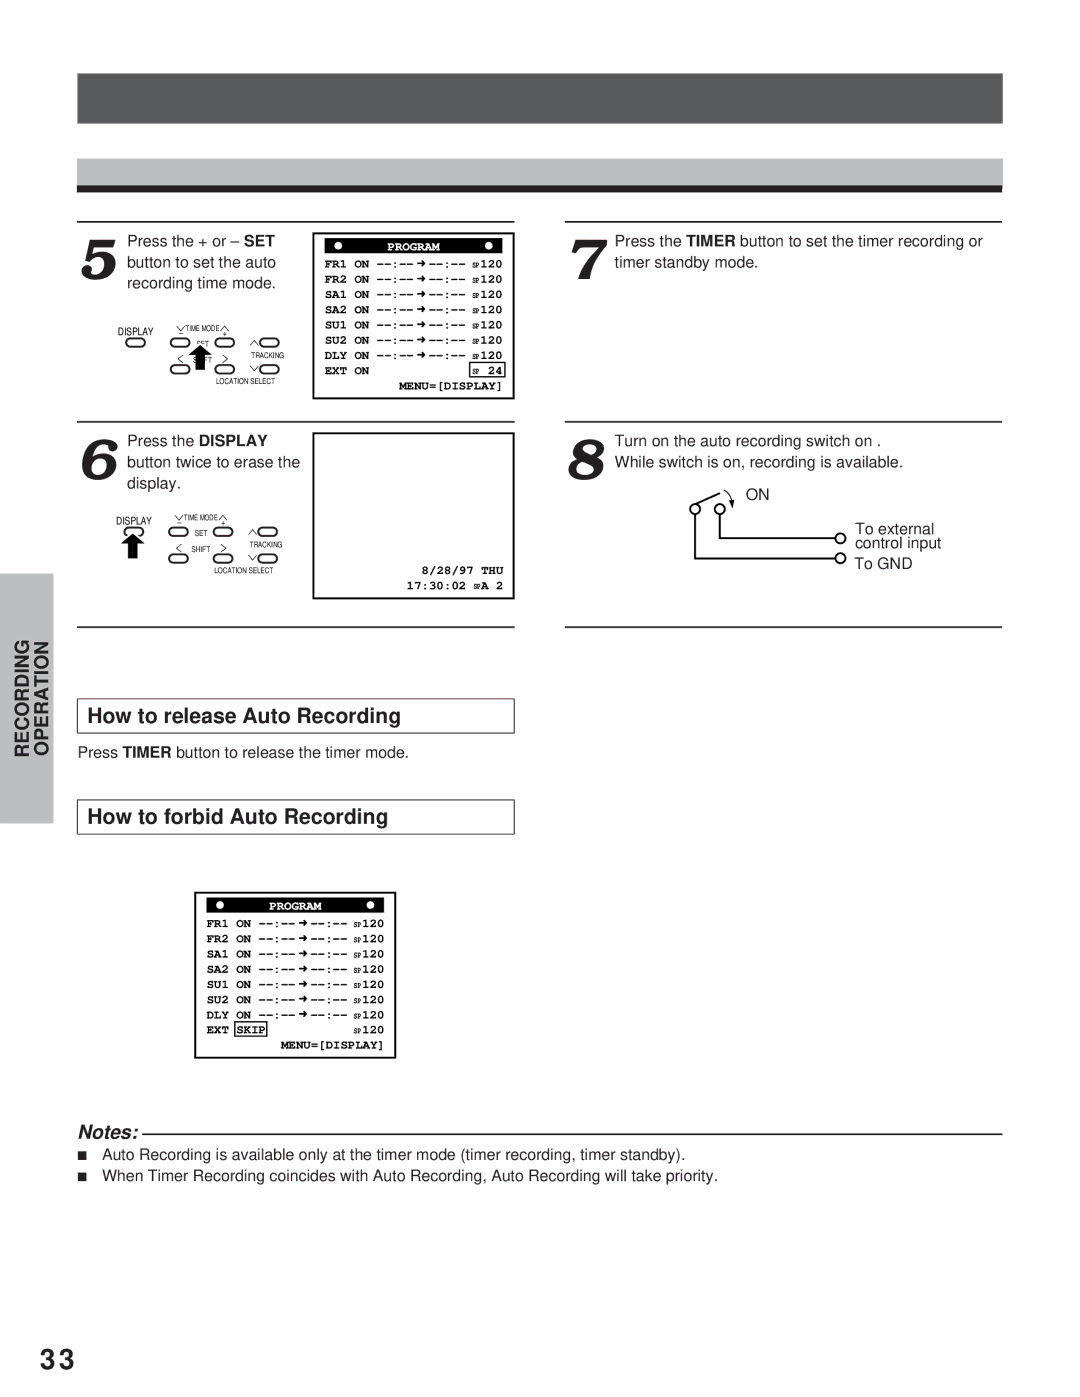
Press the + or – SET
5 button to set the auto recording time mode.
DISPLAY – TIME MODE +
SET |
|
SHIFT | TRACKING |
| |
| LOCATION SELECT |
![]() PROGRAM
PROGRAM ![]() FR1 ON
FR1 ON
EXT ON |
| SP 24 |
| MENU=[DISPLAY] | |
Press the TIMER button to set the timer recording or
7 timer standby mode.
PREPARATION
Press the DISPLAY
6 buttondisplay.twice to erase the
DISPLAY – TIME MODE +
SET
SHIFT | TRACKING |
| |
| LOCATION SELECT |
8/28/97 THU 17:30:02 SPA 2
Turn on the auto recording switch on .
8 While switch is on, recording is available.
ON
To external control input
![]() To GND
To GND
RECORDING | OPERATION |
PLAYBACK | OPERATION |
|
|
NOTICE
How to release Auto Recording
Press TIMER button to release the timer mode.
How to forbid Auto Recording
PROGRAM
FR1 ON
FR2 ON
SA1 ON
SA2 ON
SU1 ON
SU2 ON
DLY ON
EXT | SKIP | SP120 |
|
| MENU=[DISPLAY] |
Notes:
iAuto Recording is available only at the timer mode (timer recording, timer standby).
iWhen Timer Recording coincides with Auto Recording, Auto Recording will take priority.
33
