Remote Repeater Installation
Note:
1.Test to make sure that the entire installation works properly before pulling cables through ceilings/walls.
2.24AWG, Solid Wire Cat5e/6 cable, such as Tripp Lite’s
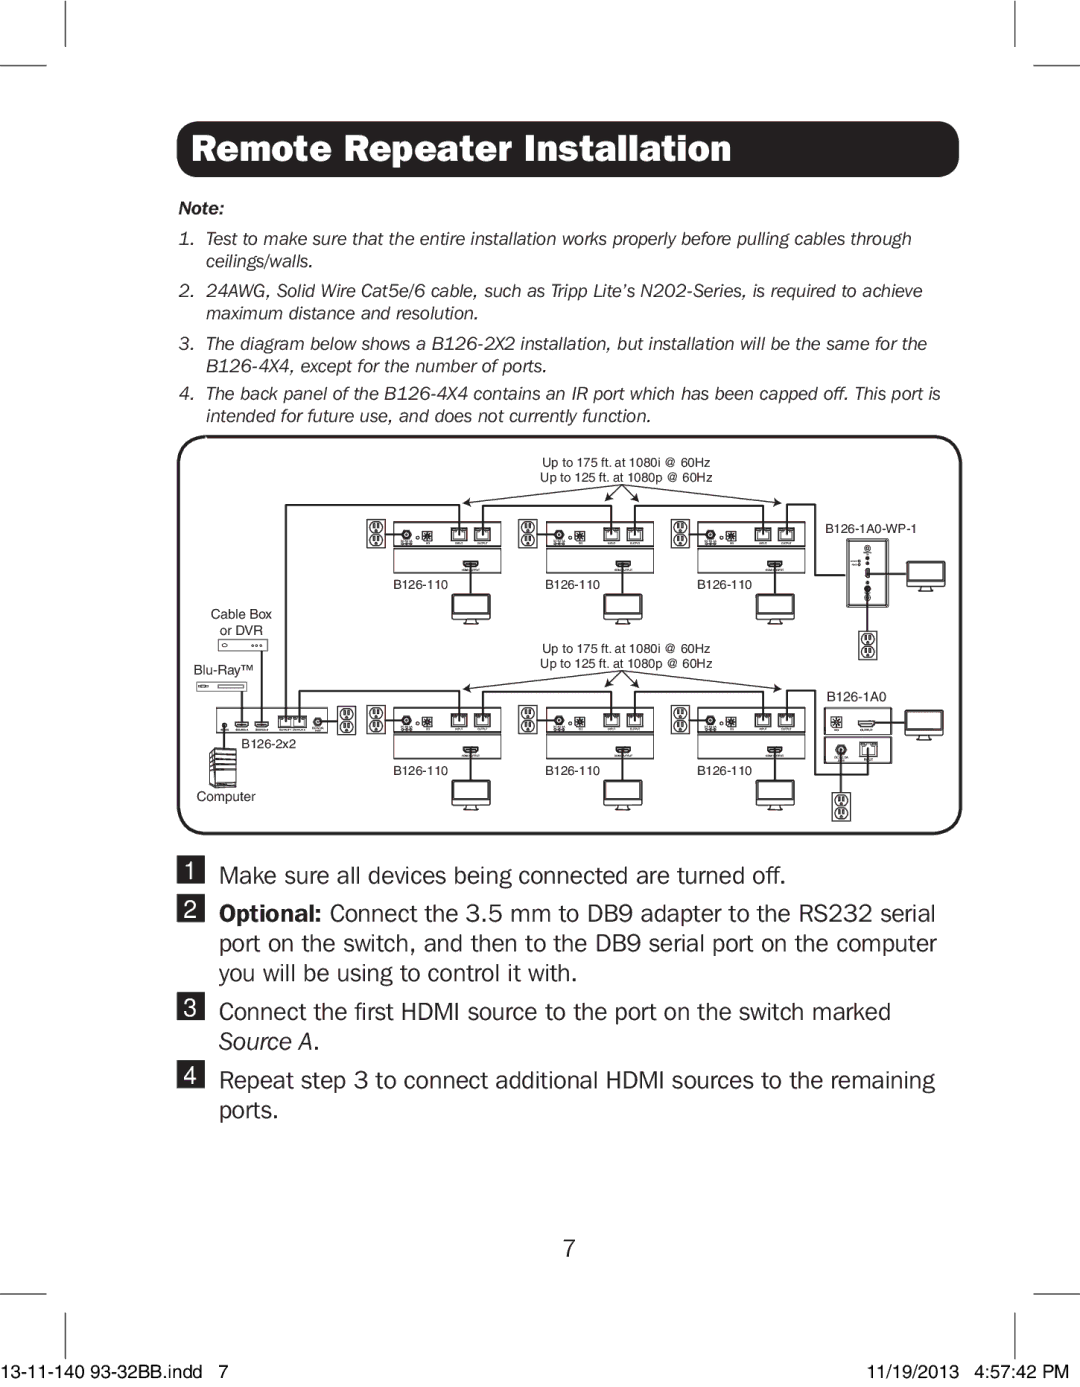
3.The diagram below shows a
4.The back panel of the
Up to 175 ft. at 1080i @ 60Hz
Up to 125 ft. at 1080p @ 60Hz
Cable Box
or DVR
Computer
| |
Up to 175 ft. at 1080i @ 60Hz
Up to 125 ft. at 1080p @ 60Hz
| |
1Make sure all devices being connected are turned off.
2Optional: Connect the 3.5 mm to DB9 adapter to the RS232 serial port on the switch, and then to the DB9 serial port on the computer you will be using to control it with.
3Connect the first HDMI source to the port on the switch marked
Source A.
4Repeat step 3 to connect additional HDMI sources to the remaining ports.
7
11/19/2013 4:57:42 PM |
