Quick Installation
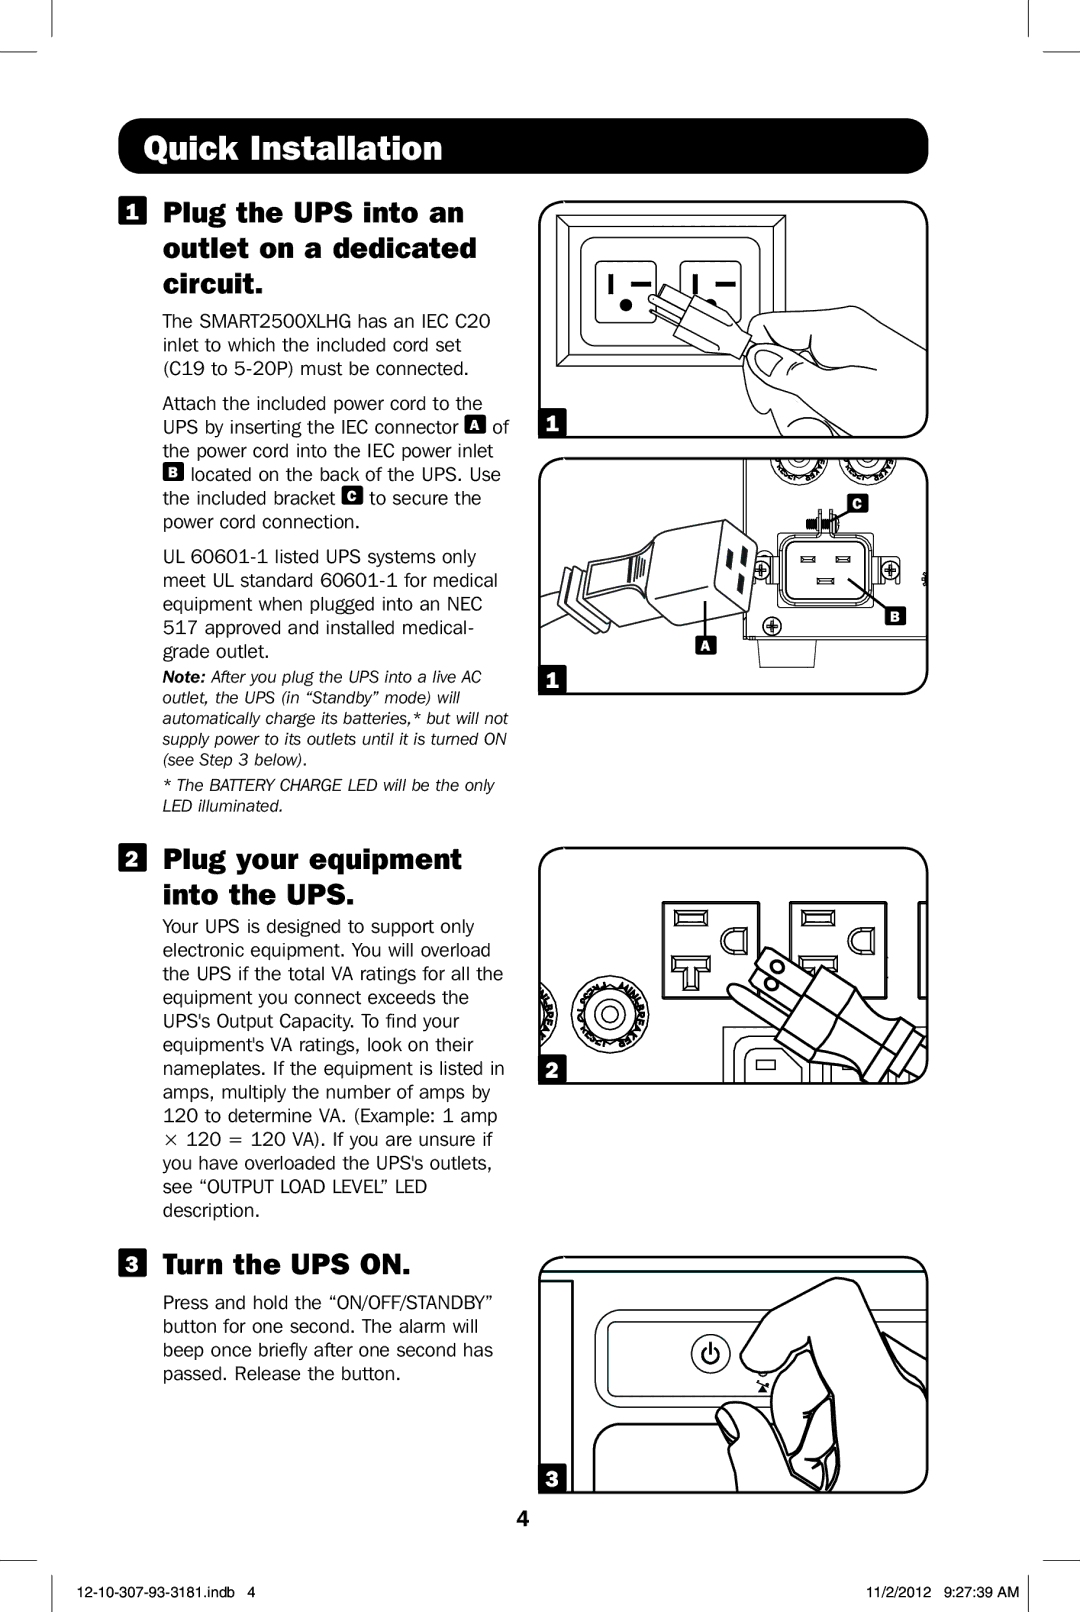
1 Plug the UPS into an outlet on a dedicated circuit.
The SMART2500XLHG has an IEC C20 inlet to which the included cord set
(C19 to
Attach the included power cord to the
UPS by inserting the IEC connector A of 1 the power cord into the IEC power inlet
Blocated on the back of the UPS. Use the included bracket C to secure the power cord connection.
UL
Note: After you plug the UPS into a live AC | 1 |
outlet, the UPS (in “Standby” mode) will |
|
automatically charge its batteries,* but will not supply power to its outlets until it is turned ON (see Step 3 below).
*The BATTERY CHARGE LED will be the only LED illuminated.
2Plug your equipment
into the UPS.
Your UPS is designed to support only |
|
electronic equipment. You will overload |
|
the UPS if the total VA ratings for all the |
|
equipment you connect exceeds the |
|
UPS's Output Capacity. To find your |
|
equipment's VA ratings, look on their |
|
nameplates. If the equipment is listed in | 2 |
amps, multiply the number of amps by |
|
120 to determine VA. (Example: 1 amp
×120 = 120 VA). If you are unsure if you have overloaded the UPS's outlets, see “OUTPUT LOAD LEVEL” LED description.
3Turn the UPS ON.
Press and hold the “ON/OFF/STANDBY” button for one second. The alarm will beep once briefly after one second has passed. Release the button.
3
4
A
C
B
11/2/2012 9:27:39 AM |