C. Connect the base unit |
| |
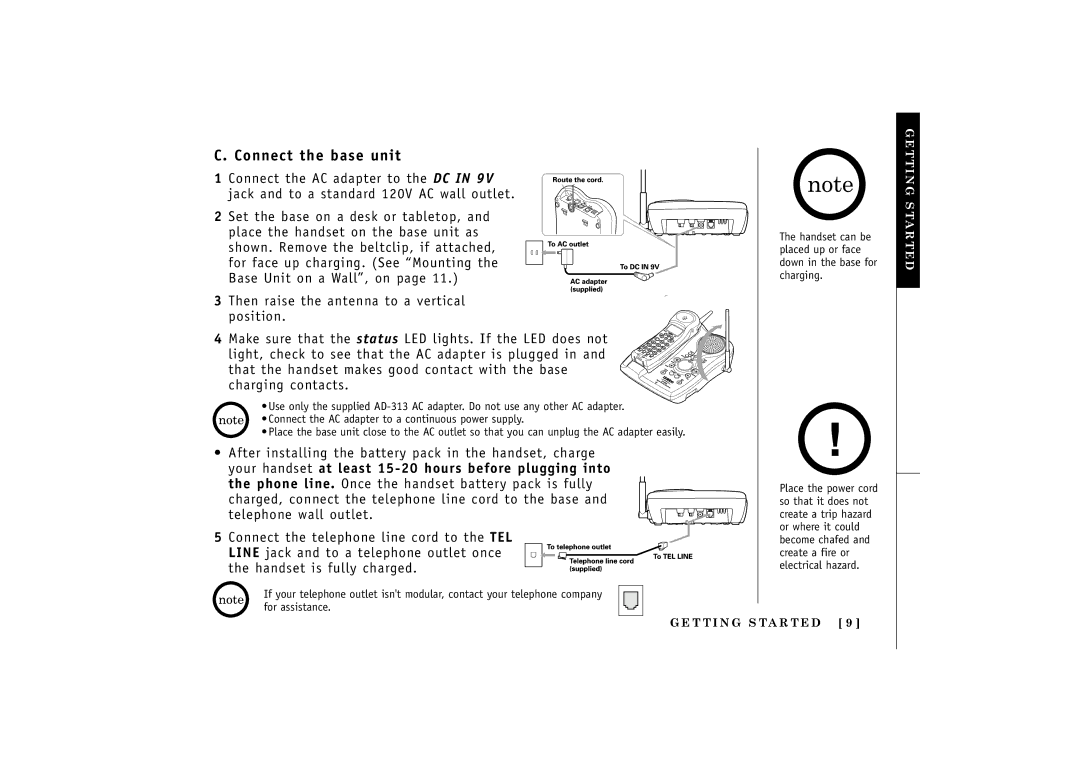
1 | Connect the AC adapter to the DC IN 9V |
|
| jack and to a standard 120V AC wall outlet. |
|
2 | Set the base on a desk or tabletop, and |
|
| place the handset on the base unit as | The handset can be |
| shown. Remove the beltclip, if attached, | placed up or face |
| for face up charging. (See “Mounting the | down in the base for |
| Base Unit on a Wall”, on page 11.) | charging. |
3 Then raise the antenna to a vertical position.
4 Make sure that the status LED lights. If the LED does not light, check to see that the AC adapter is plugged in and that the handset makes good contact with the base charging contacts.
• Use only the supplied
• Connect the AC adapter to a continuous power supply.
•Place the base unit close to the AC outlet so that you can unplug the AC adapter easily.
•After installing the battery pack in the handset, charge your handset at least
the phone line. Once the handset battery pack is fully | Place the power cord |
charged, connect the telephone line cord to the base and | so that it does not |
telephone wall outlet. | create a trip hazard |
5 Connect the telephone line cord to the TEL | or where it could |
become chafed and | |
LINE jack and to a telephone outlet once | create a fire or |
the handset is fully charged. | electrical hazard. |
If your telephone outlet isn't modular, contact your telephone company |
|
for assistance. |
|
| G E T T I N G S TA R T E D [ 9 ] |
GETTING STARTED
