VBrick Systems VBrick v4.2.1 manual Configure the ETV Portal Server, Verify the Installation

Models: VBrick v4.2.1

1 38
Download 38 pages 41.82 Kb
Page 15
Image 15

Getting Started

Step 5. Configure the ETV Portal Server

The VOD-WM server must be configured in VBrick's ETV Portal Server before it is recognized as part of the ETV system.

TTo configure the VOD-WM server in ETV Portal Server:

1.Launch ETV Portal Server and login as an administrator.

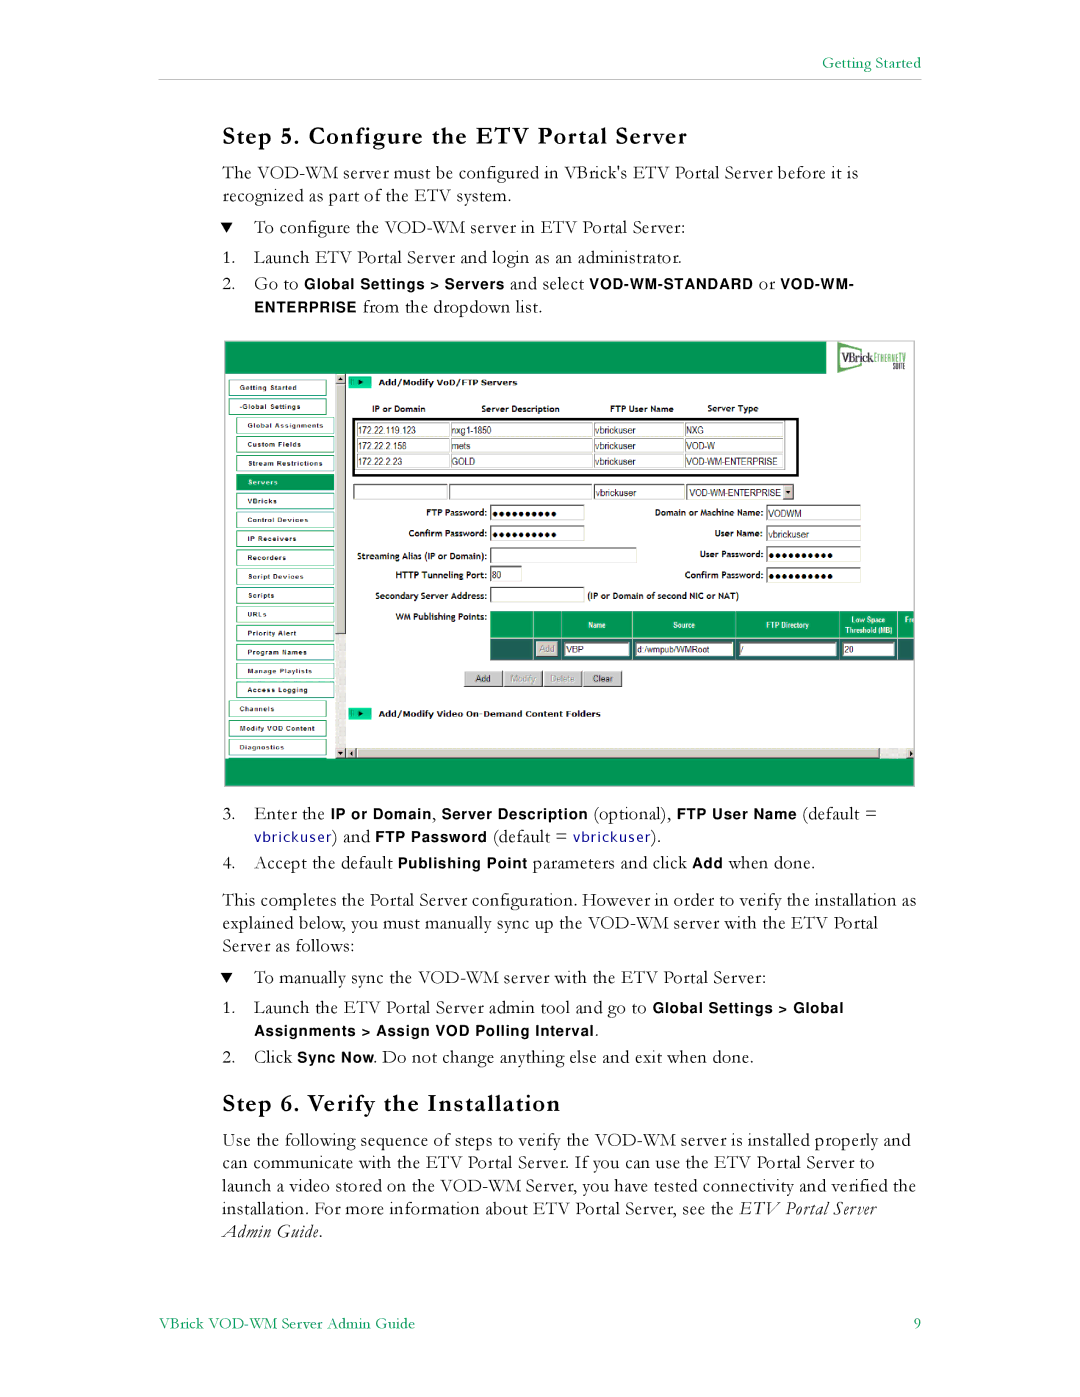
2.Go to Global Settings > Servers and select VOD-WM-STANDARD or VOD-WM-

ENTERPRISE from the dropdown list.

3.Enter the IP or Domain, Server Description (optional), FTP User Name (default = vbrickuser) and FTP Password (default = vbrickuser).

4.Accept the default Publishing Point parameters and click Add when done.

This completes the Portal Server configuration. However in order to verify the installation as explained below, you must manually sync up the VOD-WM server with the ETV Portal Server as follows:

TTo manually sync the VOD-WM server with the ETV Portal Server:

1.Launch the ETV Portal Server admin tool and go to Global Settings > Global

Assignments > Assign VOD Polling Interval.

2.Click Sync Now. Do not change anything else and exit when done.

Step 6. Verify the Installation

Use the following sequence of steps to verify the VOD-WM server is installed properly and can communicate with the ETV Portal Server. If you can use the ETV Portal Server to launch a video stored on the VOD-WM Server, you have tested connectivity and verified the installation. For more information about ETV Portal Server, see the ETV Portal Server Admin Guide.

VBrick VOD-WM Server Admin Guide

9

Page 15
Image 15
VBrick Systems VBrick v4.2.1 manual Configure the ETV Portal Server, Verify the Installation