Operation
ROTISSERIE SETUP (if equipped)
The Rotisserie burner is intended to be used for rotisserie cooking only.
WARNING: Never use the main burners while using the Rotisserie burner, as that could result in igniting the drippings, or overheating your Grill.
The Rotisserie assembly includes a |
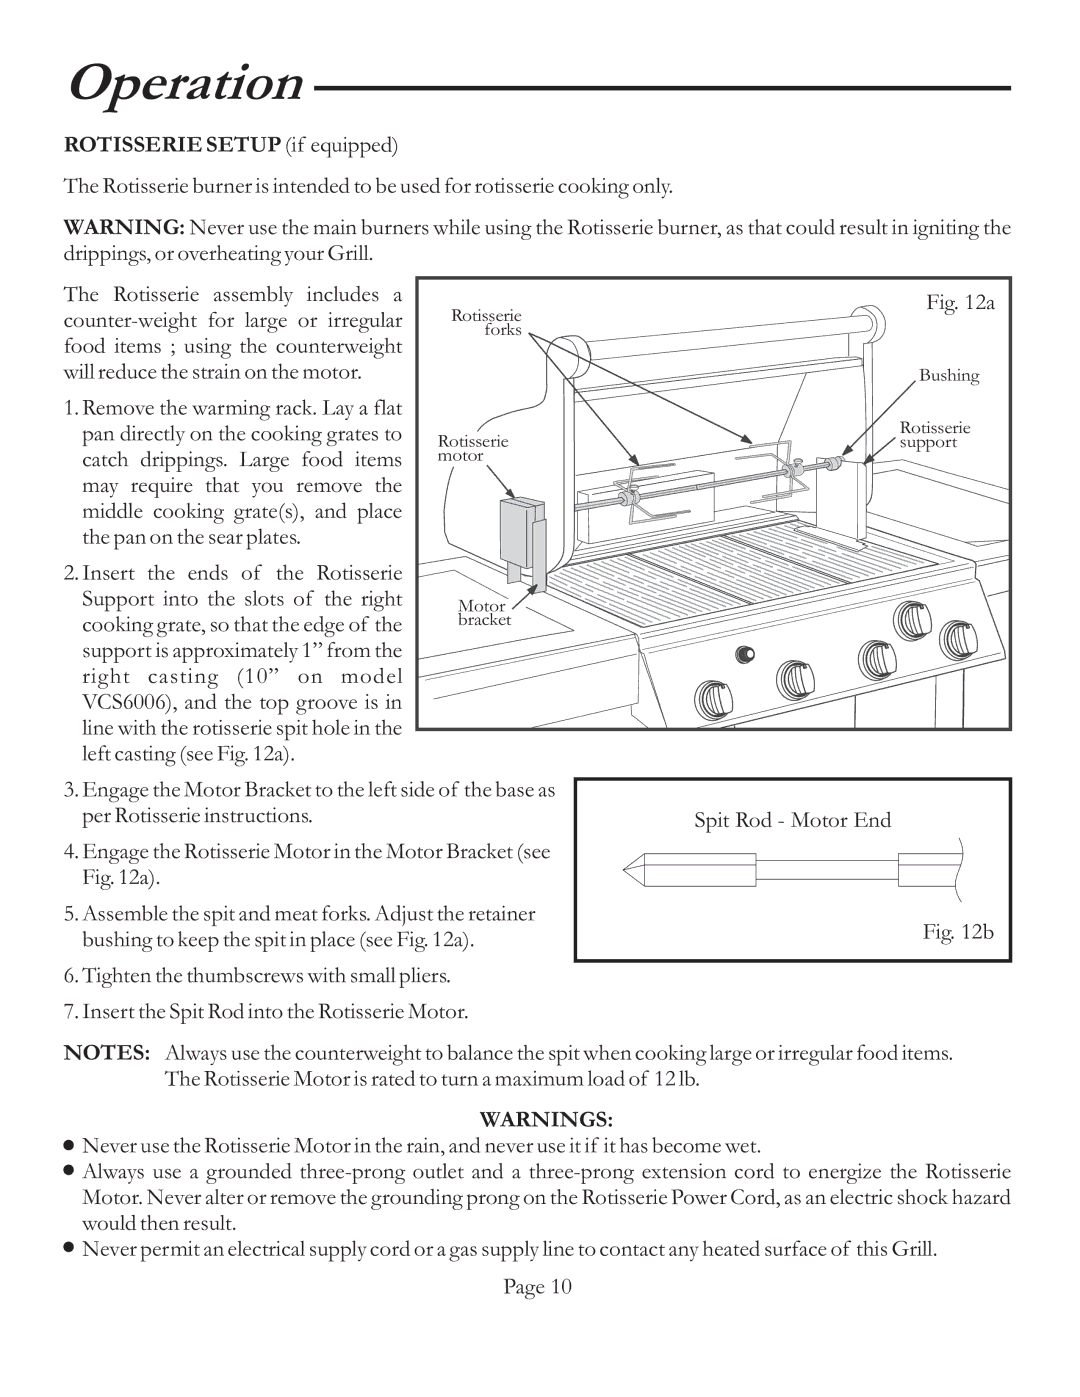
| Fig. 12a | ||
Rotisserie | ||||
| ||||
food items ; using the counterweight | forks |
| ||
|
| |||
will reduce the strain on the motor. |
| Bushing | ||
1. Remove the warming rack. Lay a flat |
|
| ||
pan directly on the cooking grates to | Rotisserie | Rotisserie | ||
support | ||||
|
| |||
catch drippings. Large food items | motor |
| ||
may require that you remove the |
|
| ||
middle cooking grate(s), and place |
|
| ||
the pan on the sear plates. |
|
|
| |
2. Insert the ends of the | Rotisserie |
|
| |
Support into the slots of | the right | Motor |
| |
cooking grate, so that the edge of the | bracket |
| ||
support is approximately 1” from the |
|
| ||
right casting (10” on model |
|
| ||
VCS6006), and the top groove is in |
|
| ||
line with the rotisserie spit hole in the |
|
| ||
left casting (see Fig. 12a). |
|
|
| |
3. Engage the Motor Bracket to the left side of the base as |
| |
per Rotisserie instructions. | Spit Rod - Motor End | |
4. Engage the Rotisserie Motor in the Motor Bracket (see |
| |
Fig. 12a). |
| |
5. Assemble the spit and meat forks. Adjust the retainer | Fig. 12b | |
bushing to keep the spit in place (see Fig. 12a). | ||
| ||
6. Tighten the thumbscrews with small pliers. |
| |
7. Insert the Spit Rod into the Rotisserie Motor. |
|
NOTES: Always use the counterweight to balance the spit when cooking large or irregular food items. The Rotisserie Motor is rated to turn a maximum load of 12 lb.
WARNINGS:
![]() Never use the Rotisserie Motor in the rain, and never use it if it has become wet.
Never use the Rotisserie Motor in the rain, and never use it if it has become wet.
![]() Always use a grounded
Always use a grounded
![]() Never permit an electrical supply cord or a gas supply line to contact any heated surface of this Grill.
Never permit an electrical supply cord or a gas supply line to contact any heated surface of this Grill.
Page 10