Power Connection
If the power cord is not compatible with the local AC outlet standard, contact your local dealer or ViewSonic Corp to obtain the correct power cord..
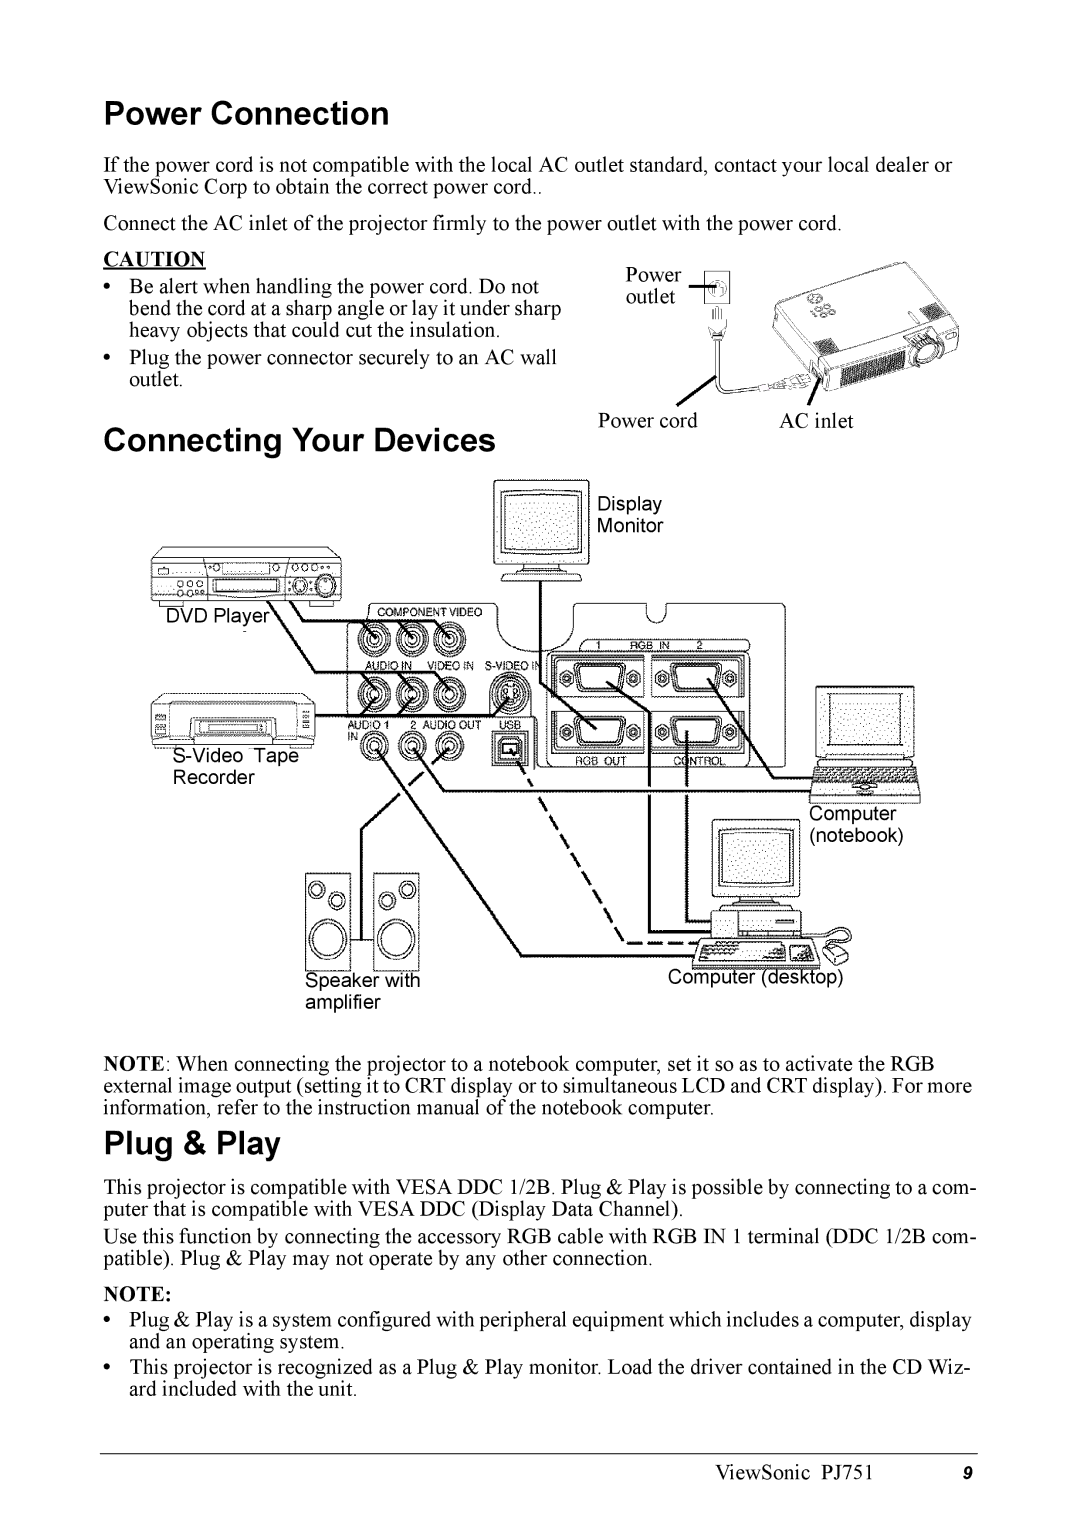
Connect the AC inlet of the projector firmly to the power outlet with the power cord.
CAUTION
•Be alert when handling the power cord. Do not bend the cord at a sharp angle or lay it under sharp heavy objects that could cut the insulation.
•Plug the power connector securely to an AC wall outlet.
Connecting Your Devices
DVD Player
Recorder
Power outlet
Power cord | AC inlet |
Display
Monitor
Computer (notebook)
|
|
|
|
| Computer (desktop) |
Speaker with | ||
amplifier |
|
|
|
| |
|
|
|
NOTE: When connecting the projector to a notebook computer, set it so as to activate the RGB external image output (setting it to CRT display or to simultaneous LCD and CRT display). For more information, refer to the instruction manual of the notebook computer.
Plug & Play
This projector is compatible with VESA DDC 1/2B. Plug & Play is possible by connecting to a com- puter that is compatible with VESA DDC (Display Data Channel).
Use this function by connecting the accessory RGB cable with RGB IN 1 terminal (DDC 1/2B com- patible). Plug & Play may not operate by any other connection.
NOTE:
•Plug & Play is a system configured with peripheral equipment which includes a computer, display and an operating system.
•This projector is recognized as a Plug & Play monitor. Load the driver contained in the CD Wiz- ard included with the unit.
ViewSonic PJ751 | 9 |