Operating

Using the automatic adjustment feature

1.

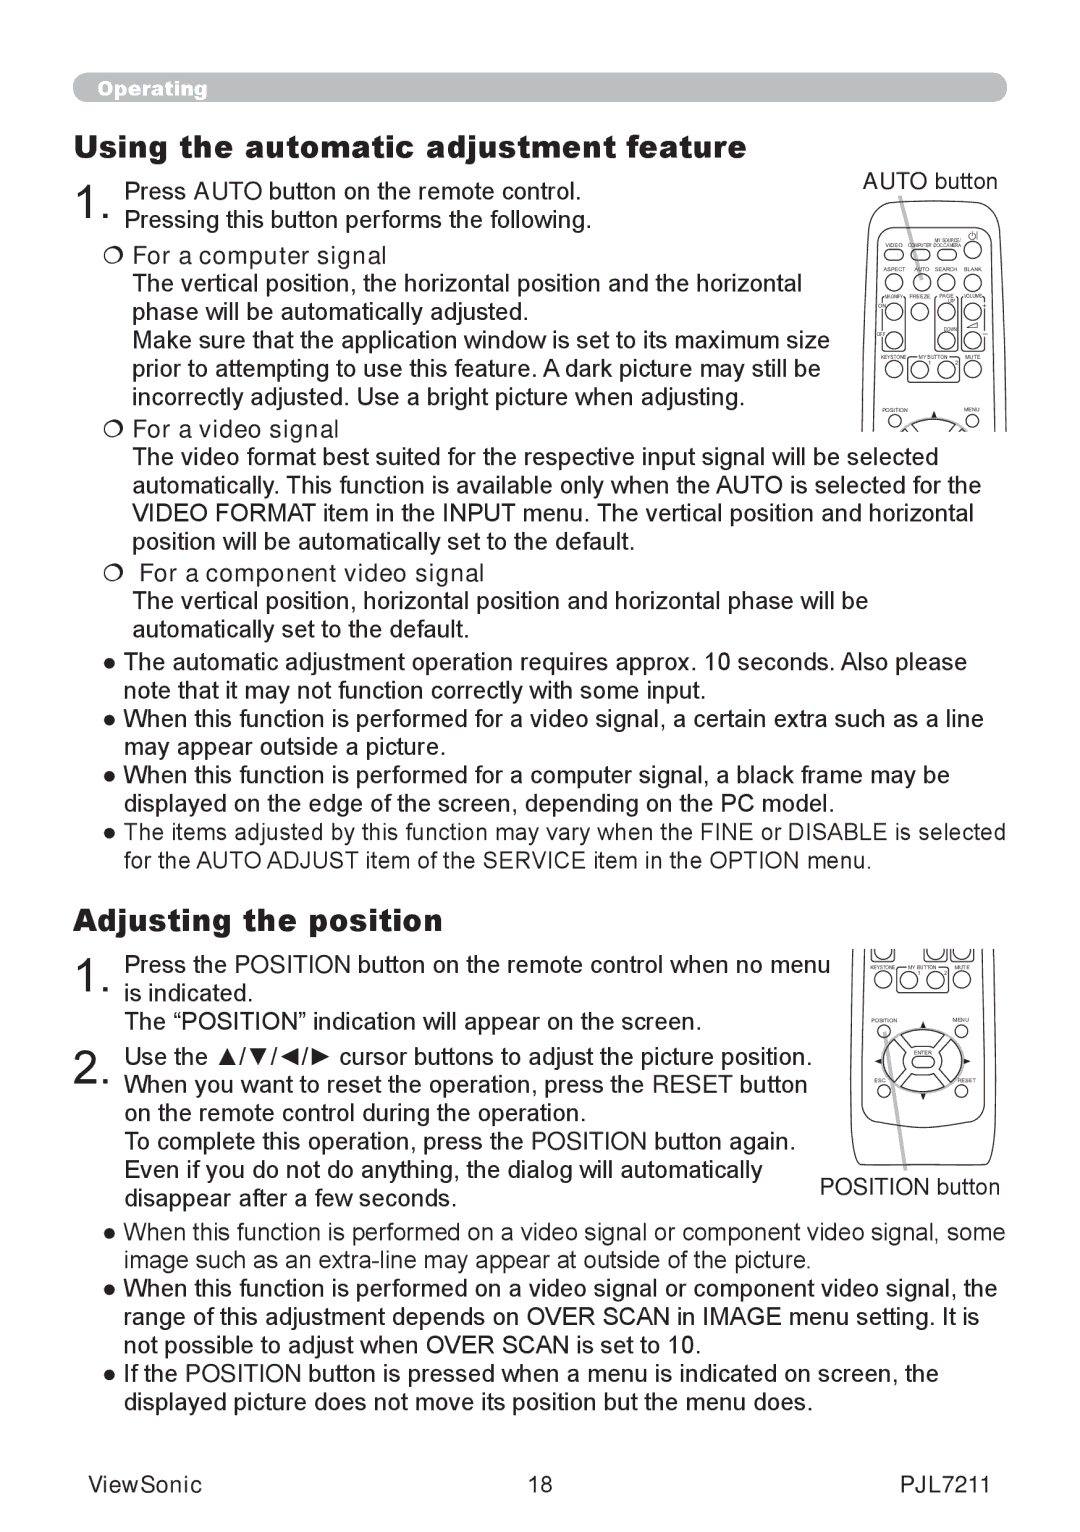
Press AUTO button on the remote control.

AUTO button


Pressing this button performs the following.


For a computer signal

MY SOURCE/ VIDEO COMPUTER DOC.CAMERA

The vertical position, the horizontal position and the horizontal phase will be automatically adjusted.

Make sure that the application window is set to its maximum size prior to attempting to use this feature. A dark picture may still be incorrectly adjusted. Use a bright picture when adjusting.

ASPECT AUTO SEARCH BLANK

MAGNIFY

FREEZE

PAGE


VOLUME

ON


UP


OFF


DOWN


KEYSTONE

MY BUTTON

2

MUTE


1


POSITION


MENU

For a video signal The video format best suited for the respective input signal will be selected automatically. This function is available only when the AUTO is selected for the VIDEO FORMAT item in the INPUT menu. The vertical position and horizontal position will be automatically set to the default.

For a component video signal

The vertical position, horizontal position and horizontal phase will be automatically set to the default.

The automatic adjustment operation requires approx. 10 seconds. Also please note that it may not function correctly with some input.

When this function is performed for a video signal, a certain extra such as a line may appear outside a picture.

When this function is performed for a computer signal, a black frame may be displayed on the edge of the screen, depending on the PC model.

The items adjusted by this function may vary when the FINE or DISABLE is selected for the AUTO ADJUST item of the SERVICE item in the OPTION menu.

Adjusting the position

Press the POSITION button on the remote control when no menu


1

2

1. is indicated.

KEYSTONE

MY BUTTON

MUTE


The “POSITION” indication will appear on the screen.

POSITION


MENU

Use the ▲/▼/◄/► cursor buttons to adjust the picture position.


ENTER


2. When you want to reset the operation, press the RESET button

ESC


RESET

on the remote control during the operation.


To complete this operation, press the POSITION button again.


Even if you do not do anything, the dialog will automatically

POSITION button

disappear after a few seconds.


When this function is performed on a video signal or component video signal, some image such as an extra-line may appear at outside of the picture.

When this function is performed on a video signal or component video signal, the range of this adjustment depends on OVER SCAN in IMAGE menu setting. It is not possible to adjust when OVER SCAN is set to 10.

If the POSITION button is pressed when a menu is indicated on screen, the displayed picture does not move its position but the menu does.

ViewSonic

18

PJL7211

Page 23
Image 23
ViewSonic PJL7211 manual Using the automatic adjustment feature, Adjusting the position,  For a component video signal

PJL7211 specifications

The ViewSonic PJL7211 is a versatile projector designed to meet the needs of both business and educational environments. With its high brightness and advanced features, it delivers exceptional performance for various presentation scenarios. One of the standout characteristics of the PJL7211 is its impressive brightness level, reaching up to 4,200 ANSI lumens. This significant brightness ensures that content remains clear and vibrant, even in well-lit rooms.

The PJL7211 boasts a native XGA resolution of 1024x768 pixels, allowing for sharp images with accurate detail. It also supports various resolutions up to Full HD, making it suitable for a wide range of content from standard presentations to high-definition videos. The projector incorporates DLP technology, which enhances color accuracy and produces smoother images with lower latency, making it ideal for both still images and dynamic video content.

In terms of connectivity, the ViewSonic PJL7211 offers a comprehensive selection of ports, including HDMI, VGA, and USB. This versatility allows users to easily connect it to laptops, desktops, and other multimedia devices without hassle. The addition of an optional wireless adapter enhances its connectivity options, enabling wireless projection from smartphones and tablets, thus adding convenience for tech-savvy users.

Another notable feature is its integrated 10W speaker, providing sufficient audio output for most small to medium-sized rooms without the need for additional sound equipment. This is especially beneficial for classrooms and small meeting rooms where space and setup time are limited.

The PJL7211 also features a user-friendly interface, making it easy for presenters to adjust settings, switch inputs, and manage presentations efficiently. Its energy-efficient design includes a long lamp life, rated at up to 15,000 hours in Eco mode, which significantly reduces maintenance costs and the frequency of lamp replacements.

With a lightweight design and robust build quality, the ViewSonic PJL7211 is portable enough for on-the-go presentations while being durable for everyday use. The combined features of high brightness, resolution versatility, extensive connectivity, and user-friendly operations make the ViewSonic PJL7211 a compelling choice for professionals looking for a reliable and effective projection solution.