10PAPERPORT FLATBED SCANNER INSTALLATION GUIDE
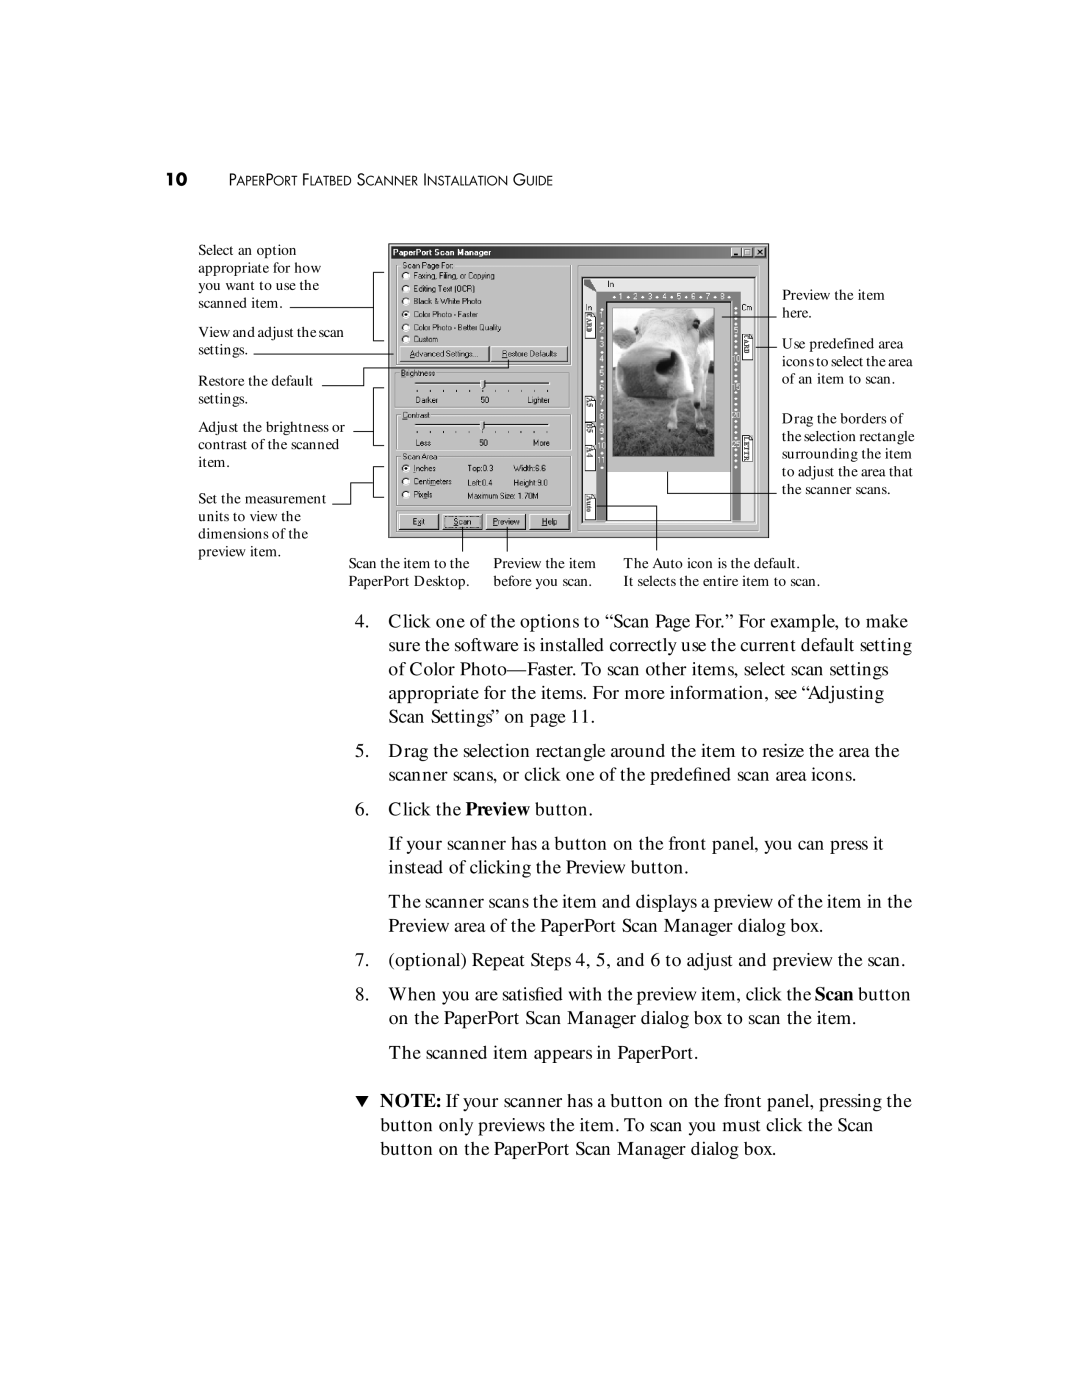
Select an option appropriate for how you want to use the scanned item.
View and adjust the scan settings.
Restore the default settings.
Adjust the brightness or contrast of the scanned item.
Set the measurement units to view the dimensions of the preview item.
Scan the item to the | Preview the item |
PaperPort Desktop. | before you scan. |
Preview the item here.
Use predefined area icons to select the area of an item to scan.
Drag the borders of the selection rectangle surrounding the item to adjust the area that the scanner scans.
The Auto icon is the default.
It selects the entire item to scan.
4.Click one of the options to “Scan Page For.” For example, to make sure the software is installed correctly use the current default setting of Color
5.Drag the selection rectangle around the item to resize the area the scanner scans, or click one of the predefined scan area icons.
6.Click the Preview button.
If your scanner has a button on the front panel, you can press it instead of clicking the Preview button.
The scanner scans the item and displays a preview of the item in the Preview area of the PaperPort Scan Manager dialog box.
7.(optional) Repeat Steps 4, 5, and 6 to adjust and preview the scan.
8.When you are satisfied with the preview item, click the Scan button on the PaperPort Scan Manager dialog box to scan the item.
The scanned item appears in PaperPort.
▼NOTE: If your scanner has a button on the front panel, pressing the button only previews the item. To scan you must click the Scan button on the PaperPort Scan Manager dialog box.