VIVOTEK
Hardware Reset
The reset button is used to reset the system or restore the factory default settings. Sometimes resetting the system can return the camera to normal operation. If the system problems remain after reset, restore the factory settings and install again.
Reset: Press and release the recessed reset button with a straightened paper clip. Wait for the Network Camera to reboot.
Restore: Press and hold the recessed reset button until the status LED rapidly blinks. Note that all settings will be restored to factory default. Upon successful restore, the status LED will blink green and red during normal operation.
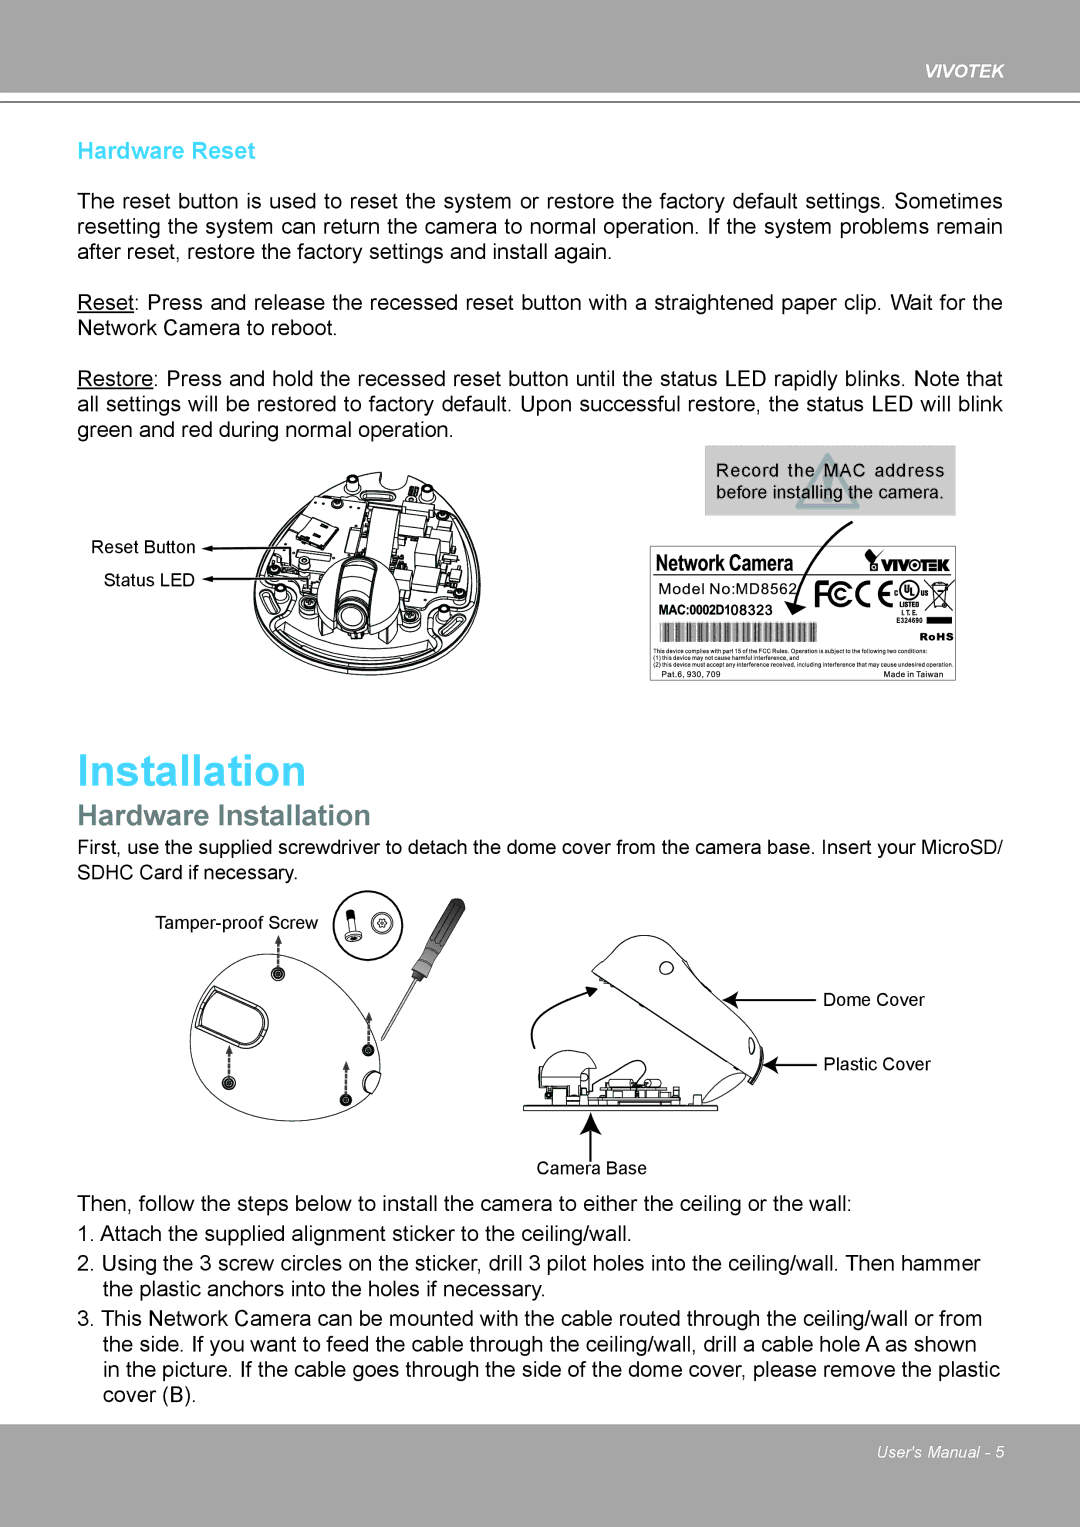
Record the MAC address before installing the camera.
Reset Button ![]()
Status LED ![]()
![]()
![]()
![]()
![]()
![]()
![]()
![]()
![]()
![]()
![]()
![]()
![]()
![]()
![]()
![]()
![]()
![]()
![]()
![]()
![]()
![]()
![]()
![]()
![]()
![]()
![]()
![]()
![]()
![]()
![]()
![]()
Installation
Hardware Installation
First, use the supplied screwdriver to detach the dome cover from the camera base. Insert your MicroSD/ SDHC Card if necessary.
![]()
![]() Dome Cover
Dome Cover
![]()
![]()
![]() Plastic Cover
Plastic Cover
Camera Base
Then, follow the steps below to install the camera to either the ceiling or the wall:
1.Attach the supplied alignment sticker to the ceiling/wall.
2.Using the 3 screw circles on the sticker, drill 3 pilot holes into the ceiling/wall. Then hammer the plastic anchors into the holes if necessary.
3.This Network Camera can be mounted with the cable routed through the ceiling/wall or from the side. If you want to feed the cable through the ceiling/wall, drill a cable hole A as shown in the picture. If the cable goes through the side of the dome cover, please remove the plastic cover (B).
User's Manual - 5