www.vxitech.com
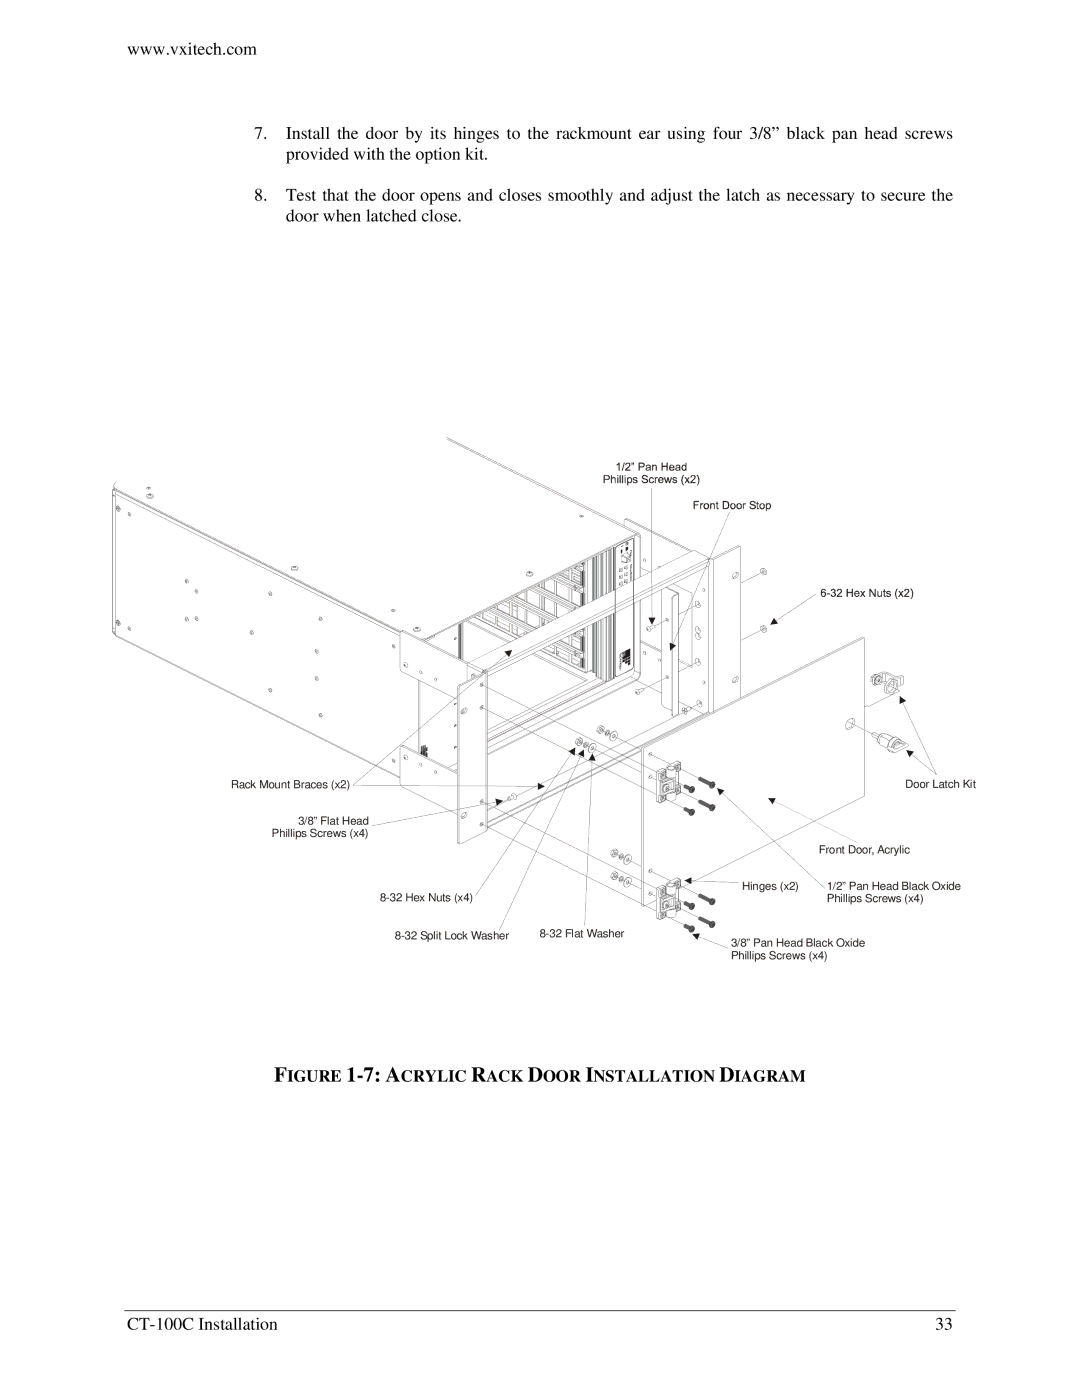
7.Install the door by its hinges to the rackmount ear using four 3/8” black pan head screws provided with the option kit.
8.Test that the door opens and closes smoothly and adjust the latch as necessary to secure the door when latched close.
Rack Mount Braces (x2) |
| Door Latch Kit |
3/8” Flat Head |
|
|
Phillips Screws (x4) |
|
|
|
| Front Door, Acrylic |
Hinges (x2) | 1/2” Pan Head Black Oxide | |
| Phillips Screws (x4) | |
| ||
| 3/8” Pan Head Black Oxide | |
Phillips Screws (x4)
FIGURE 1-7: ACRYLIC RACK DOOR INSTALLATION DIAGRAM
33 |
