INSTALLATION (continued)
SET GAS PRESSURE:
Gas pressure regulator is factory set.
SET PILOT FLAME:
Remove all burner control knobs, then remove the front panel. Remove grates.
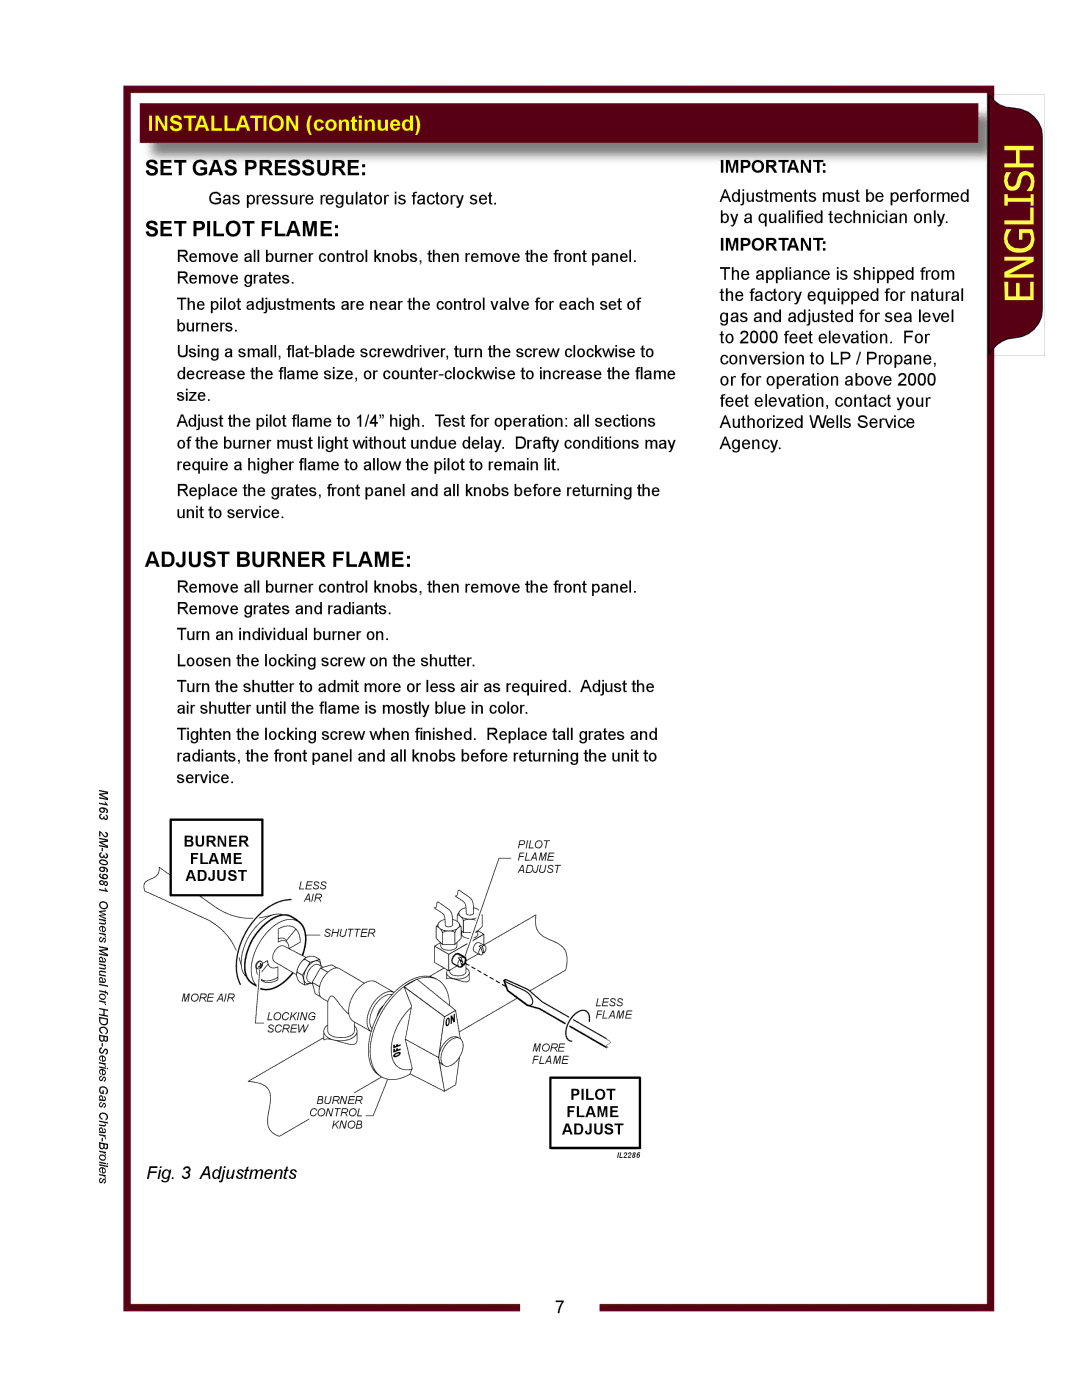
The pilot adjustments are near the control valve for each set of burners.
Using a small,
Adjust the pilot flame to 1/4” high. Test for operation: all sections of the burner must light without undue delay. Drafty conditions may require a higher flame to allow the pilot to remain lit.
Replace the grates, front panel and all knobs before returning the unit to service.
ADJUST BURNER FLAME:
Remove all burner control knobs, then remove the front panel. Remove grates and radiants.
Turn an individual burner on.
Loosen the locking screw on the shutter.
Turn the shutter to admit more or less air as required. Adjust the air shutter until the flame is mostly blue in color.
Tighten the locking screw when finished. Replace tall grates and radiants, the front panel and all knobs before returning the unit to service.
IMPORTANT:
Adjustments must be performed by a qualified technician only.
IMPORTANT:
The appliance is shipped from the factory equipped for natural gas and adjusted for sea level to 2000 feet elevation. For conversion to LP / Propane, or for operation above 2000 feet elevation, contact your Authorized Wells Service Agency.
M163
BURNER
FLAME
ADJUST
MORE AIR
LESS
AIR
SHUTTER
LOCKING
SCREW ![]()
![]() OFF
OFF ![]()
BURNER
CONTROL KNOB
PILOT
FLAME
ADJUST
LESS
FLAME
MORE
FLAME
PILOT
FLAME
ADJUST
IL2286
Broilers
Fig. 3 Adjustments
7
