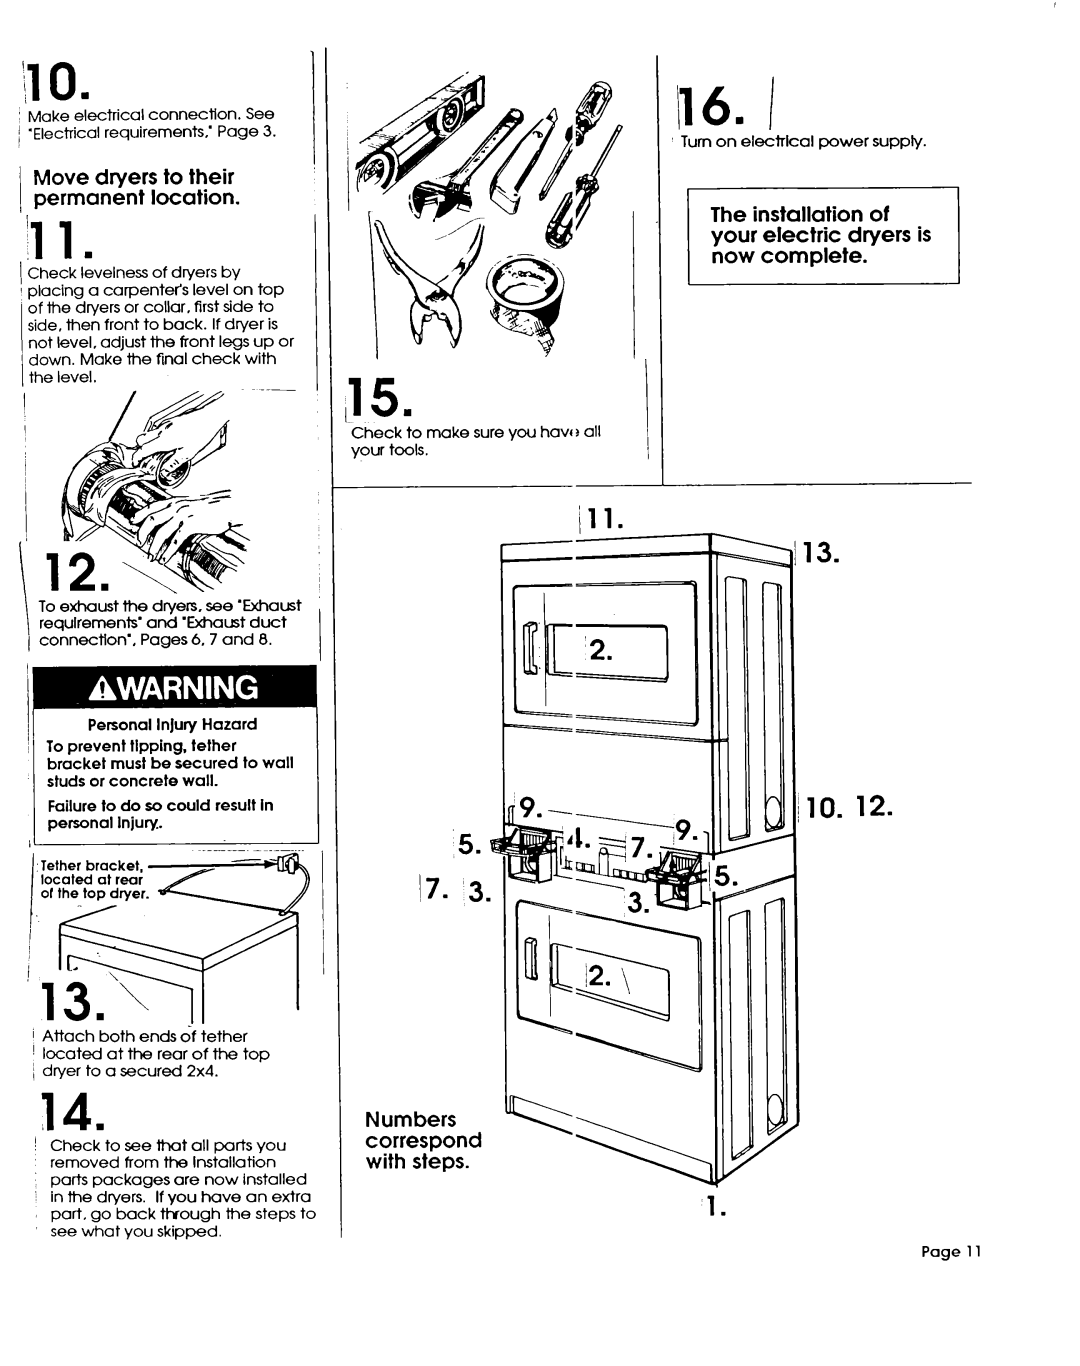
ilO.
: Make electrical connection. | See |
/ ‘Electrical requirements,’ | Page 3. |
Move dryers to their permanent location.
‘11.
Check levelness of dryers by placing a carpenter’s level on top of the dryers or collar, first side to side, then front to back. If dryer is not level, adjust the front legs up or down. Make the final check with the level.
1
ITo exhaust the dn/ers, see ‘Exhaust
requlremenk’ and ‘Exhaust duct
( connection’, Pages 6.7 and 8.
Personal Injury Hazard
~To prevent tlpping. tether
bracket must be secured to wall studs or concrete wall.
Failure to do so could result in personal Injury.
:Tether bracket, located at rear of the top dryer.
I
1
1 Attach both ends 6f tether
!located at the rear of the top / dryer to a secured 2x4.
14 .
) Check to see that all parts you
removed | from | the Installation | |||
parts | packages | are | now | installed | |
I in the | dryers. | If you | have | an extra | |
part, | go | back | though | the steps to | |
see what | you | skipped. |
| ||
ib I
Turn on electrIcal power supply.
The | installation | of |
your | electric | dryers is |
now | complete. |
|
15n
Check to make sure you have ?all your tools.
Numbers correspond with steps.
Page 11