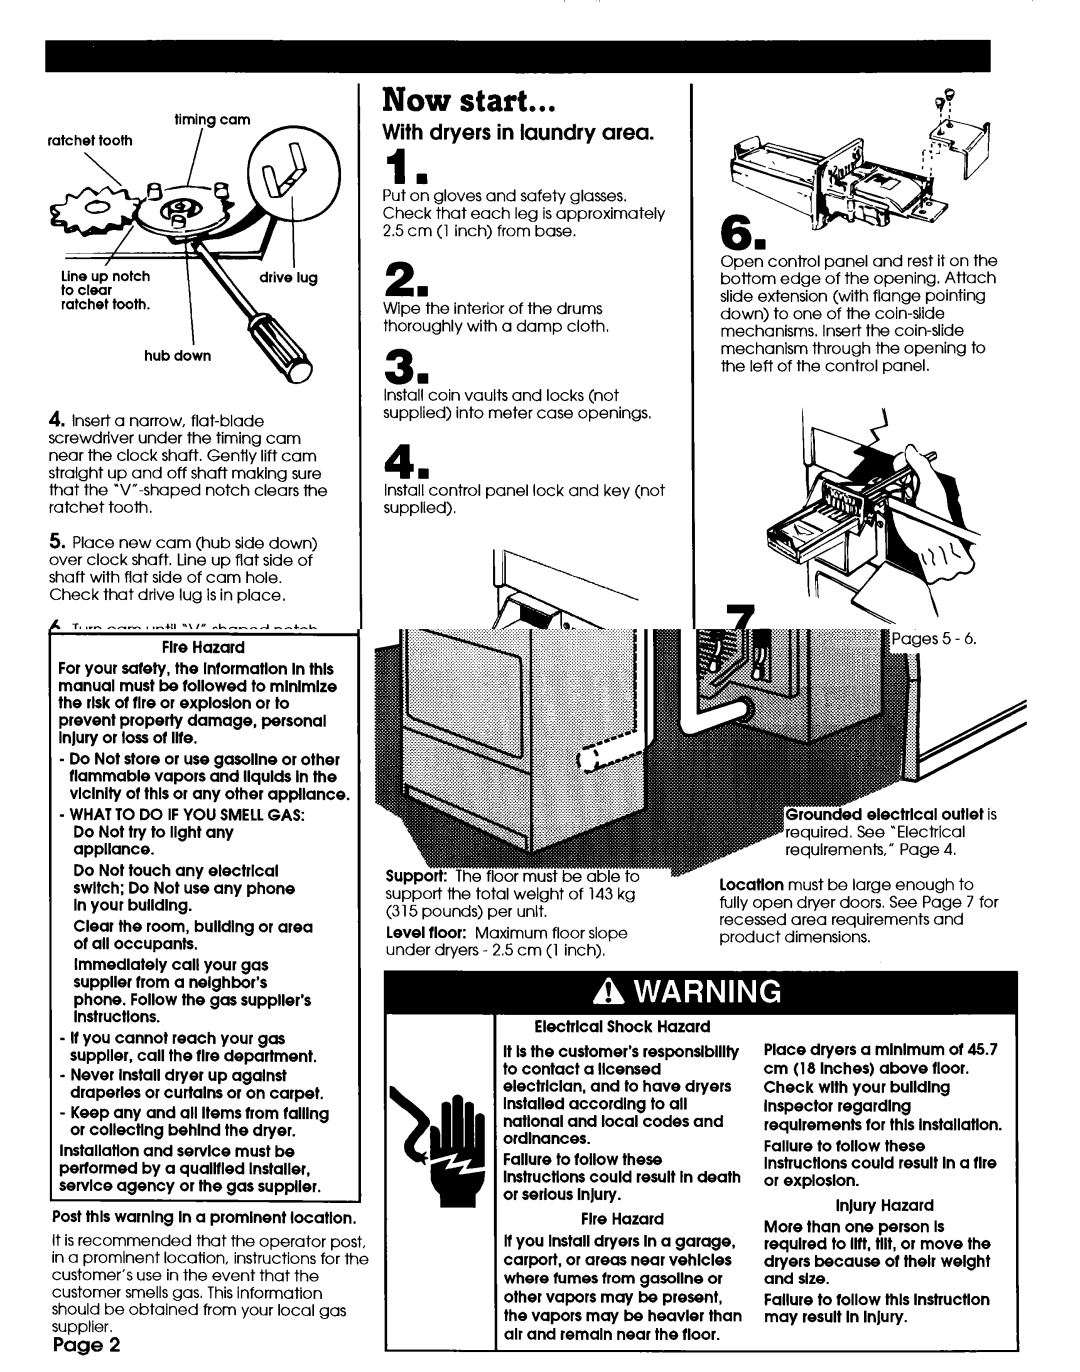
to clear
ratchet tooth.
4.Insert a narrow,
5.Place new cam (hub side down) over clock shaft. Line up flat side of shaft with flat side of cam hole.
Check that drive lug is in place,
6.Turn cam until
7.Press cam down in place on motor shaft. Make sure that
notch clears the ratchet tooth,
8.Reattach the timer bracket assembly; tighten the screws.
9.Repeat steps for other timer.
10.Close and lock the control panel.
Now start...
With dryers in laundry area.
1 n
Put on gloves and safety glasses. Check that each leg is approximately 2.5 cm (1 inch) from base.
2.
Wipe the interior of the drums thoroughly with a damp cloth.
3.
Install coin vaults and locks (not supplied) into meter case openings.
4.
Install control panel lock and key (not supplied).
5.
If you wish to change the
Open control panel and rest it on the bottom edge of the opening. Attach slide extension (with flange pointing down) to one of the
7.
Secure
8.
Repeat Steps 6 and 7 for the other
l
i
9.
Insert top of wire guard into holes on each side of the
Page 8