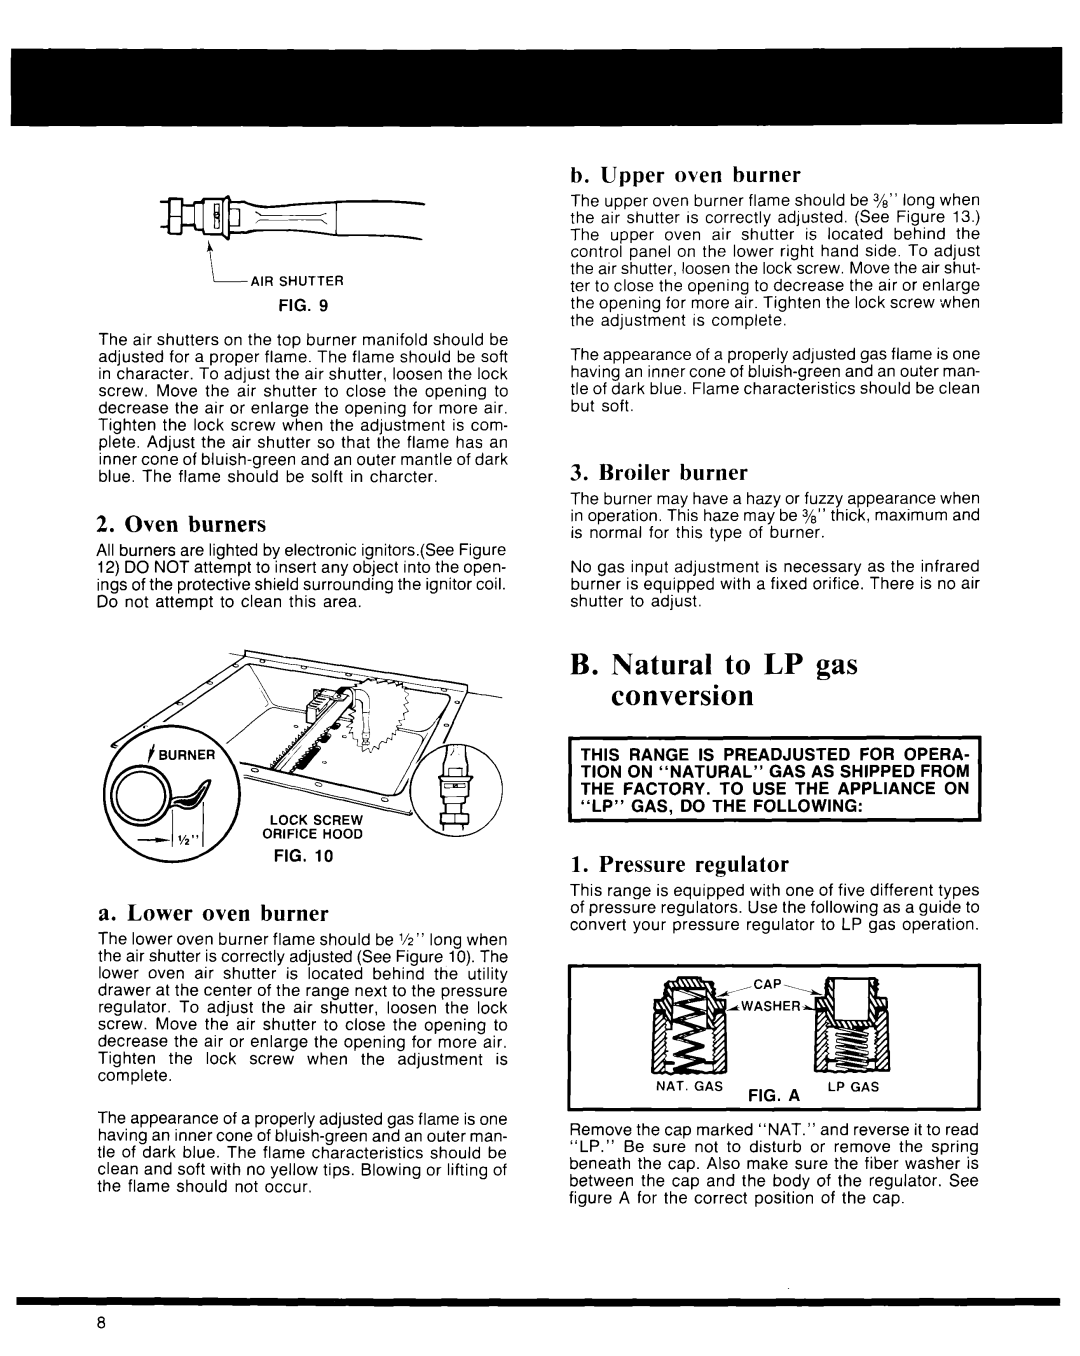
gq@- -
L AIR SHUTTER
FIG. 9
The air shutters on the top burner manifold should be adjusted for a proper flame. The flame should be soft in character. To adjust the air shutter, loosen the lock screw. Move the air shutter to close the opening to decrease the air or enlarge the opening for more air. Tighten the lock screw when the adjustment is com- plete. Adjust the air shutter so that the flame has an inner cone of
2. Oven burners
All burners are lighted by electronic ignitors.(See Figure
12)DO NOT attempt to insert any object into the open- ings of the protective shield surrounding the ignitor coil. Do not attempt to clean this area.
b. Upper oven burner
The upper oven burner flame should be %” long when the air shutter is correctly adjusted. (See Figure 13.) The upper oven air shutter is located behind the control panel on the lower right hand side. To adjust the air shutter, loosen the lock screw. Move the air shut- ter to close the opening to decrease the air or enlarge the opening for more air. Tighten the lock screw when the adjustment is complete.
The appearance of a properly adjusted gas flame is one having an inner cone of
3. Broiler burner
The burner may have a hazy or fuzzy appearance when in operation. This haze may be 3/e” thick, maximum and is normal for this type of burner.
No gas input adjustment is necessary as the infrared burner is equipped with a fixed orifice. There is no air shutter to adjust.
a. Lower oven burner
The lower oven burner flame should be l/z” long when the air shutter is correctly adjusted (See Figure 10). The lower oven air shutter is located behind the utility drawer at the center of the range next to the pressure regulator. To adjust the air shutter, loosen the lock screw. Move the air shutter to close the opening to decrease the air or enlarge the opening for more air. Tighten the lock screw when the adjustment is complete.
The appearance of a properly adjusted gas flame is one having an inner cone of
B. Natural to LP gas conversion
THIS RANGE IS PREADJUSTED FOR OPERA- TION ON “NATURAL” GAS AS SHIPPED FROM THE FACTORY. TO USE THE APPLIANCE ON “LP” GAS, DO THE FOLLOWING:
1. Pressure regulator
This range is equipped with one of five different types of pressure regulators. Use the following as a guide to convert your pressure regulator to LP gas operation.
NAT. GAS | FIG. | A | LP GAS |
|
|
Remove the cap marked “NAT.” and reverse it to read “LP.” Be sure not to disturb or remove the spring beneath the cap. Also make sure the fiber washer is between the cap and the body of the regulator. See figure A for the correct position of the cap.
8
