l Sliding aluminum pans or foil, and copper pans, on the smoothtop can leave marks, Aluminum marks can be removed if they are not heated. See page 14 for cleaning and caring suggestions.
Cooking...
The glass will take longer to heat up than a regular surface unit. It will also take longer to cool down. Turn off the unit a few minutes be- fore you are finished cooking.
Care and Cleaning...
Always clean the smoothtop after cooking. Avoiding stains
l Use a special smoothtop cleaner/condi- tioner every time you use the Smoothtop
Module. Follow the package directions carefully.
l Wipe the smoothtop with a clean, damp paper towel before you use the smooth- top. (Do not use a sponge or cloth. A little leftover soap or soil can stain the smooth- top when heated.)
l Use only clean cookware.
I
l Avoid spillovers. Use pans with tall sides.
l Don’t let covers drip on the smoothtop.
l Wipe up any spills with a wet cloth, when the unit is cool enough not to steam. The longer you cook with a spillover on the unit, the harder it will be to remove.
l Clean off metal marks (from copper or alu- minum) right away. If heated they may never come off.
Avoiding damage
l Do not use the smoothtop as a cutting board.
l Sugary spills can cause pitting on the surface.
l Spilling cold water on a hot surface may crack it. Do not use a cracked smoothtop.
l Dropping heavy or hard objects on the cooktop can crack it. Be careful with heavy skillets. Don’t store jars or cans above the smoothtop.
See the special smoothtop cleaning sugges- tions on page 14.
Accessory canning kit (Part no. 242905)
The large diameter of most
pressure canners combined with high heat settings for long periods of time can shorten the life of regular surface units and cause damage to the cooktop
If you plan to use the cooktop for can-
ning, we recommend the installation of a Canning Krt. The kit includes one heavy
duty 8” surface unit and necessary switches. Order the kit from your Whirlpool Dealer or
Cleaning and caring for your cooktop
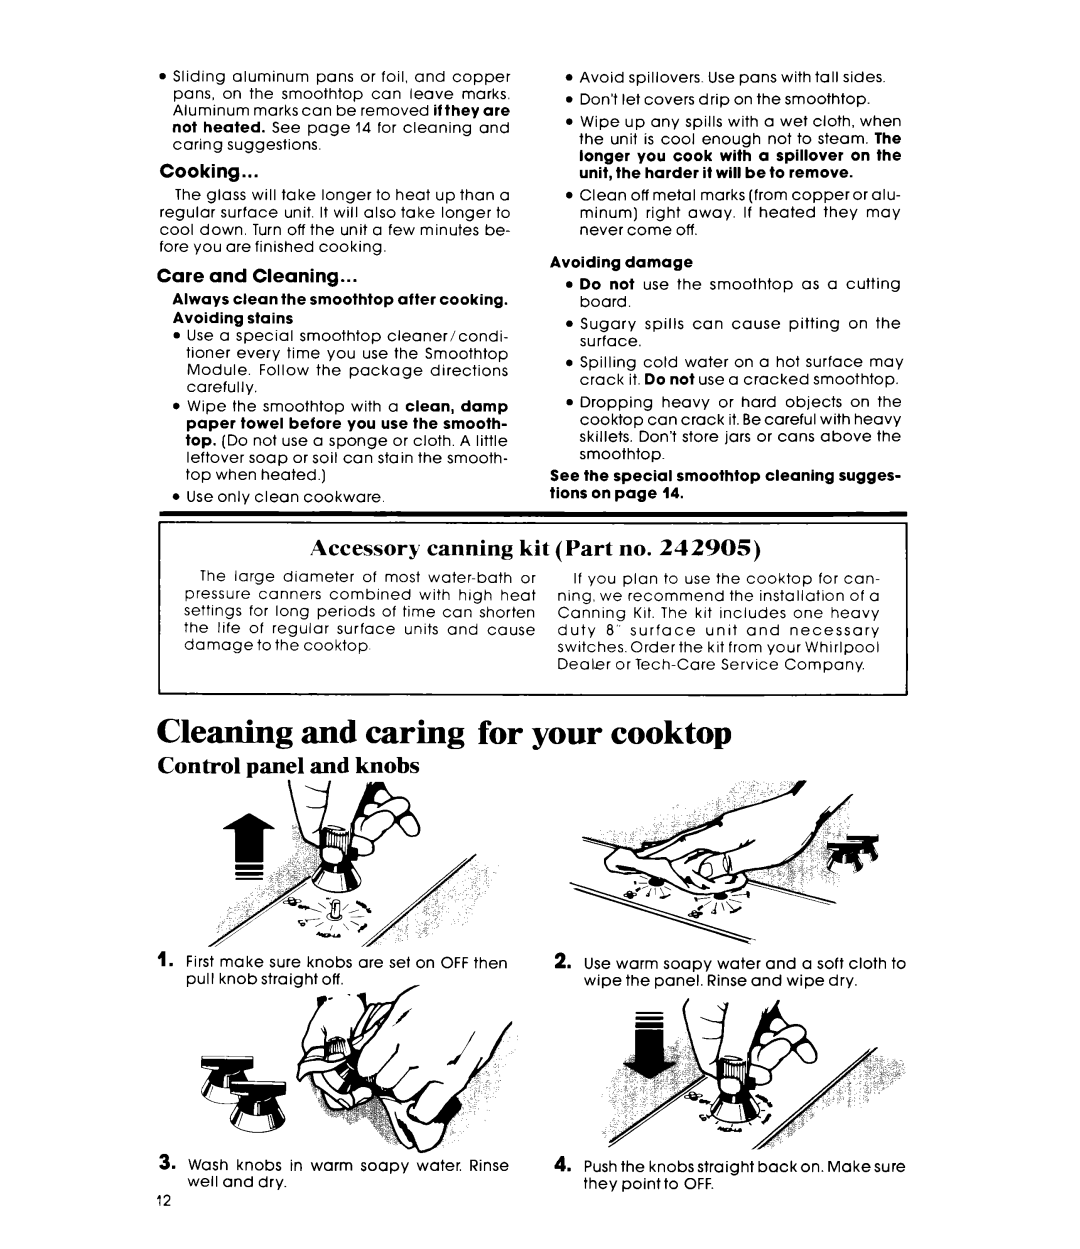
Control panel and knobs
1. First | make | sure | knobs | are set on OFF then | 2. Use | warm | soapy | water | and a | soft cloth to |
pull | knob | straight | off. | , | wipe | the | panel. | Rinse | and wipe | dry. |
3. Wash | knobs in warm soapy water. Rinse | 4. Push the knobsstraight | backon. | Makesure |
well | and dry. | they point to OFF. |
|
|
12
