USING YOUR RANGE
USING THE ELECTRONIC MINUTE TIMER (CONT.)
3.Start the minute timer.
The minute timer will begin counting down immediately after the timer is started.
PRESS | YOU SEE |
START
ENTER![]()
![]()
![]() TIMER
TIMER
5 SEC
(display counts down)
When the time is up:
You will hear four
YOU SEE
TIMER
NOTE: To display the time of day while the minute timer is counting down, press CLOCK.
4. Turn off the minute timer. | PRESS | YOU SEE |
| TIMER |
|
| OFF |
|
|
| (time of day) |
|
| |
|
|
|
To cancel the minute timer: | PRESS | YOU SEE |
Press TIMER OFF. | TIMER |
|
|
| |
| OFF |
|
|
| (time of day) |
|
|
STARTING/CANCELING A FUNCTION
After setting a function, you must press START/ENTER to start the function.
START
ENTER
![]() 5 SEC
5 SEC
OFF/CANCEL will cancel any function except
for the clock, timer, or control lock. When OFF you press OFF/CANCEL, the display CANCEL will show the time of day or, if the minute
timer is also being used, the time remaining.
BAKING/ROASTING
Your oven is designed with the ACCUBAKE® temperature management system to constantly monitor oven temperature. The bake element will cycle, as needed, to maintain the desired temperature. This feature is automatically activated when the oven is in operation.
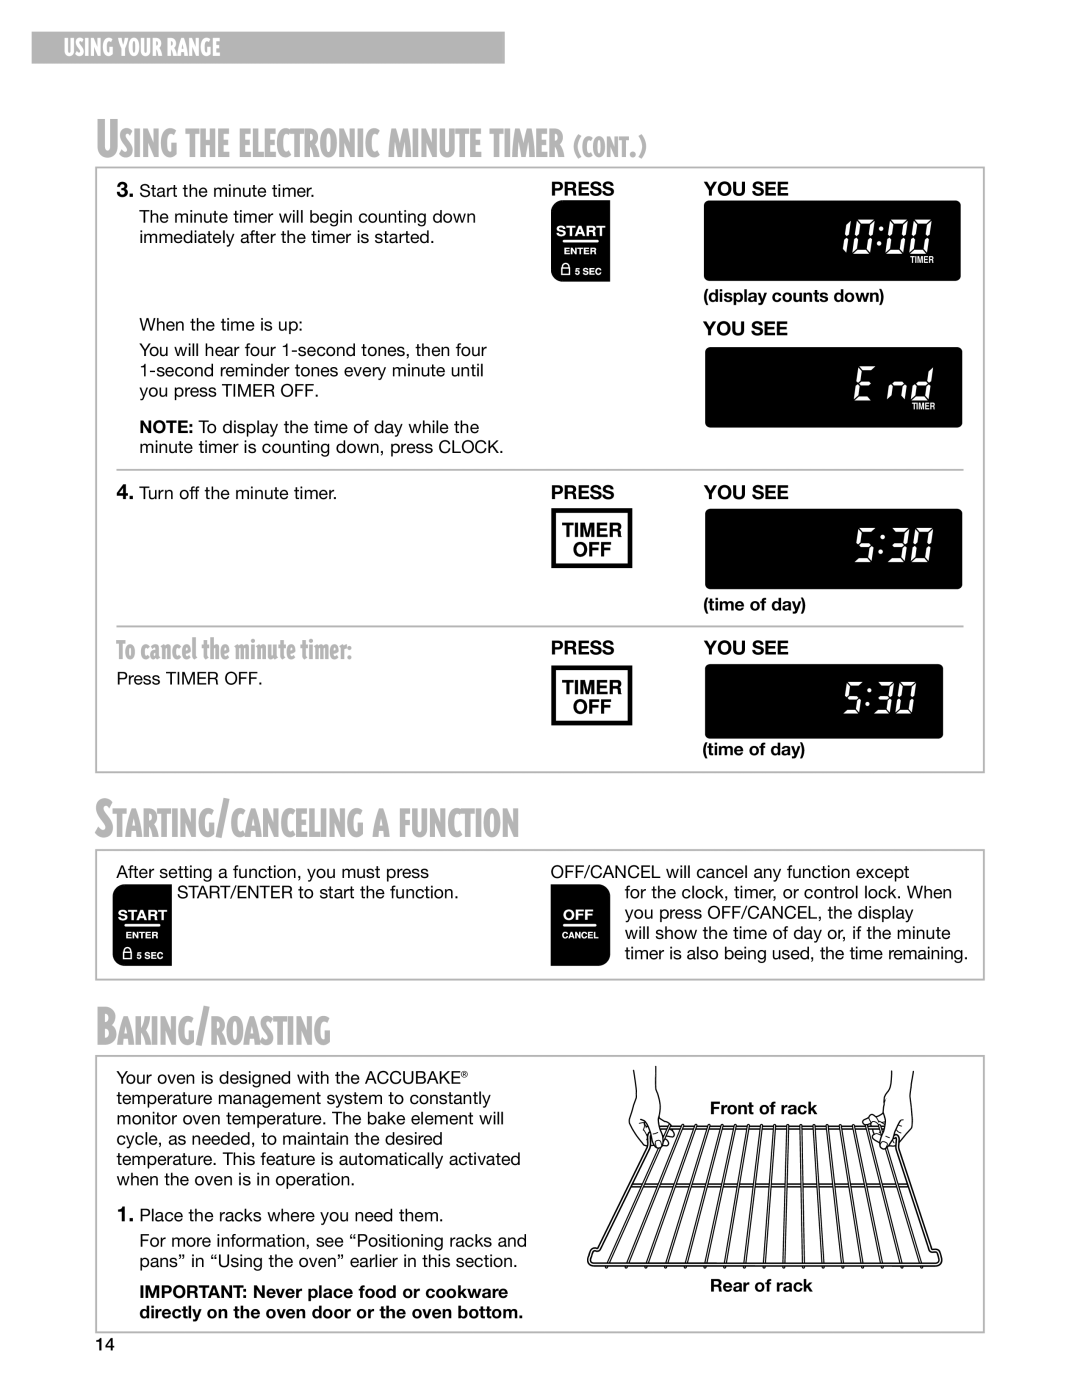
1.Place the racks where you need them.
For more information, see “Positioning racks and pans” in “Using the oven” earlier in this section.
IMPORTANT: Never place food or cookware directly on the oven door or the oven bottom.
Front of rack
Rear of rack
14