USING YOUR RANGE
USING THE ELECTRONIC MEALTIMERTM CONTROL (CONT.)
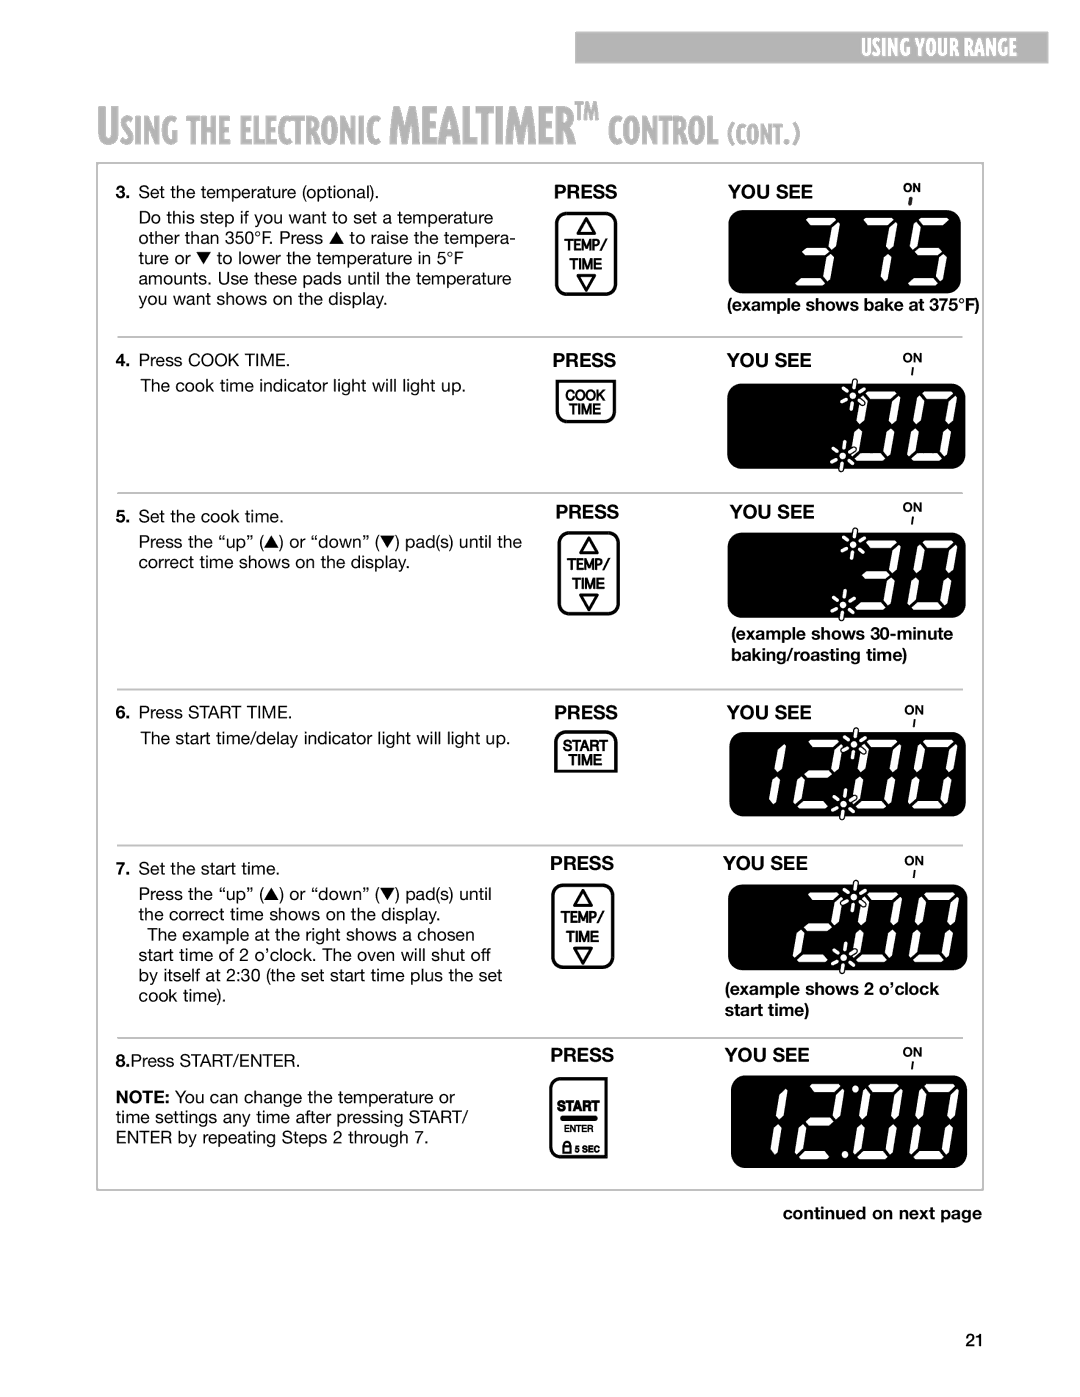
3.Set the temperature (optional).
Do this step if you want to set a temperature other than 350°F. Press ▲ to raise the tempera- ture or ▼ to lower the temperature in 5°F amounts. Use these pads until the temperature you want shows on the display.
PRESS | YOU SEE | ON |
|
TIME
(example shows bake at 375°F)
4. Press COOK TIME.PRESSYOU SEE ON
The cook time indicator light will light up.
COOK
TIME
5. Set the cook time.PRESSYOU SEE
Press the “up” (s) or “down” (t) pad(s) until the correct time shows on the display.
ON
TIME
|
|
| (example shows | |
|
|
| baking/roasting time) | |
|
|
|
|
|
6. Press START TIME. | PRESS | YOU SEE | ON | |
| The start time/delay indicator light will light up. | START |
|
|
|
|
|
| |
TIME
7.Set the start time.
Press the “up” (s) or “down” (t) pad(s) until the correct time shows on the display.
The example at the right shows a chosen start time of 2 o’clock. The oven will shut off by itself at 2:30 (the set start time plus the set cook time).
PRESS | YOU SEE | ON |
TIME
(example shows 2 o’clock start time)
8.Press START/ENTER.
NOTE: You can change the temperature or time settings any time after pressing START/ ENTER by repeating Steps 2 through 7.
PRESS | YOU SEE | ON |
START
ENTER
![]() 5 SEC
5 SEC
continued on next page
21
