12
Changing abrasive belts (continued)
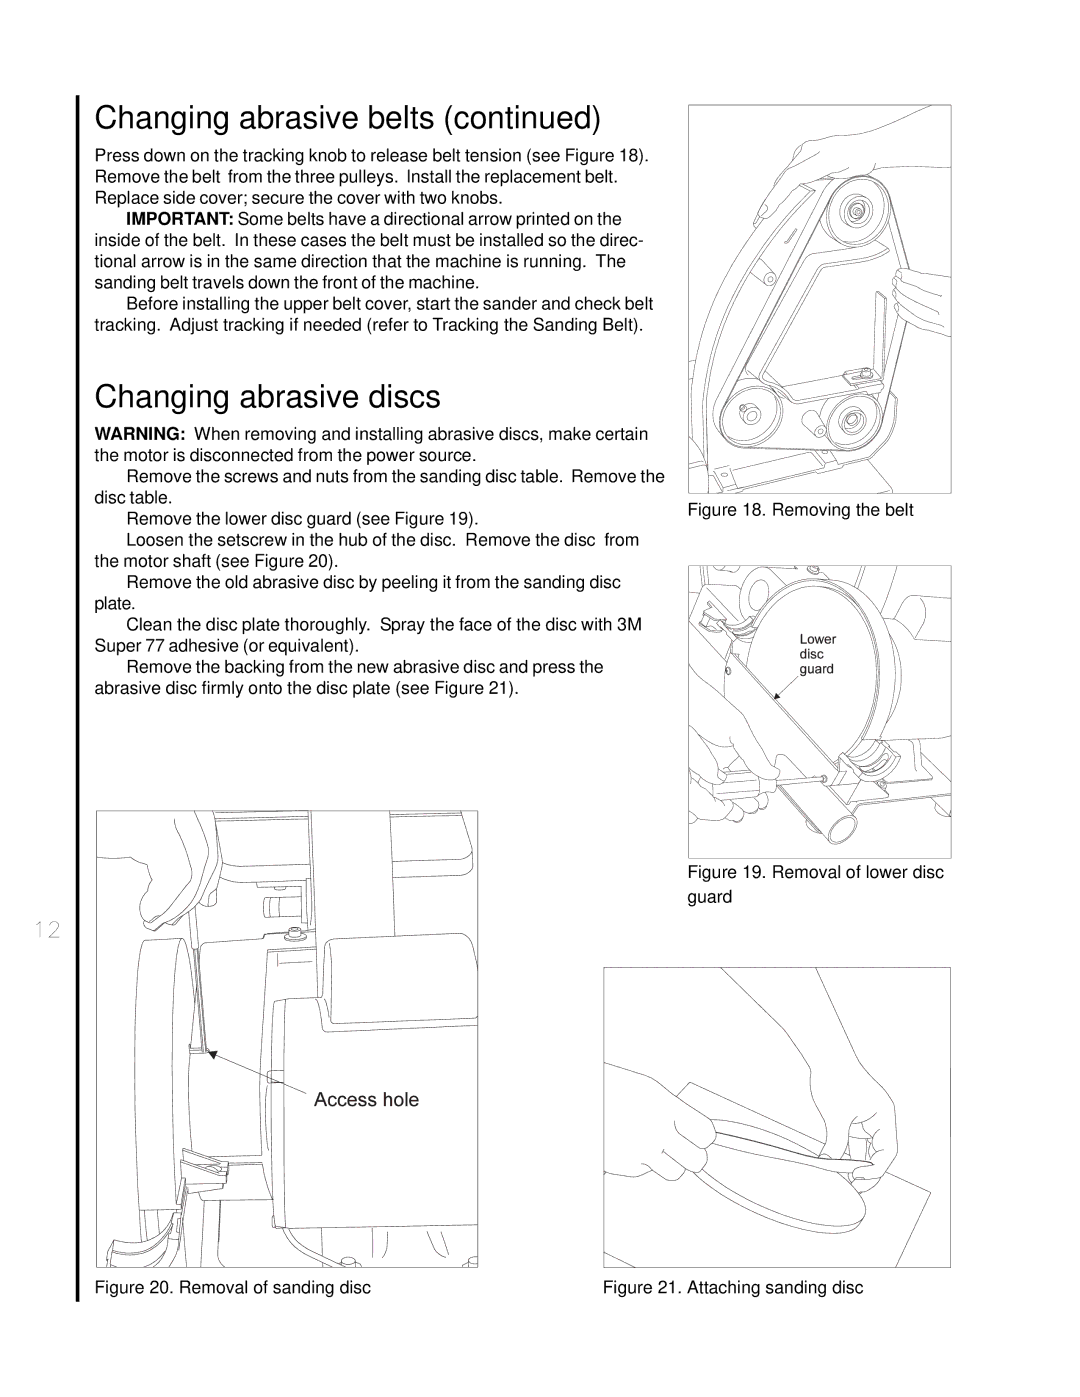
Press down on the tracking knob to release belt tension (see Figure 18). Remove the belt from the three pulleys. Install the replacement belt. Replace side cover; secure the cover with two knobs.
IMPORTANT: Some belts have a directional arrow printed on the inside of the belt. In these cases the belt must be installed so the direc- tional arrow is in the same direction that the machine is running. The sanding belt travels down the front of the machine.
Before installing the upper belt cover, start the sander and check belt tracking. Adjust tracking if needed (refer to Tracking the Sanding Belt).
Changing abrasive discs
WARNING: When removing and installing abrasive discs, make certain the motor is disconnected from the power source.
Remove the screws and nuts from the sanding disc table. Remove the disc table.
Remove the lower disc guard (see Figure 19).
Loosen the setscrew in the hub of the disc. Remove the disc from the motor shaft (see Figure 20).
Remove the old abrasive disc by peeling it from the sanding disc plate.
Clean the disc plate thoroughly. Spray the face of the disc with 3M Super 77 adhesive (or equivalent).
Remove the backing from the new abrasive disc and press the abrasive disc firmly onto the disc plate (see Figure 21).
Figure 18. Removing the belt
Figure 19. Removal of lower disc guard
Figure 20. Removal of sanding disc | Figure 21. Attaching sanding disc |