Repeat the insertion of the paper between the wheel shoulder and the blade until the paper is cut in two pieces.
Note: You may have to repeat the check with the paper several times before the blade and the shoulder cut the paper into two pieces. Do not hurry the adjustment. Patience and accuracy here will pay off with better, more accurate, quieter cutting and much longer machine and blade life.
When the paper is cut:
10.Turn the adjustment screws (F) slightly in the
11.Shut off the saw.
12.Tighten the hex locking screws (E).
13.Install the
14.Position the guides so the top bearing just touches the blade (see Blade Guide Bearing Adjustment on page 16) .
15.Close the wheel covers (K, Fig. 14).
Blade Guide Adjustment
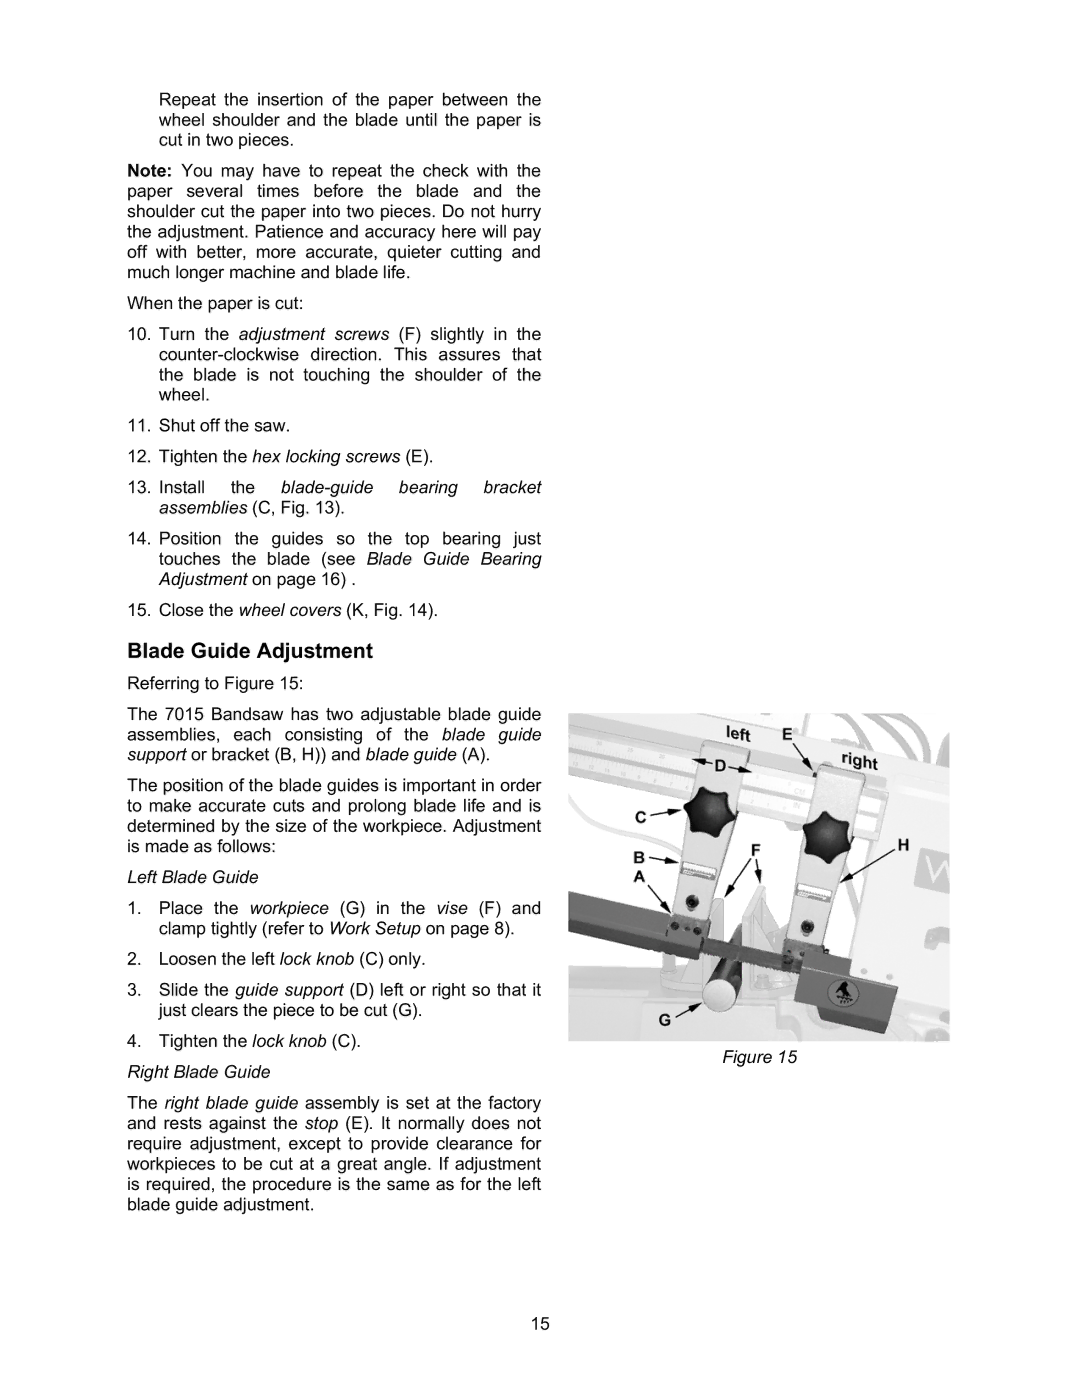
Referring to Figure 15:
The 7015 Bandsaw has two adjustable blade guide assemblies, each consisting of the blade guide support or bracket (B, H)) and blade guide (A).
The position of the blade guides is important in order to make accurate cuts and prolong blade life and is determined by the size of the workpiece. Adjustment is made as follows:
Left Blade Guide
1.Place the workpiece (G) in the vise (F) and clamp tightly (refer to Work Setup on page 8).
2.Loosen the left lock knob (C) only.
3.Slide the guide support (D) left or right so that it just clears the piece to be cut (G).
4.Tighten the lock knob (C).
Figure 15
Right Blade Guide
The right blade guide assembly is set at the factory and rests against the stop (E). It normally does not require adjustment, except to provide clearance for workpieces to be cut at a great angle. If adjustment is required, the procedure is the same as for the left blade guide adjustment.
15