Verifying Adjustment Accuracy
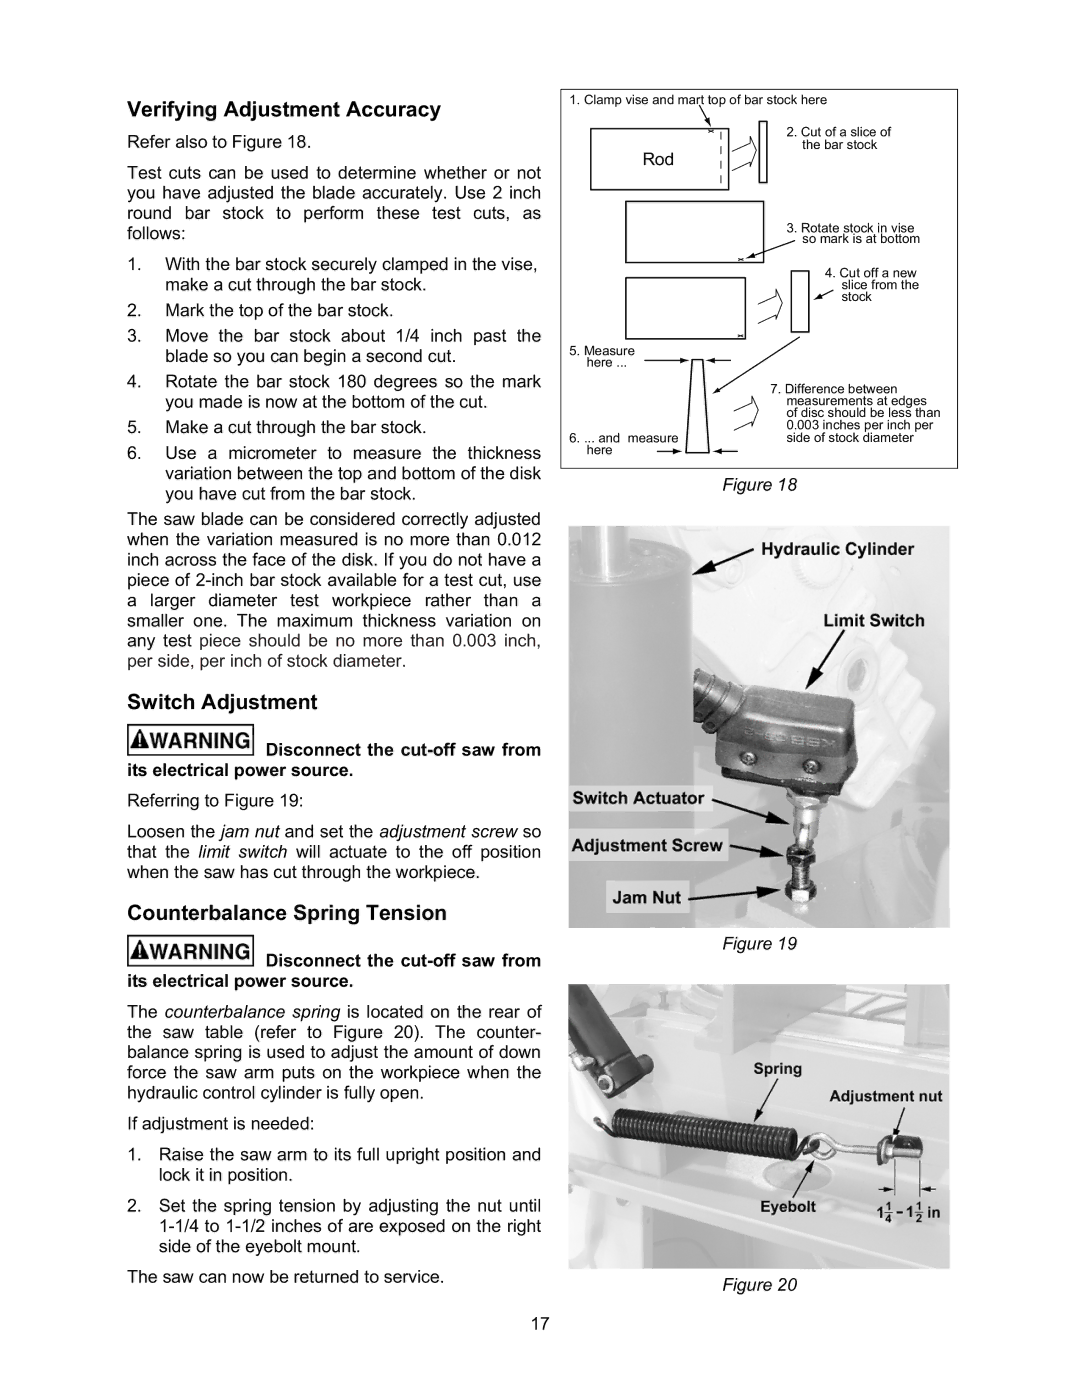
Refer also to Figure 18.
Test cuts can be used to determine whether or not you have adjusted the blade accurately. Use 2 inch round bar stock to perform these test cuts, as follows:
1.With the bar stock securely clamped in the vise, make a cut through the bar stock.
2.Mark the top of the bar stock.
3.Move the bar stock about 1/4 inch past the blade so you can begin a second cut.
4.Rotate the bar stock 180 degrees so the mark you made is now at the bottom of the cut.
5.Make a cut through the bar stock.
6.Use a micrometer to measure the thickness variation between the top and bottom of the disk you have cut from the bar stock.
The saw blade can be considered correctly adjusted when the variation measured is no more than 0.012 inch across the face of the disk. If you do not have a piece of
Switch Adjustment
 Disconnect the
 cut-off saw from its electrical power source.
Referring to Figure 19:
Loosen the jam nut and set the adjustment screw so that the limit switch will actuate to the off position when the saw has cut through the workpiece.
Counterbalance Spring Tension
![]() Disconnect the
Disconnect the
The counterbalance spring is located on the rear of the saw table (refer to Figure 20). The counter- balance spring is used to adjust the amount of down force the saw arm puts on the workpiece when the hydraulic control cylinder is fully open.
If adjustment is needed:
1.Raise the saw arm to its full upright position and lock it in position.
2.Set the spring tension by adjusting the nut until
The saw can now be returned to service.
1.Clamp vise and mart top of bar stock here
2.Cut of a slice of the bar stock
Rod
|
|
|
|
|
|
|
|
|
|
| 3. Rotate stock in vise | ||
|
|
|
|
|
|
|
|
|
|
|
| so mark is at bottom | |
|
|
|
|
|
|
|
|
|
|
|
|
| 4. Cut off a new |
|
|
|
|
|
|
|
|
|
|
|
|
| |
|
|
|
|
|
|
|
|
|
|
|
|
| slice from the |
|
|
|
|
|
|
|
|
|
|
|
|
| stock |
|
|
|
|
|
|
|
|
|
|
|
|
|
|
|
|
|
|
|
|
|
|
|
|
|
|
|
|
5. Measure |
|
|
| ||||||||||
here ... |
|
|
|
|
|
| 7. Difference between | ||||||
|
|
| |||||||||||
|
|
|
|
|
|
|
|
|
|
| |||
|
|
|
|
|
|
|
|
|
|
| measurements at edges | ||
|
|
|
|
|
|
|
|
|
|
| of disc should be less than | ||
|
|
|
|
|
|
|
|
|
|
| 0.003 inches per inch per | ||
6. ... and measure | side of stock diameter | ||||||||||||
here |
|
|
|
|
|
|
|
| |||||
|
|
|
|
| |||||||||
Figure 18
Figure 19
Figure 20
17
